


Having a SQL database being version controlled locally, by storing all changes in a repository on a local machine can be quite handy. In the context of team based database development, it is necessary to establish the environment where changes can be tested locally, specific revisions reverted from the commit history, and doing such things before pushing changes to the remote repository where the rest of the team will be able to review them, and apply against a local database copy.
Distributed source control systems such as Git or Mercurial provide a possibility to work with the local repository and when changes are tested locally, they can be pushed to the remote repository. Also, the advantage of this approach is that it does not require the remote repository to be constantly available, and allows developers to work “offline”, independently, on their own sandboxes, before pushing changes to the central repository.
In this article, synchronizing local changes with a remote repository will be covered through GitBash (a free client for Git source control system), Tortoise Hg (a free client tool for Mercurial source control system), and ApexSQL Source Control, the add-in that integrates directly into SQL Server Management Studio (SSMS) and allows seamless version control without using any other client tool.
Git
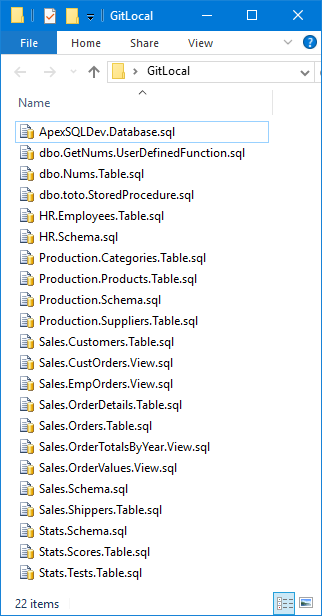
As a starting point, all database objects are scripted from within SSMS and saved to a local folder that will be used as a local repository. For detailed instructions about how to generate scripts for all (or a group of) database objects, refer to this article. For the purpose of this article, each SQL database object is scripted in a separate file. Exploring the GitLocal folder created to be a local git repository, the following result is shown:
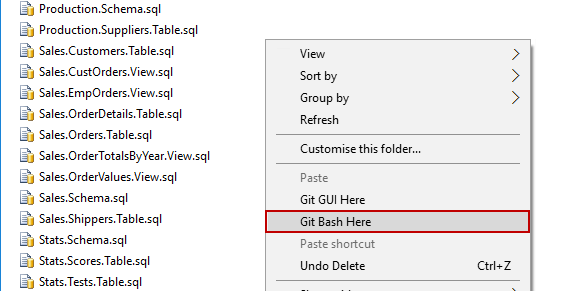
To make this folder a Git repository, start GitBash command line client, and set the GitLocal folder to be the current folder. This can be done by right-clicking the folder, and choosing the Git Bash here option:
This initiates the Git Bash command line where the first command is to initialize the current folder as a Git repository. To do so, type the following command:
$ git init
After the repository is initialized, type the following command to check the status of SQL files saved in the GitLocal folder:
$ git status
The result is as follows:
On branch master
Initial commit
Untracked files:
(use “git add <file>…” to include in what will be committed)
HR.Employees.Table.sql
HR.Schema.sql
Production.Categories.Table.sql
Production.Products.Table.sql
…
…
dbo.toto.StoredProcedure.sql
nothing added to commit but untracked files present (use “git add” to track)
The current status of these files is that Git recognizes them, but no files are included to be version controlled. The next step is to “add” them or to “prepare” them to be committed. The following command is used:
git add .
Basically, the add command will include all files specified after the command. Since the goal in this case is to add all SQL scripts, the ”.” is used. Checking the status gives the following result:
On branch master
Initial commit
Changes to be committed:
(use “git rm –cached <file>…” to unstage)
new file: HR.Employees.Table.sql
new file: HR.Schema.sql
new file: Production.Categories.Table.sql
new file: Production.Products.Table.sql
……..
new file: dbo.toto.StoredProcedure.sql
All files are recognized as new, and now they are ready to be initially committed to the local repository. This will be done using the following command:
$ git commit –all -m ‘Initial commit’
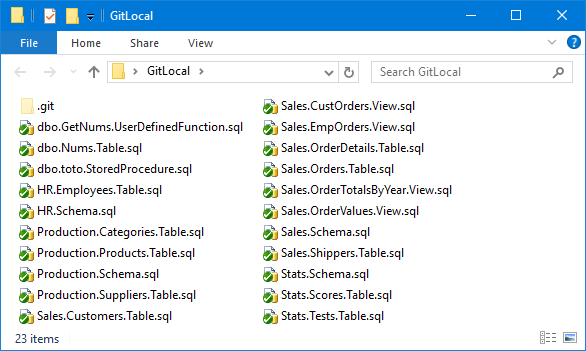
In the similar way as all files are added/prepared to be committed, using the –-all argument for the commit command, all previously added files will be committed. To provide the commit message, the -m argument is used followed by the commit message. After the commit is finished, there will be no results, next time the status is checked, since this means that all objects are added to be committed, and initially committed to the local repository. Exploring the actual repository, each object will have the appropriate icon showing that the object is being version controlled, and it is synchronized with the local repository:
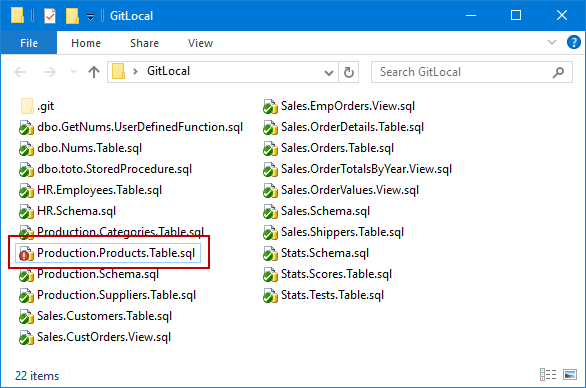
Making any change in any of these files results in changing the icon and the result when checking the status through the command line. For example, a new column is added to the Production.Products.sql table, and a script is saved in the GitLocal folder, by overwriting the previously saved file. The result is as follows:
In addition to this, executing the git status command gives the following:
On branch master
Changes not staged for commit:
(use “git add
(use “git checkout —
modified: Production.Products.Table.sql
no changes added to commit (use “git add” and/or “git commit -a”)
The following command is used to add and commit this change in one line:
$ git commit -a -m ‘Added test column to Production.Products table’
Executing the above command will revert the icon for the changed file as it was before, and checking the status of the repository will show no results, again.
Making other changes and committing them locally can be achieved in the same way as explained above, no matter if a single or multiple changes are made. They just have to be properly added and committed. For the purpose of this article, a few more changes are added and committed.
Pushing to the remote repository
As soon as a database object change is verified locally (tested on a local copy of a database), it can be pushed to a remote repository, so the rest of the team can see the change and apply it against a working copy of a database.
In order to push changes committed locally, a remote repository should be added/specified through GitBash. To add a remote repository, the following command is used:
$ git remote add origin
https://ApexSQLTest@bitbucket.org/apexsqltest/apexsqltest.git
When the remote repository is added, changes committed locally can be pushed with the following command:
$ git push origin master
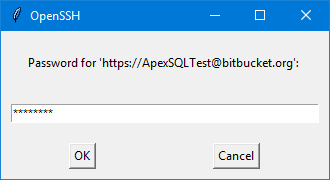
Executing this command invokes the dialog for providing credentials to access the remote repository:
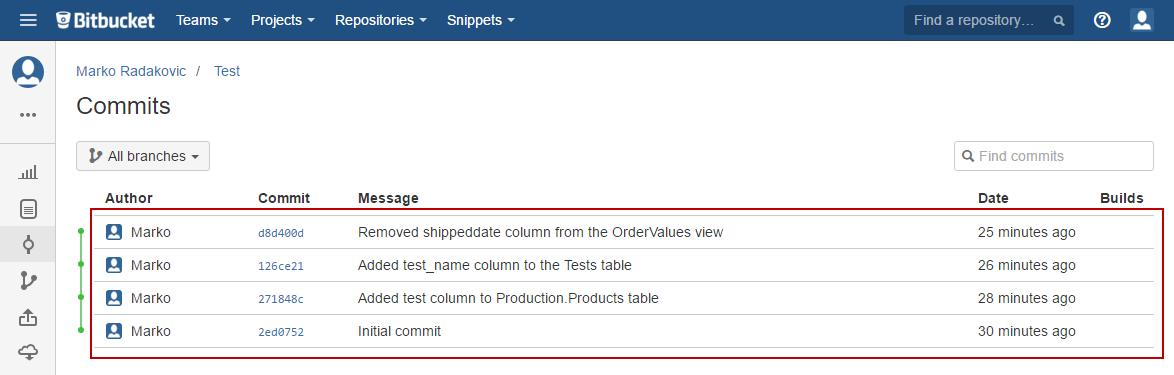
Once the changes are pushed, the rest of the team can pull each of them to apply locally. By inspecting the remote repository, a list of commits will be shown:
In addition to this, the previously created remote repository can be cloned to a local folder where changes can be committed, and later pushed in the same way. This approach will be explained below using another source control system.
TortoiseHg
Similar to above presented steps in Git, using TortiseHg, a Mercurial client tool is used to present the same flow of committing changes locally, and pushing them to a remote repository. The only difference in this approach is that the remote repository is set at the beginning and cloned to a local folder. Note that the same can be achieved using Git. Instead of adding a remote repository after changes are committed locally, it can be set at the beginning, and cloned to a local folder. The result will be the same.
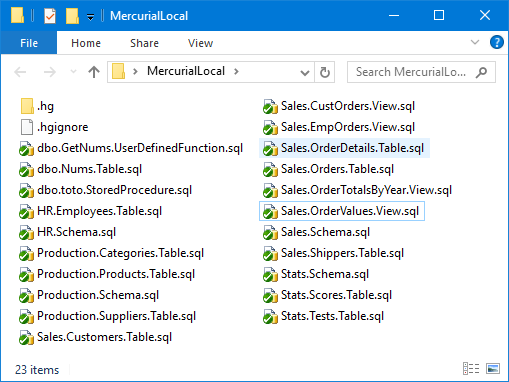
For the purpose of this article, the MercurialLocal folder is used to be a local folder where the remote repository is cloned. To clone the remote repository, pick its URL and paste it in the Source field, in the Clone dialog that can be found in the Windows right click context menu:

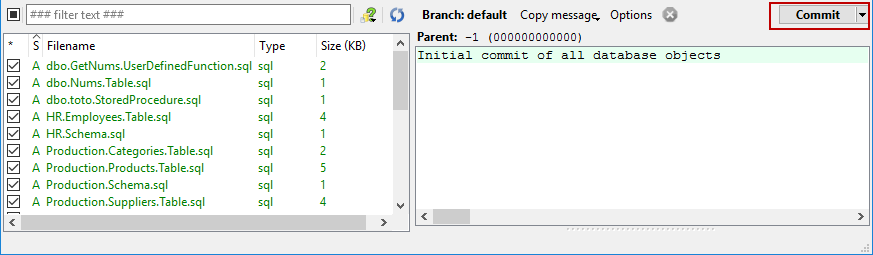
After scripting the same database objects to the MercurialLocal folder, the result shown in the Commit tab (marked with the green checkmark in the toolbar) is as follows:
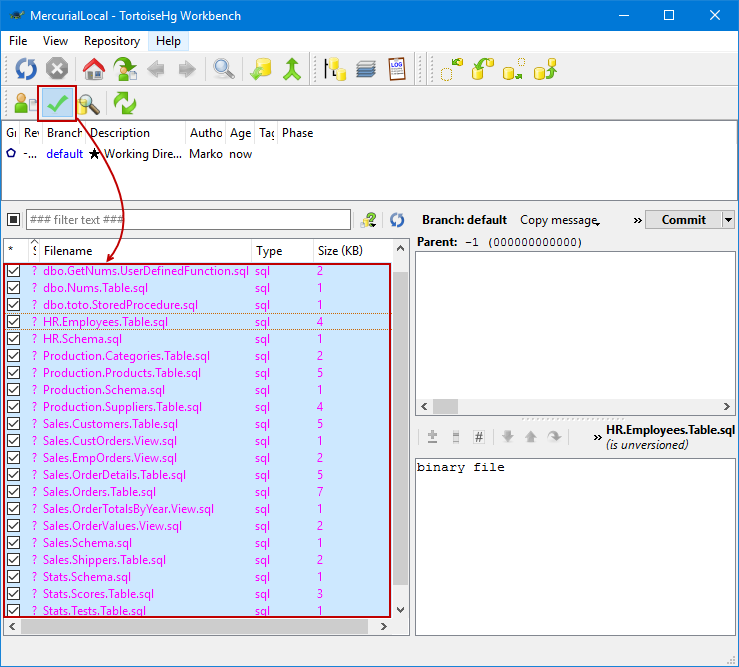
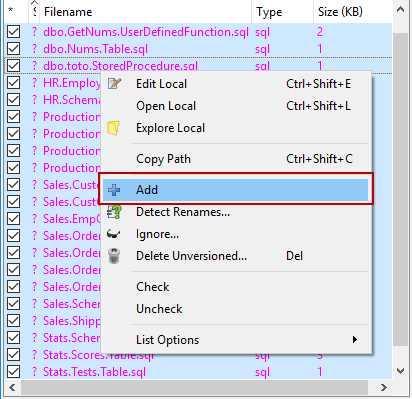
All scripted files appear in the lower left section, with the question mark in front of each file. This means that Mercurial recognized that such files exist in the cloned repository, but no files are added, or even committed. Similar to previously explained workflow using Git, these files will be added first (prepared to be committed). To perform this, right click the list of files (all files are highlighted and checked), and from the context menu, select the Add option:
Once the files are added, they’ll change the color to green, and at this point they can be committed. On the lower right section, a commit message field is available, along with the Commit command:
Inspecting the local repository gives the same result as with Git, presenting that after the initial commit all objects are synchronized with the local repository:
Any additional database SQL object change appears in the lower left section of the TortoiseHg main form as soon as it is refreshed, and can be added/committed with the appropriate commit message. For the purpose of this article, the same changes are made as when presenting the Git workflow. It is important to note that committing changes like this will not push them to the remote repository.
Pushing to the remote repository
Once the changes are good enough to be pushed to the remote repository, the Push command from the toolbar is used. It initiates the confirmation dialog:

Inspecting the remote repository after the push operation is done gives the following result:
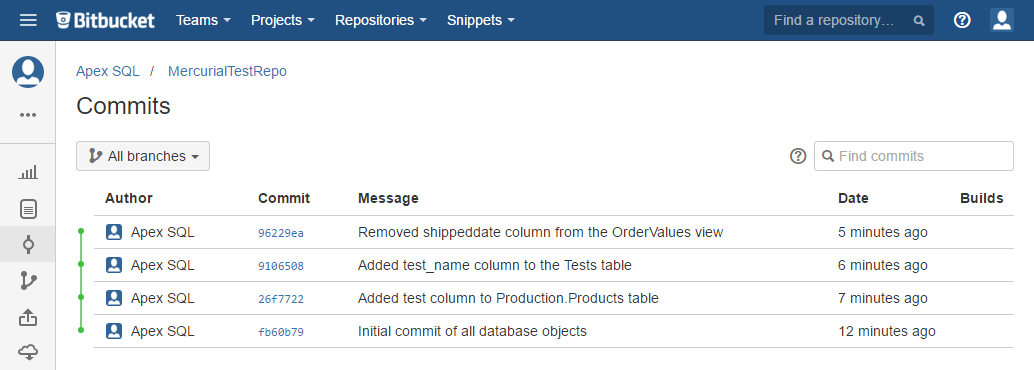
All changes committed locally are pushed to the remote repository where the rest of the team can access to review/apply those changes.
In both cases, using Git and Mercurial clients, it is necessary to switch between SSMS and the client after making any change, in order to commit/push it. People can get used to it, but it would be good to have a solution that can be used to accomplish all of these from within SQL Server Management Studio, and to avoid initializing, cloning and adding remote repository.
ApexSQL Source Control
ApexSQL Source Control is an add-in that allows seamless integration with the most popular source control systems directly from SSMS and without the need to use any additional source control client tools. Besides Team Foundation Server, Subversion, and Perforce, it supports Git and Mercurial as well, distributed source control systems covered in this article. In this case only Git will be covered, as the workflow is the same for both source control systems.
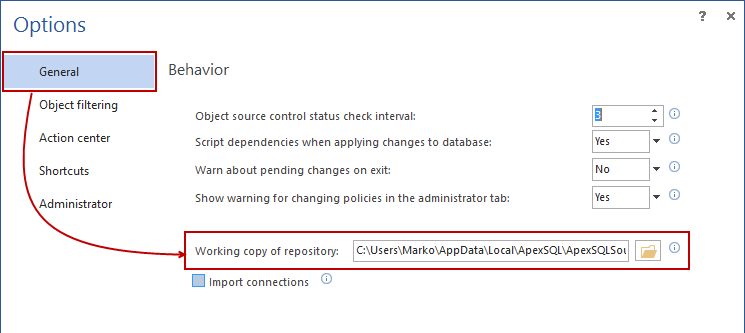
ApexSQL Source Control automatically creates the local repository upon linking a database. In case the user wants to specify other location, this should be set before linking a database. This can be done from the Options form, by changing the path of the working copy, under the General tab:
To accomplish the same workflow of committing changes locally and push them to a remote repository, using ApexSQL Source Control, follow the steps below:
-
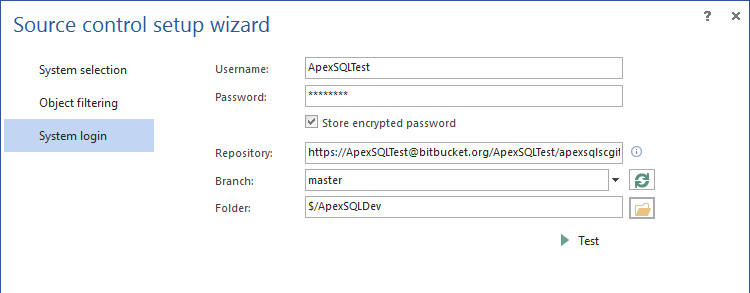
Link a database to source control selecting either Git or Mercurial. In the final step of the Source control wizard (the System login step), specify username and password used to access the remote repository (Username and Password fields), URL of the remote repository (Repository field), and optionally, a folder (project) inside the repository (Folder field), to link a database to:
-
As soon as a database is linked, the user can control if changes will be pushed to the remote repository or committed locally. By default, ApexSQL Source Control will push all changes directly to the remote repository. On other hand, as long as the “offline” mode is active, all changes committed through the Action center tab will not be pushed to the remote repository, but only committed to the local repository.
In this case, the initial commit of all database objects is pushed to the remote repository, so the “offline mode” is not activated:
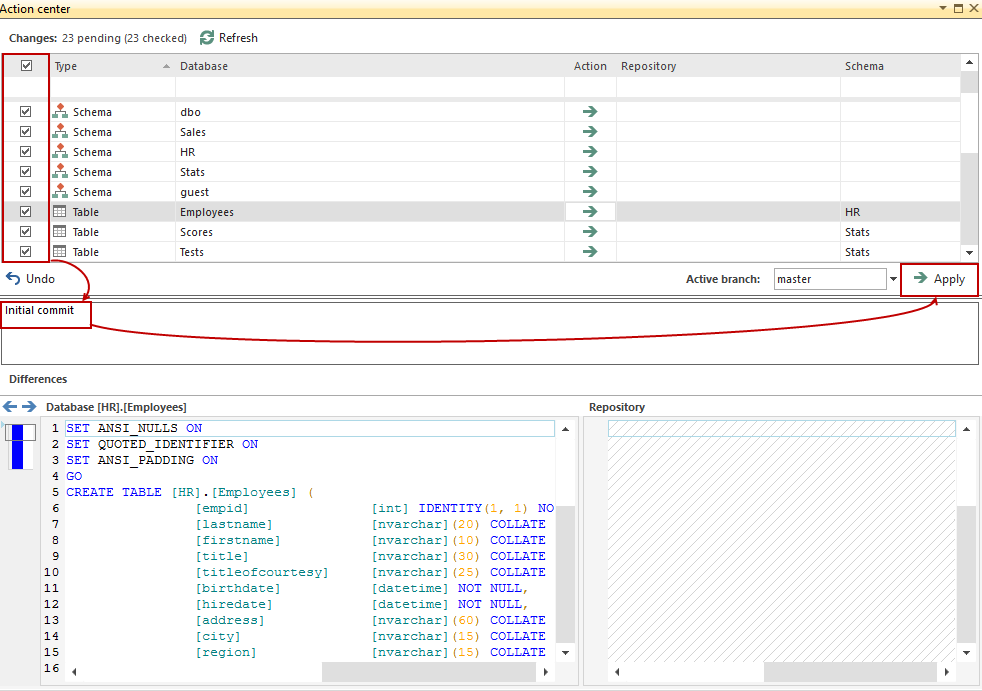
After all objects are checked and the commit message provided, clicking the Apply button will initially commit all selected objects to a local repository, and at the same time push them to the remote repository without additional user interaction.
-
Checking the remote repository shows that objects are pushed properly:

-
Any additional changes can be made against database objects, such changes can be tested, and once they are ready to be committed, this can be done through the Action center tab, or from the right click context menu within Object Explorer.
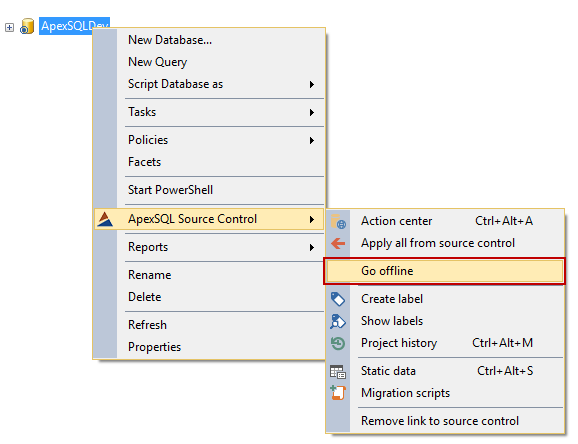
The user can choose if such changes will be pushed directly to the remote repository, or committed locally. For the next change (adding the test column to a Production.Products table), the Go offline option is activated:
-
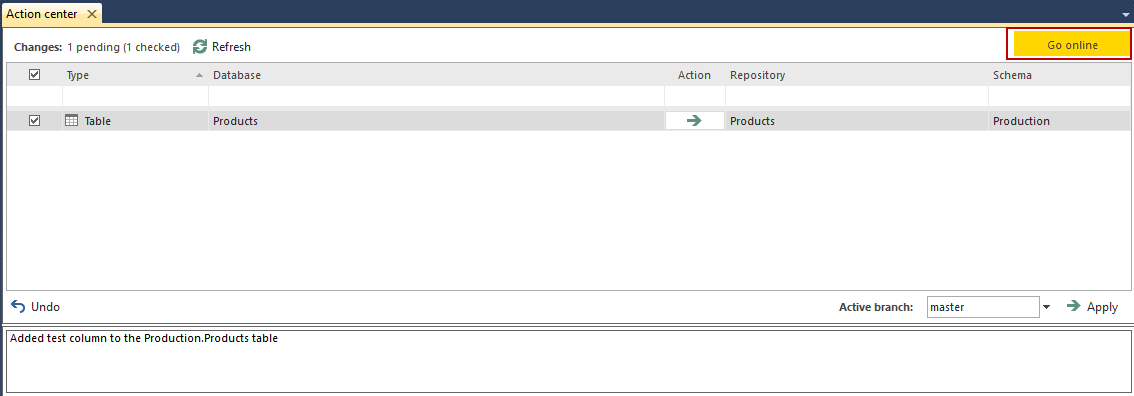
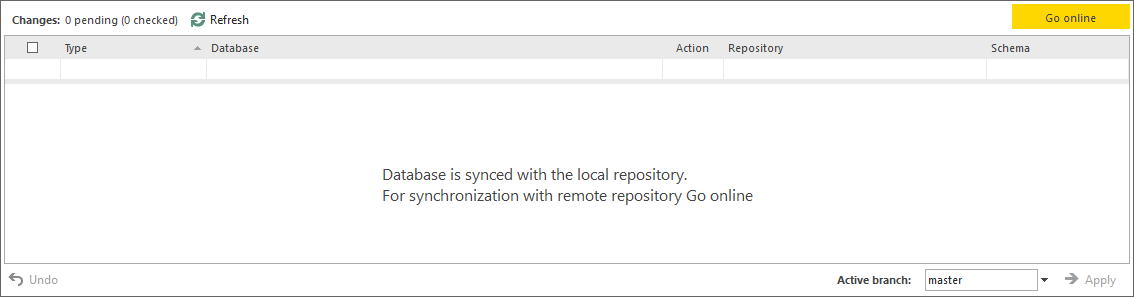
When initiating/refreshing the Action center tab, the Go online button appears in the upper right corner of the Action center tab:
-
Applying this change will perform the Commit operation only. Checking the remote repository will show that no additional changes are pushed and inspecting the working copy path shows that the change is properly committed.
-
After the commit is finished, the informative message appears, showing that changes are synchronized with the local repository, and for pushing them to the remote repository, the Go online option must be used:
-
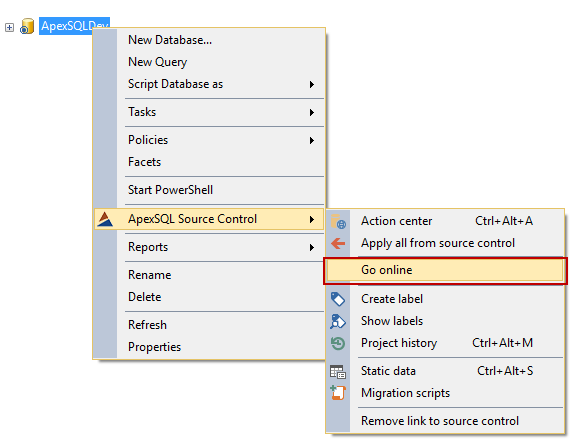
To demonstrate this, use the Go online option, available in the Action center tab, or from the context menu in Object Explorer:
-
After the synchronization is finished, inspecting the remote repository gives the following result:

As shown above, all changes committed locally are pushed to the remote repository. The user can switch back to the offline mode, or continue working online, and having changes pushed directly. All changes will be available offline as well.
April 26, 2016


