


Now it’s time to extend our knowledge of VSPackages, and try to see what can be done with them. In this article, we are going to explain how to create toolbars and new windows, and customize command appearance in Visual Studio
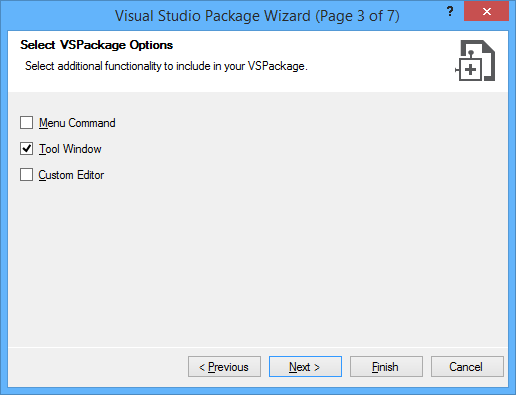
Let’s start with creating new project from Extensibility option. If you remember from previous blog, we had a couple of steps that we had to go through in order for us to create VSPackage add-in. We are going to do all the same, except in step three, where we are going to check Tool Window, like in the picture bellow:
When project is created in Solution Explorer, you are going to see new files like MyControl.xaml and MyToolWindow.cs. As we mentioned before this Wizard is going to do a lot of work for you, so when you open CompleteToolWndPackage.cs (this name in your case can be different depending on the name of the window that you entered in step 5 for Tool Window Options) we are going to see a new method ShowToolWindow like in the code bellow
private void ShowToolWindow(object sender, EventArgs e)
{
     ToolWindowPane window = this.FindToolWindow(typeof(MyToolWindow), 0, true);
     if ((null == window) || (null == window.Frame))
     {
     throw new NotSupportedException(Resources.CanNotCreateWindow);
     }

     IVsWindowFrame windowFrame = (IVsWindowFrame)window.Frame;
     Microsoft.VisualStudio.ErrorHandler.ThrowOnFailure(windowFrame.Show());
}
As you can see in line
ToolWindowPane window = this.FindToolWindow(typeof(MyToolWindow), 0, true);
We are calling for our tool window that we mention above that was created with new files from wizard. Please do note that we removed comments just for the simplicity of viewing the code and in the rest of the code in this blog further comments will be omitted
Tool window description
Just hold for a second and let me explain in short what the tool window is. The tool window consists of a frame border and a client area. A frame, provided by the environment, is responsible for docking with other interface objects of the environment, as well as for the size and position of the window itself. A client area is a pane, controlled by user, which houses the contents of a window. Tool windows can host user-created WinForms and WPF components and are capable of handling regular events, such as OnShow, OnMove, etc.
A user tool window, or its client area to be more precise, can be implemented by inheriting the class representing a standard empty IDE window – ToolWindowPane:
[Guid("f60b1f00-c7ad-4799-ae41-06ce8982eeb5")]
public class MyToolWindow : ToolWindowPane
{
       public MyToolWindow() :
            base(null)
       {
            this.Caption = Resources.ToolWindowTitle;
            this.BitmapResourceID = 301;
            this.BitmapIndex = 1;

            base.Content = new MyControl();
       }
}
Guid attribute has to be unique since it’s identifying each custom user window. For example if your package is holding more than one tool window then each one of them would be recognized by its Guid attribute
Hosting user components
The tool window can host WPF and WinForms controls. When Visual Studio 2010 was released, tool windows were based on WPF components and they still provide backward compatibility for WinForms components. Even before VS 2010 you could still host WPF controls with ElementHost object
In order for you to host user created control inside our tool window the following method has to be overridden:
public override IWin32Window Window
{
       get
       {
           return (IWin32Window)control;
       }
}
And your tool window class would had to look like this (Note that MyControl is type of UserControl):
public MyControl control;

public MyToolWindow()
            : base(null)
        {
            this.Caption = Resources.ToolWindowTitle;
            this.BitmapResourceID = 301;
            this.BitmapIndex = 1;
            this.control = new MyControl();
        }
As you can see the difference now is that when you host WPF control you have to set content of the ToolWindowPane. You have to keep in mind that these two methods described above cannot be used simultaneously which means that when you are hosting WPF control above overridden method is being ignored. Before we build and start our project let’s do a couple of things and make our tool window interesting. Since we already played with menus and commands in previous article we are going to have fun with toolbars now
Toolbars
First of all let’s avoid confusion, we are not adding a toolbar to Visual Studio instance, we are adding a toolbar to our tool window. Adding a toolbar is pretty simple, first of all you have to define in <symbols> section the following two elements:
    <GuidSymbol name="guidCompleteToolWndCmdSet"
value="{8b4c59c8-7697-45d8-a9a9-491a35509da0}">

...

      <IDSymbol name="ToolbarID" value="0x1000" />
      <IDSymbol name="ToolbarGroupID" value="0x1001" />
      <IDSymbol name="cmdidTestToolbar" value="0x132" />
    </GuidSymbol>
Above <Groups> section we have to define new menu:
    <Menus>
      <Menu guid="guidCompleteToolWndCmdSet" id="ToolbarID"
            priority="0x0000" type="ToolWindowToolbar">
        <Parent guid="guidCompleteToolWndCmdSet"
id="ToolbarID" />
        <Strings>
          <ButtonText>Tool Window Toolbar</ButtonText>
          <CommandName>Tool Window Toolbar</CommandName>
        </Strings>
      </Menu>
    </Menus>
Don’t forget to declare value for ToolbarID in PkgCmdIDList class and cmdidTestToolbar our command that also has to be defined in <symbols> section. In MyToolWindow class, actually in the constructor of that class we need to add the following lines just above
base.Content = new MyControl();
These lines are creating toolbar and associating button event handler for that command
          this.ToolBar = new CommandID(GuidList.guidCompleteToolWndCmdSet,
PkgCmdIDList.ToolbarID);
          this.ToolBarLocation = (int)VSTWT_LOCATION.VSTWT_TOP;

          var mcs = GetService(typeof(IMenuCommandService))
              as OleMenuCommandService;
          if(null != mcs)
          {
              var toolbarbtnCmdID = new CommandID(
                  GuidList.guidCompleteToolWndCmdSet,
                  (int)PkgCmdIDList.cmdidTestToolbar);
              var menuItem = new MenuCommand(ButtonHandler, toolbarbtnCmdID);
              mcs.AddCommand(menuItem);
          }
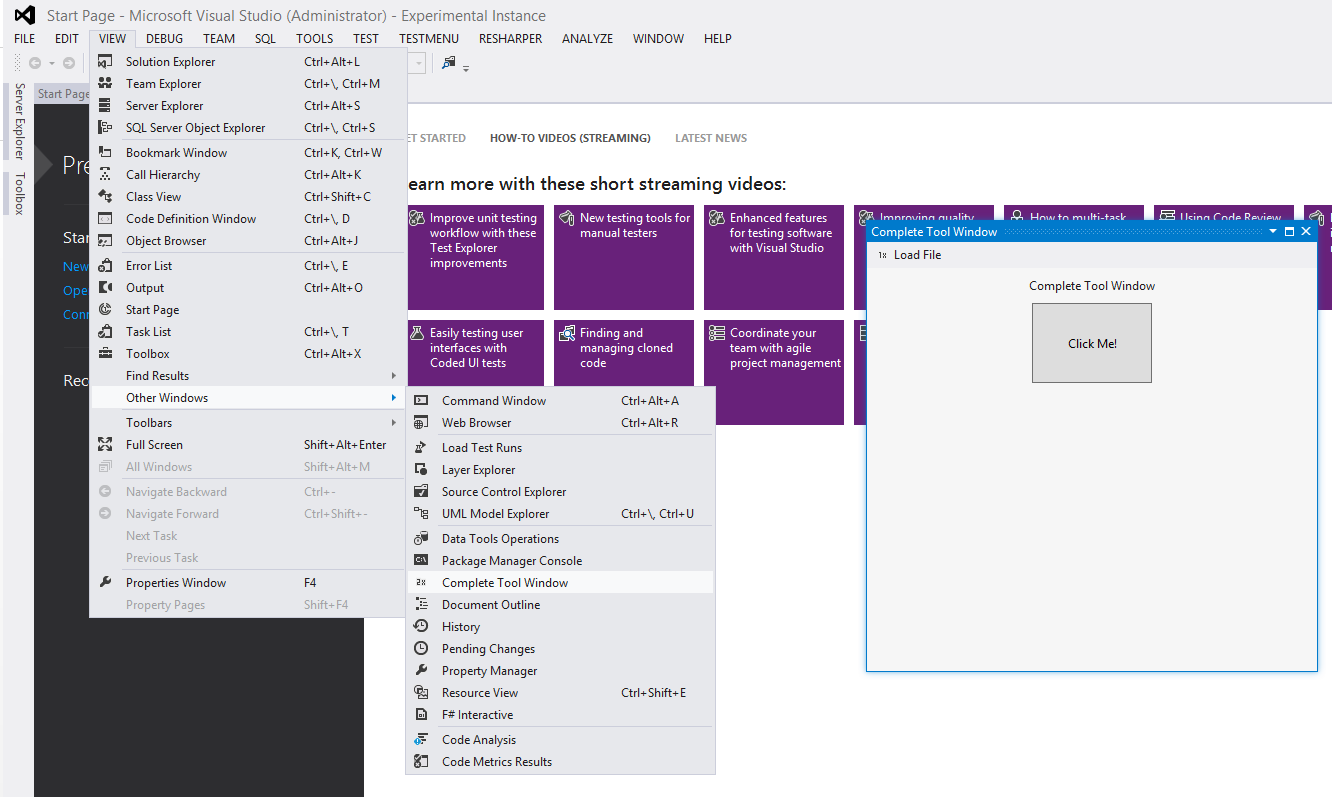
Beneath defined constructor we will create our ButtonHandler event. Now you can implement its functionality however you like. That’s it, in order for you to check and see your new window, build and start our project, go to View – Other Windows and there you’ll see Complete Tool Window, click on it and voila. Don’t think that our work is done here. You have all the freedom to customize the tool window and play with it but that’s something that we will do in our next series where we will cover creating toolbars in IDE and handling tool windows events. Let just show you how to set a default position for the tool window, open CompleteToolWndPackage.cs and find the following attribute:
[ProvideToolWindow(typeof(MyToolWindow))]
Attribute and change it to look like this:
[ProvideToolWindow(typeof(MyToolWindow),
    Style = Microsoft.VisualStudio.Shell.VsDockStyle.Tabbed,
    Window = "f60b1f00-c7ad-4799-ae41-06ce8982eeb5")]
Remember the following Guid is from our tool window. As you can see, this position is self-explanatory, and you can find what best suites your needs. This attribute is not implemented because it wouldn’t be fair to do all the work by myself, as you know practice makes it perfect. What you get as final product is shown on the picture bellow, please do note that default implementation, done by VSPackage Wizard for MyControl.xaml was left with intention for you to see that Microsoft did a pretty good job with giving us a start edge for building add-ins
Commands visibility and state
In previous series, we’ve only scratched the surface when it comes to commands and their state and visibility. Visual Studio has an algorithm that checks, queries the state of the command, only for commands that have a chance to be displayed in current context. A simple example would be the Copy and Paste the command, you know that there is no need for Paste command to be enabled when there is nothing to Paste, actually nothing has been copied. Now, let’s take a look at how command state can be set with Command flag. If we specify command flag like this:
        <Button guid="guidCompleteToolWndCmdSet" id=" ChangesVisibility1"
        priority="0x0300" type="Button">
          <Parent guid="guidCompleteToolWndCmdSet" id="MyMenuGroup" />
          <Icon guid="guidOfficeIcon" id="msotcid1" />
          <CommandFlag>DynamicVisibility</CommandFlag>
          <Strings>
            <CommandName>ChangesVisibility1</CommandName>
            <ButtonText>Changes Visibility #1</ButtonText>
          </Strings>
        </Button>
        <Button guid="guidCompleteToolWndCmdSet" id="ChangesVisibility2"
          priority="0x0300" type="Button">
          <Parent guid="guidCompleteToolWndCmdSet" id="MyMenuGroup" />
          <Icon guid="guidOfficeIcon" id="msotcid2" />
          <CommandFlag>DynamicVisibility</CommandFlag>
          <CommandFlag>DefaultInvisible</CommandFlag>
          <CommandFlag></CommandFlag>
          <Strings>
            <CommandName>ChangesVisibility2</CommandName>
            <ButtonText>Changes Visibility #2</ButtonText>
          </Strings>
        </Button>
What we are trying to accomplish here is this: button ChangesVisibility2 is going to be invisible when package is loaded, you want even see it in Menu. In Initialize method you would write this code:
        m_changesVisibility1 = RegisterCommand(CmdIDs.ChangesVisibility1,
 ChangesVisibilityCallback);
        m_changesVisibility2 = RegisterCommand(CmdIDs.ChangesVisibility2,
 ChangesVisibilityCallback);
        m_changesVisibility2.Visible = false;
Fields m_changesVisibility1 are OleMenuCommand objects
private void ChangesVisibilityCallback(object caller, EventArgs args)
      {
        m_changesVisibility1.Visible =! m_changesVisibility1.Visible;
        m_changesVisibility2.Visible =! m_changesVisibility1.Visible;
      }
Code is fairly simple, when we click on button with text Changes Visibility #1 we are going to get this button text Changes Visibility #2
When <CommandFlag>TextChanges</CommandFlag> is set like this, then text inside of that command is being changed with our functionality. There is one small trick that we can use in case we want our command to be visible but not enabled until we really need it. Using the event we registered for given command, we can set the state of that command from enabled to false
This is what you need to know to start customizing your own tool windows and Menu commands with VSPackages. I would advise to read references since they cover different needs and similar means to achieve what you need. In the next series we are going to cover creating toolbars in IDE and managing events for tool windows
References:
[1] VSPackage Tutorial 2: How to Create a Tool Window
[2] How to: Create VSPackages (C# and Visual Basic)
[3] How to: Register a VSPackage (C#)
[4] Visual Studio tool windows
[5] VSPackage Tutorial 1: How to Create a VSPackage
[6] Designing XML Command Table (.Vsct) Files
[7] Commands Element
[8] KeyBindings Element
March 23, 2015


