


Continuous integration is great, and the more iterations, the greater it is. But with all of those changes being integrated it can be easy to lose track of what has actually changed, and when, not if, something fails reconstructing a documentation trail can be a challenge.
If a label is being created with each build, then the label “image” can be restored, depending on the source control system, or even better, you can use ApexSQL Diff to compare the latest label with the previous and see in detail exactly what changed.
But with more frequent iterations (and CI processes are considered optimal when they are triggered as frequently as possible, even on each commit), creating a label for each individual commit, or even a small group of changes, isn’t practical. As changes pile up, it can be even more difficult sorting through the change logs for auditing or diagnostics purposes.
One solution is to run a database documentation tool like ApexSQL Doc on the test database created (or updated) as part of the continuous integration process. Yes, the database will be fully documented but it will be impossible to know what actually changed. Full database documentation also tends to be quite large.
Some helpful alternatives for documenting changes only
- Schema change report: A summary of all schema changes in a readable format e.g. HTML report
- Static data change report: A summary of all data changes, in the case that static data was integrated as part of the CI process, also in a readable format like HTML
- Schema change documentation: A complete package of documentation of schema changes only describing all changes in any variety of formats like HTML, CHM, PDF or Word.
- All of the above
Schema change report
In the out-of-the-box configuration of the ApexSQL CI/CD toolkit, Schema sync is part of the Continuous delivery pipeline. Although there could be a Continuous integration pipeline executed for every commit, it is unlikely there would be an equivalent number of Continuous delivery pipelines as you wouldn’t want to be updating production in an unattended manner. Builds would generally require a manual review, approval etc.
But to be able to create schema change reports as part of each and every Continuous integration pipeline, we’ll need to add a Compare schema step. But the focus of this step won’t be to create a synchronization script but instead to create a Schema change report.
To do this we need to implement the switch /output_type:h, to tell ApexSQL Diff to output an HTML report of the schema changes. The sample PowerShell code with the highlighted switch will look as follows.
Invoke-ApexSqlSchemaSyncStep -Options $options -Source $stageDB -Database
$productionDB -AdditionalOptions /output_type:h
Invoke-ApexSqlSchemaSyncStep -Options $options -Source $stageDB -Target
$productionDB
If ReportFormat switch is used, output file will be in noted extension:
Invoke-ApexSqlSchemaSyncStep -Options $options -Source $stageDB -Target
$productionDB -ReportFormat pdf
The report will be created to C:\Users\<user_name>\Documents\ApexSQL\ApexSQL Diff\Export with the default name of SchemaSync_[Source_Connection_Name]_[Target_Connection_Name]_DiffReport.html
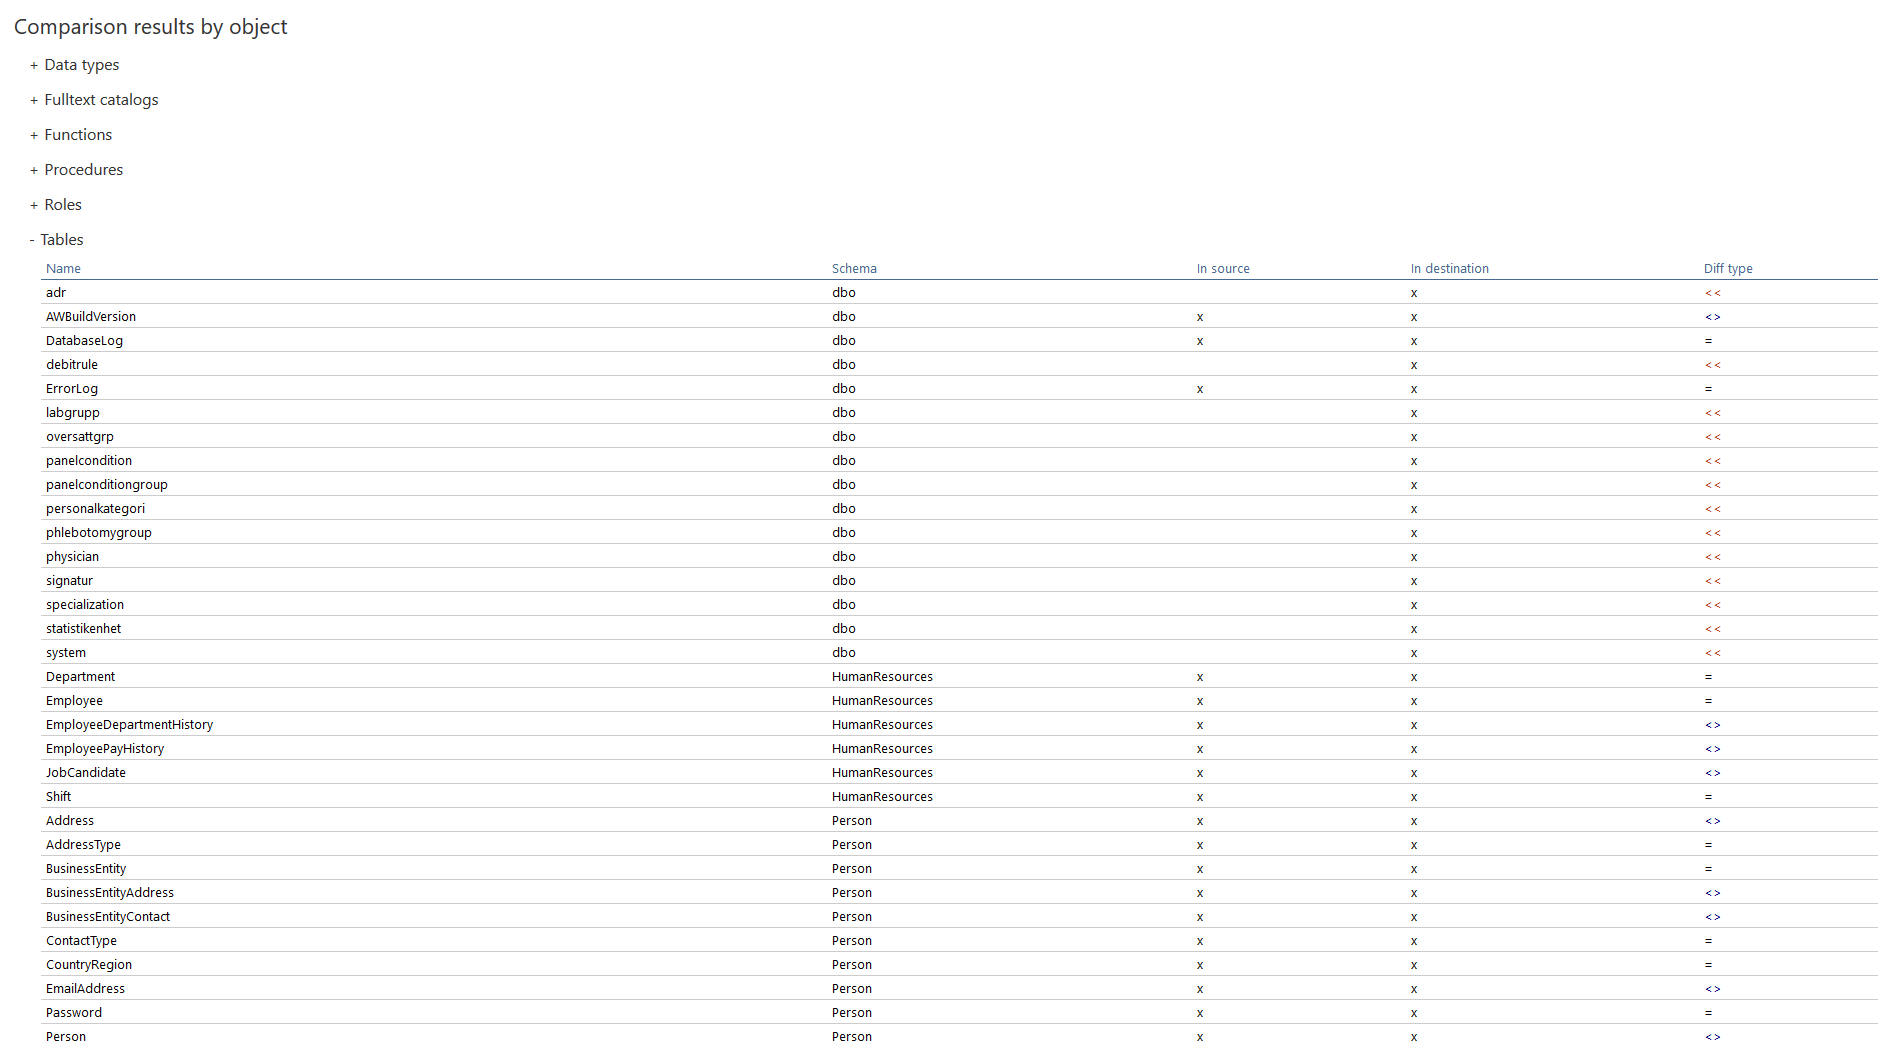
More about exporting schema comparison results into a simple HTML report can be found in the linked article.
Static data change report
A similar process would be needed to report on any static data changes, so similarly, we’ll need to add a step for Sync data as well.
To do this we need to implement the switch /output_type:h, to tell ApexSQL Data Diff to output an HTML report of the schema changes. The sample PowerShell code with the highlighted switch will look as follows:
Invoke-ApexSqlDataSyncStep -Options $options -Source $stageDB -Target
$productionDB
Note that a report was created only if there were static data changes. A return code of 102 indicates that the database was successfully compared but there were no changes. We’ll use that to avoid creating a report.
The report will be created to C:\Users\<user_name>\Documents\ApexSQL\ApexSQL Data Diff\Export with the default name of DataSync_[Source_Connection_Name]_[Target_Connection_Name]_DiffReport.html

More about how to export specific tables/rows as HTML and HTML plain reports can be found in the linked article.
Schema change documentation
To create full documentation of our Schema changes, we will need to add the Document step to our Continuous integration pipeline.
This step requires an artifact from the Compare schema step, in the form of a differential schema snapshot. So, the Sync schema step needs to be run first, and the output generated should also include a differential schema snapshot (in addition to the aforementioned Schema change report).
After the comparison of two data sources we can save the Differential snapshot by:
-
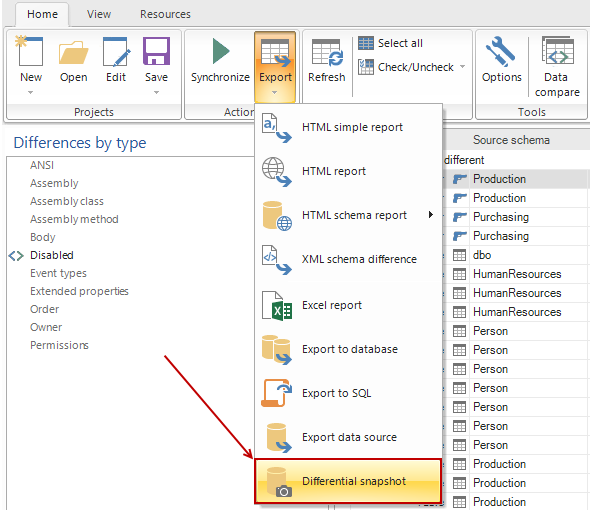
Using Export option in the Home tab and selecting Differential snapshot:
-
Through the Sync wizard in the Output options step, then we choose More pre-sync options and select the Create a differential snapshot checkbox:

-
Or using Save as batch feature where the appropriate switch will be added in the Batch script:
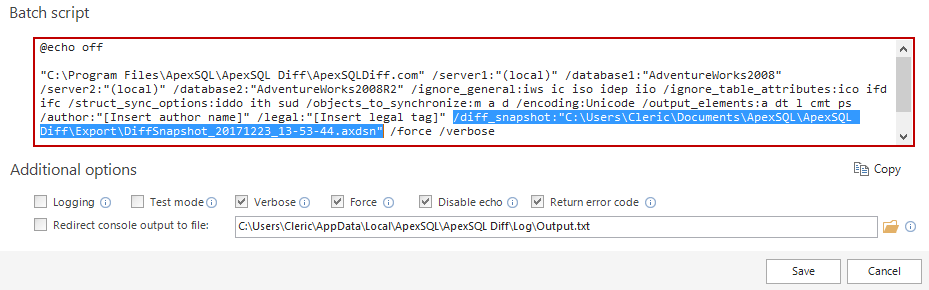
Once created, that schema snapshot will be used as the input source, by ApexSQL Doc, to create the differential documentation.
|
Quick tip: A schema snapshot is a lightweight file that contains a representation of the schema of a database. It can be consumed by a variety of ApexSQL applications e.g. ApexSQL Doc, ApexSQL Diff In addition to being consumed by ApexSQL Doc to create documentation from it, it can also be consumed by ApexSQL Diff and compared to another snapshot, to produce comparison results in a form that can be searched, sorted, filtered etc. Also, a reverse sync script could be created between snapshots to rollback changes |
To do this we need to set the data source to the name of the schema snapshot. Here are the images showing it being configured via the GUI.
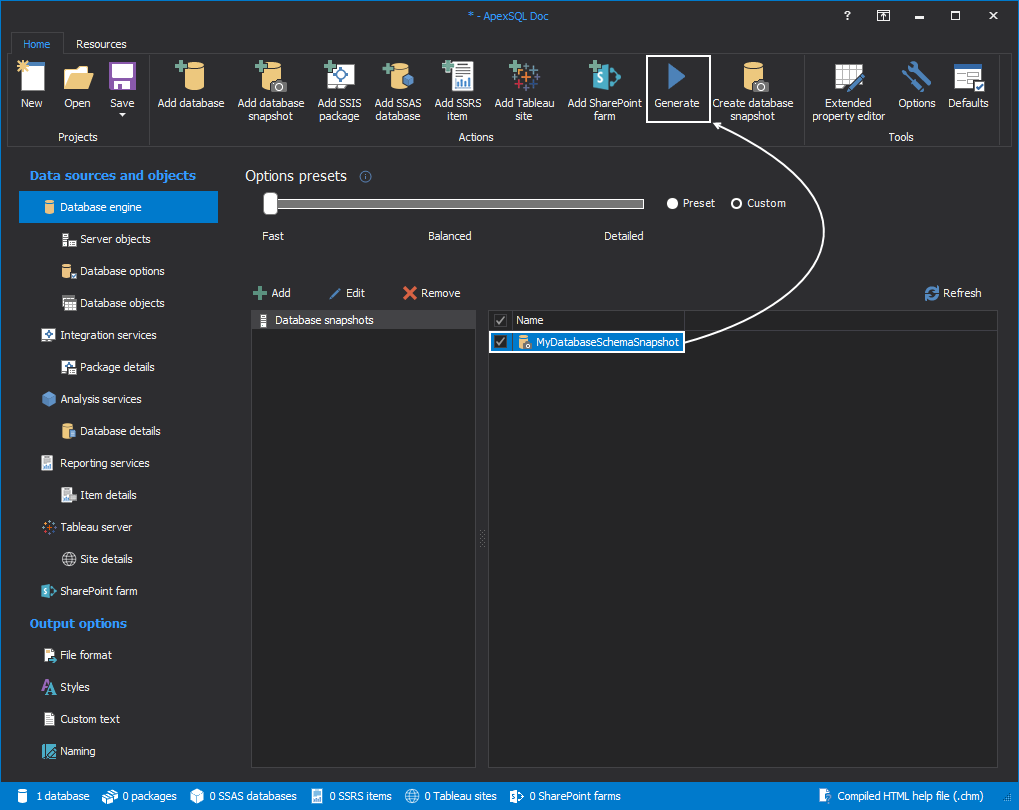
First, we need to create a New project by clicking on the New button in the main window:

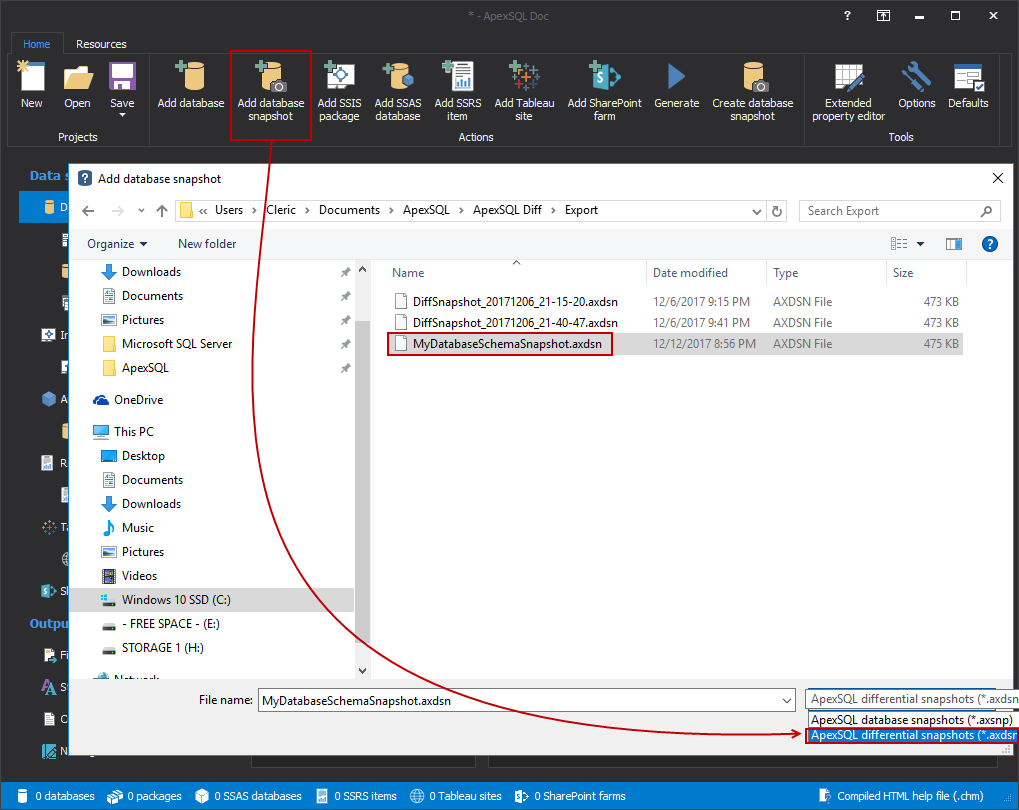
After the project is created, we now have new Actions available under the Home tab from which we can choose the source for the documentation that we want to create. In our case, we will navigate our way to the Add database snapshot button. Once clicked it will open the new window, prompting us to choose what kind of format of snapshots we want add. Given that we have created Differential snapshot in ApexSQL Diff, and we want ApexSQL Doc to make a documentation based on the information from that snapshot and produce the comparison results, we will select the ApexSQL differential snapshots (*.axdsn):
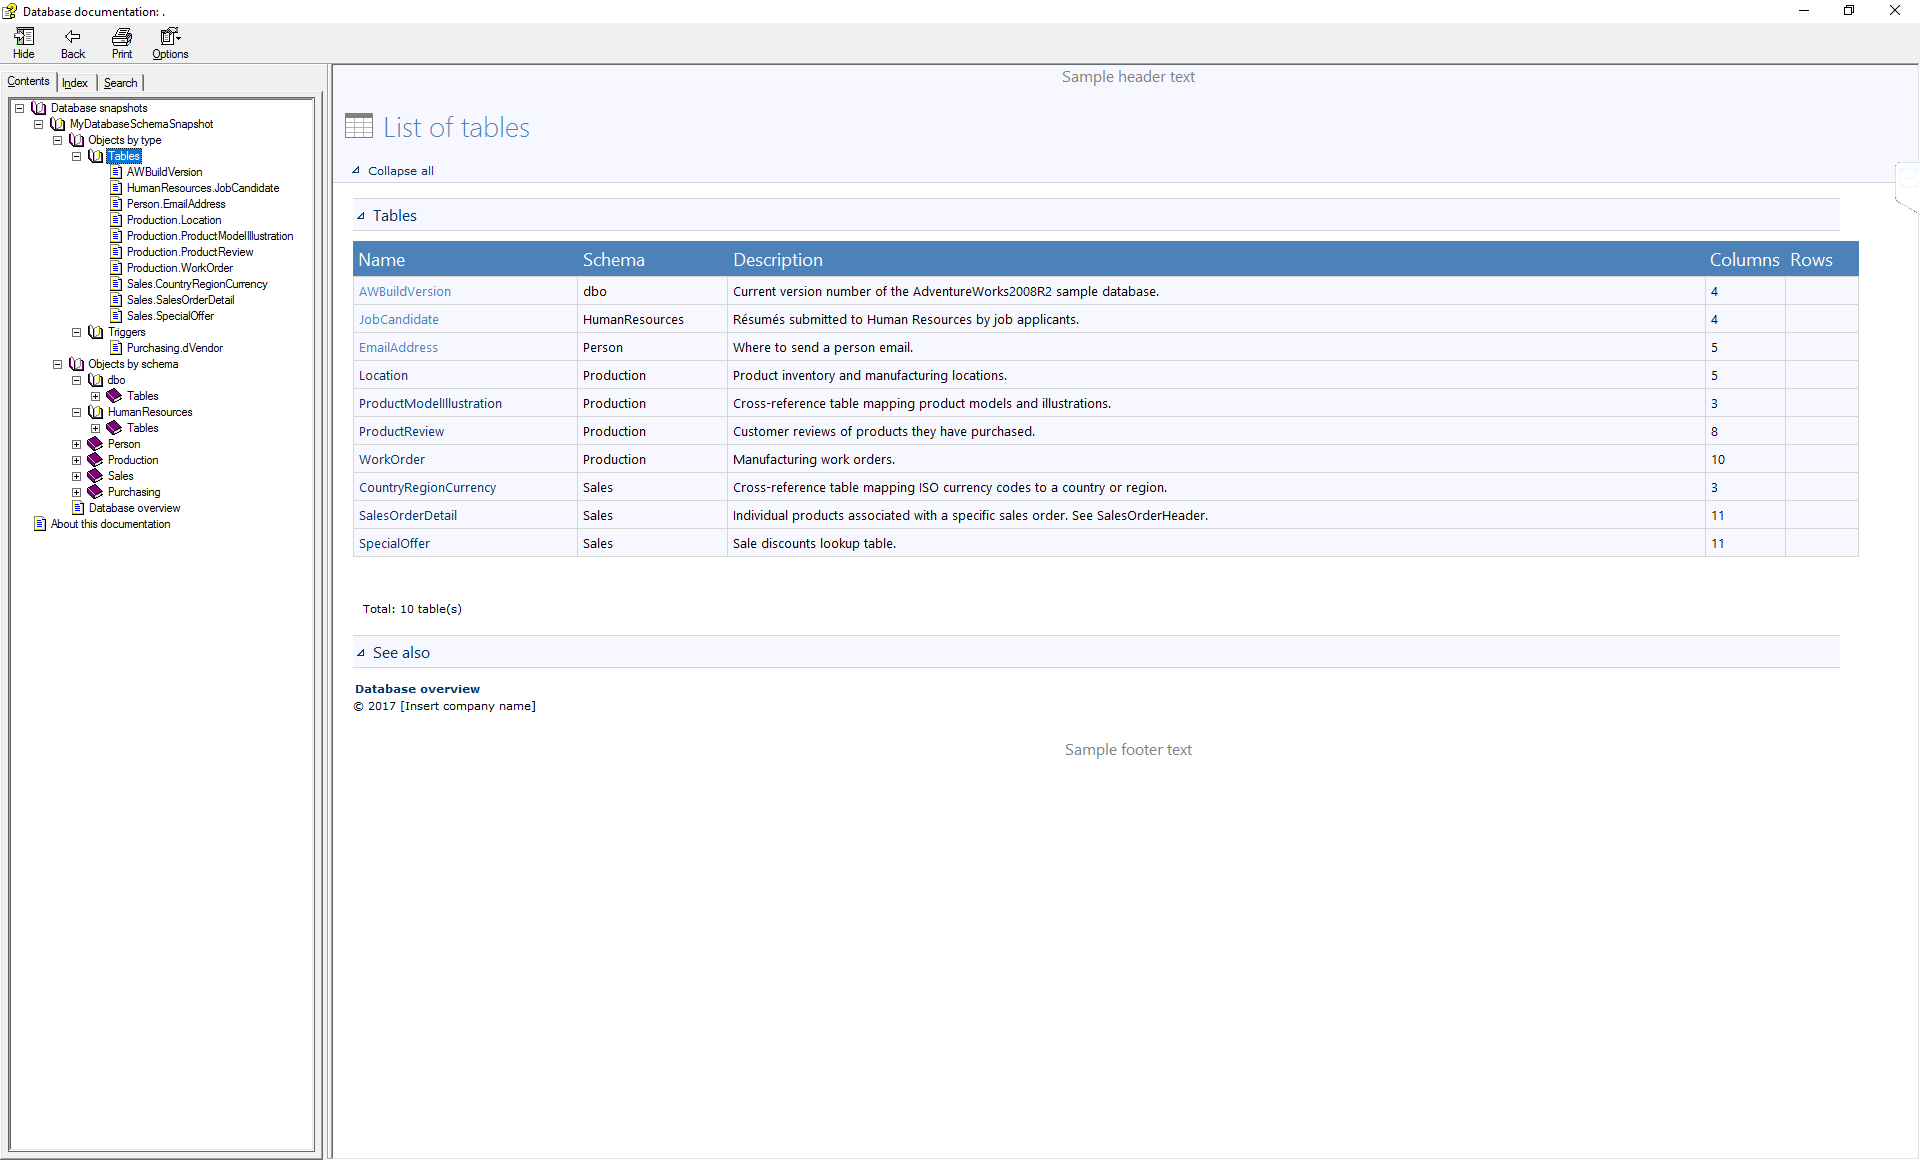
Once the Differential snapshot is added, the only thing left to do is to click on the Generate button so we could create the documentation:
It is simpler if the name is static, or said another way, it doesn’t change from build to build. That way the same file name can be located and consumed with each process. A project with settings can be specified along with the output format e.g. HTML.
The sample PowerShell code with the highlighted switch will look as follows
Invoke-ApexSqlDocumentStep -AsChm -Database $stageDB -Options $options
-AdditionalOptions /dbsnp:"c:\snap_simple.axdsn"
Invoke-ApexSqlDocumentStep -AsChm -Options $options -Differential
The documentation will be created to C:\Users\Cleric\Documents\ApexSQL\ApexSQLDoc with the default name of Document_Differential_Documentation.chm
FAQs
Q: What is the advantage of differential documentation over just documenting the newly created/updated database?
A: The documentation for the change will be much smaller and will contain only the changes. This makes it easier to see only what was in the build, and nothing else, including the vast majority of objects that weren’t changed/affected.
By producing documentation of all changes, but only of changes, in easy to locate and review format, it is possible for end users to see exactly what changed in every build. Once any particular problem or anomaly is detected, deeper investigation can be conducted, say by doing a comparison between the latest schema snapshot and the one taken immediately prior. But for the purposes of this article, creating user friendly, but tightly focused and compact documentation for each build will be described.
Q: Why would I want to report on data changes?
A: You probably wouldn’t but you might want to report on Static data changes. Static data is data that rarely changes like lists, code tables etc. Things like the cities for which a company has satellite offices in. It is a good idea to version this static data, just like schema changes. It will rarely change but if it does, you can see these changes in the data change report.
Q: Do schema or data change reports come in any other outputs?
A: Yes, you can also export change reports to XML, which might come in handy if you wanted to process all of these changes into a single repository or create reports in proprietary formats to your own specifications.
Q: Why do I need documentation if I already have a Schema and Data change report?
A: Although schema and data change reports may be more than sufficient for many users, Documentation can provide more detail and functionality than standard HTML reports and is available in other formats e.g. CHM:
- For features, documentation in CHM has a TOC (table of contents) that is helpful as an index to go to a particular change as well as in document search
- Documentation provides more information, in many cases, and in a more readable format than just syntax highlighted DDL
- Finally, documentation can be created in other formats like PDF, Word and CHM vs just HTML. Each format has its own advantages which may be preferable in certain cases.
January 18, 2018


