


When working as a SQL Server database administrator, one of the common tasks that will be requested from you is to clone the SQL Server database from the production and restore it to the development environment. This process can be performed easily by taking a backup from the production database, copy it to the development server and restore it to the development SQL Server instance there. But this happy scenario is not valid in all situations. This is due to the fact that the production database contains important and critical information about the customers or the employees that should be kept securely and away from the non-authorized user’s hands.
In order to secure this critical data, you have two options. The first option is to simply delete these critical data from the database after restoring it to the development environment and before allowing anyone to access it and perform their tests on it. But this option will not provide the developers with the real-life performance and functionality testing environment as there is no data in these tables.
The second option that we all prefer is to replace the critical data with fake data that provides the developers with the real-life testing environment and secure the critical data from the unauthorized hands. The process of replacing the critical original data with fake data and secure it from any unauthorized user is called Masking.
In this article, we will see how we could use ApexSQL Mask, data classification and masking tool to clone the SQL Server database from the production in order to restore it to the development environment for testing purposes.
Getting started
ApexSQL Mask is a data classification and masking tool that can be used easily to automatically classify and mask sensitive data within your SQL Server instance, at both the row and column levels. It provides you with the ability to create your own sensitive data classification filters and masks or edit the existing ones. ApexSQL Mask allows you also to view the data before and after performing the selects masks.
Before you start using the ApexSQL Mask tool, you need to download it from the ApexSQL download page, then install it to your machine using a straight-forward wizard, in which you will be asked to accept the license terms and specify where to install the tool on your machine.
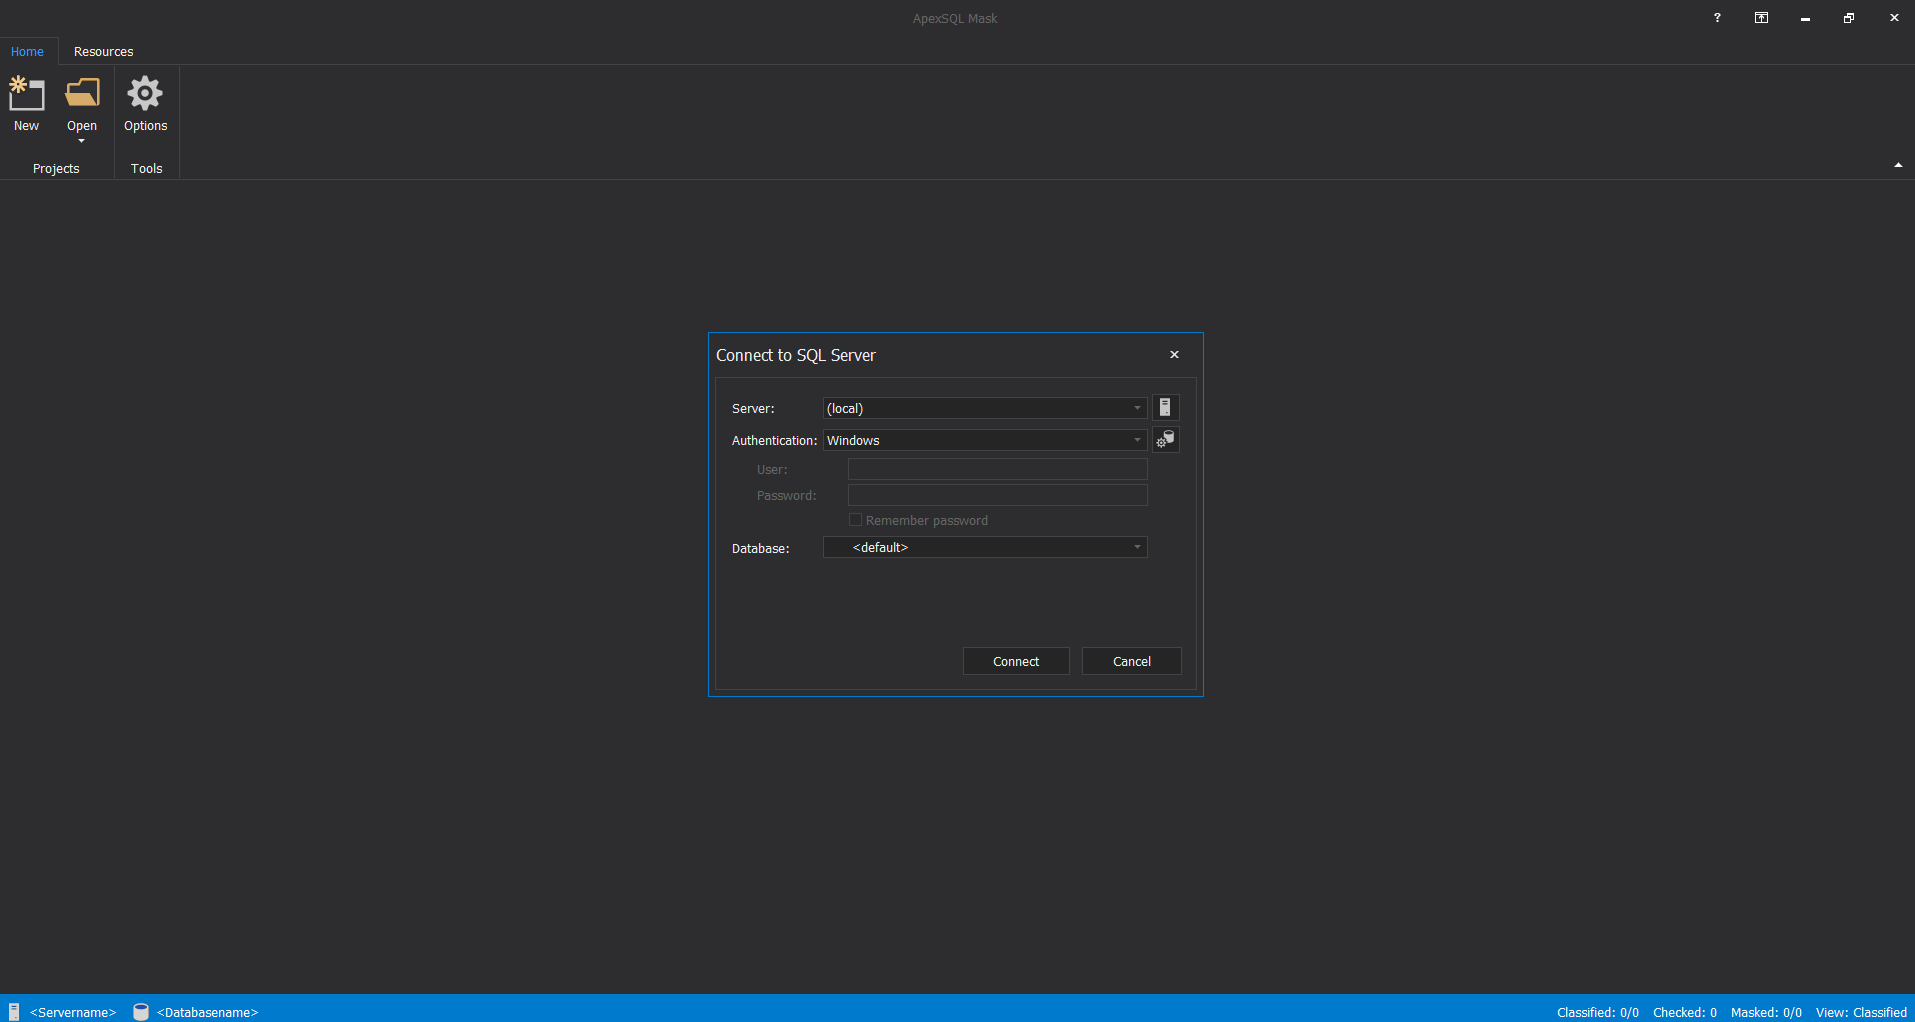
When ApexSQL Mask is launched, it will ask you to specify the name of the SQL Server instance to which you will connect, the authentication method that will be used to connect to that instance and the name of the database to be classified and masked, as shown below:
Before connecting to the SQL Server instance, let us prepare the testing environment, by creating a new demo database with one table that contains critical information of the company employees. The below T-SQL script can be used to create the database and the employee’s table:
CREATE DATABASE ApexSQLMaskDemo
GO

USE ApexSQLMaskDemo
GO

CREATE TABLE Employee_EmploymentInfo (
  Emp_ID INT IDENTITY PRIMARY KEY
  ,Emp_FirstName NVARCHAR(50)
  ,Emp_LastName NVARCHAR(50)
  ,Emp_BirthDate DATETIME
  ,Emp_BasicSalary DECIMAL(6, 2)
  ,Emp_Allowances DECIMAL(6, 2)
  ,Emp_BankAccount VARCHAR(20)
  ,Emp_Address NVARCHAR(MAX)
  )
GO
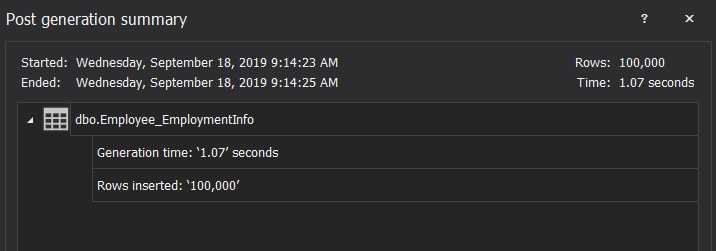
After creating the database and table, we will fill that table with testing data using ApexSQL Generate, SQL Server testing data generator, and 100K new rows will be inserted quickly, as shown below:
For now, we have a database with one table that contains critical financial data for the company employees, and as a SQL server database administrator, we are requested to clone SQL Server database and provide the development team with a copy of that database to test the new system changes on it. So, let us see what we should do before providing them with the database.
Masking critical data
The first step in the critical data masking process is connecting to the SQL Server instance that contains the target data, by providing the server name and the proper credentials in the Connect to SQL Server window, as below:
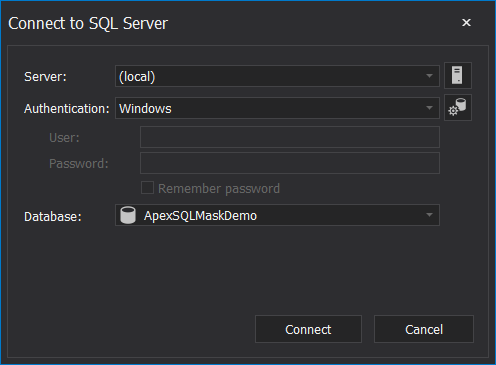
Before starting the process of how to clone the SQL Server database, the first step is connecting to the SQL Server instance, then ApexSQL Mask will perform an automatic classification process for the selected database, using built-in classification functions. In other words, ApexSQL Mask will try to identify the type of data inserted in each column by matching it with the existing classification functions, as shown below:
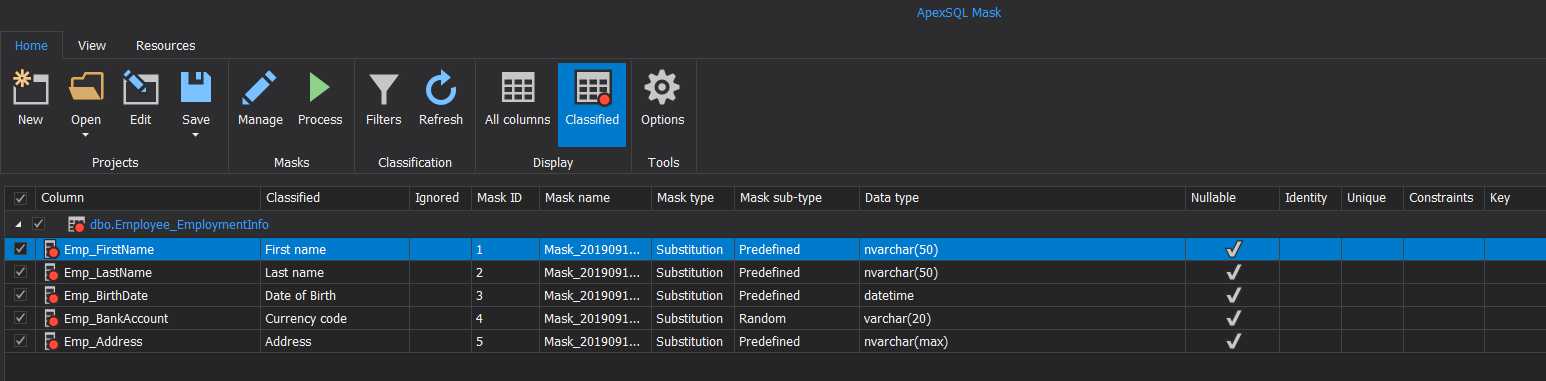
For example, ApexSQL Mask will identify that the first column contains data classified as the First Name, the second column contains data classified as the Last Name and so on.
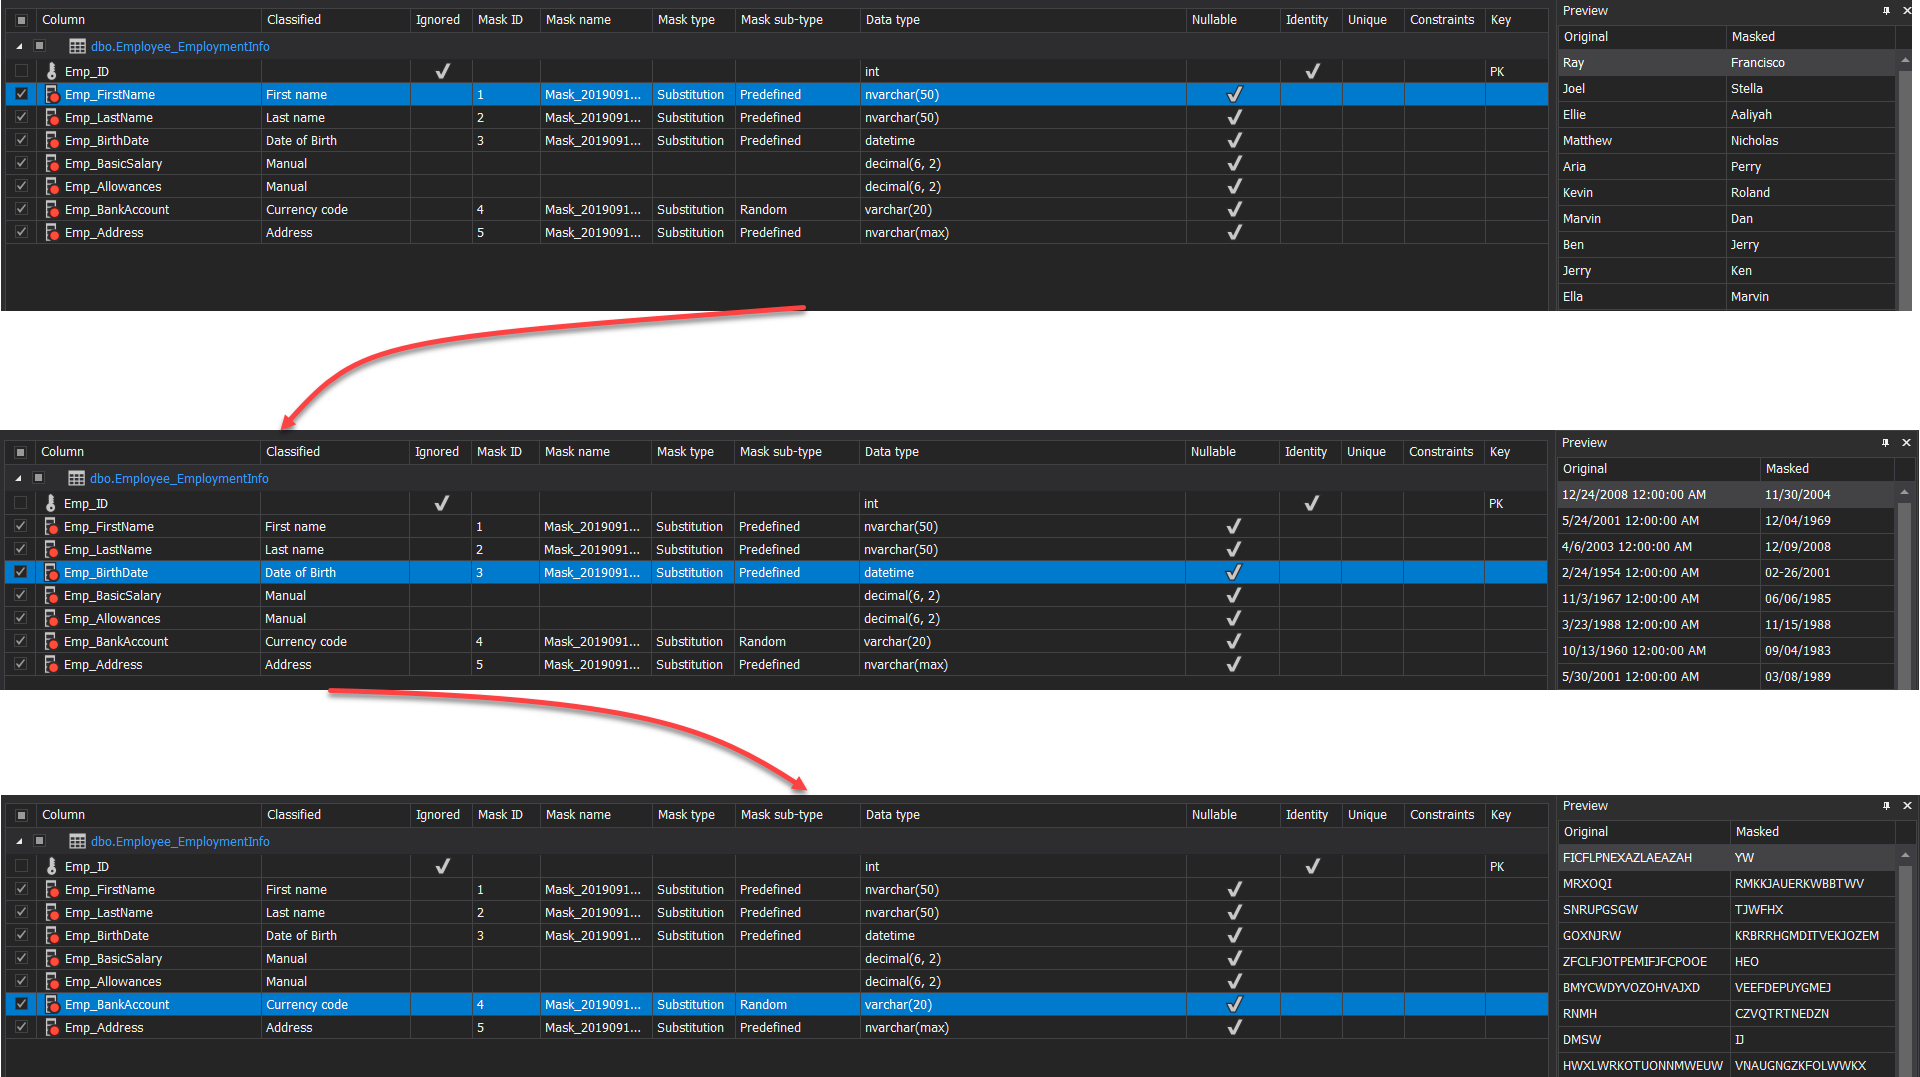
In addition, ApexSQL Mask provides us with a preview tab at the right side of the window, on which you can see and review the values that will be used to replace each column value before starting the masking process, as follows:
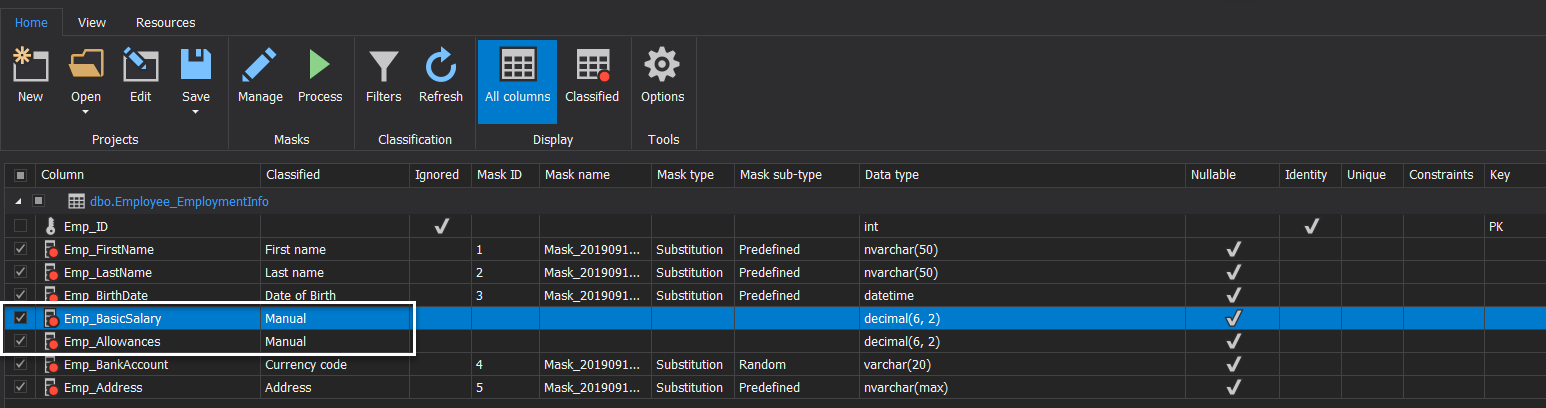
But the Basic Salary and Allowances columns that contain financial data are not classified automatically here. In order to classify it manually, click on the All Columns icon on the Display functions group under the Home page, in order to view all the table columns, as shown below:

Then tick the checkbox beside the Basic Salary and the Allowances columns, and you will see that ApexSQL Mask will mark these columns as manually classified, as follows:
After that, right-click on the Basic Salary and Allowances columns to add new masks for these columns, as below:
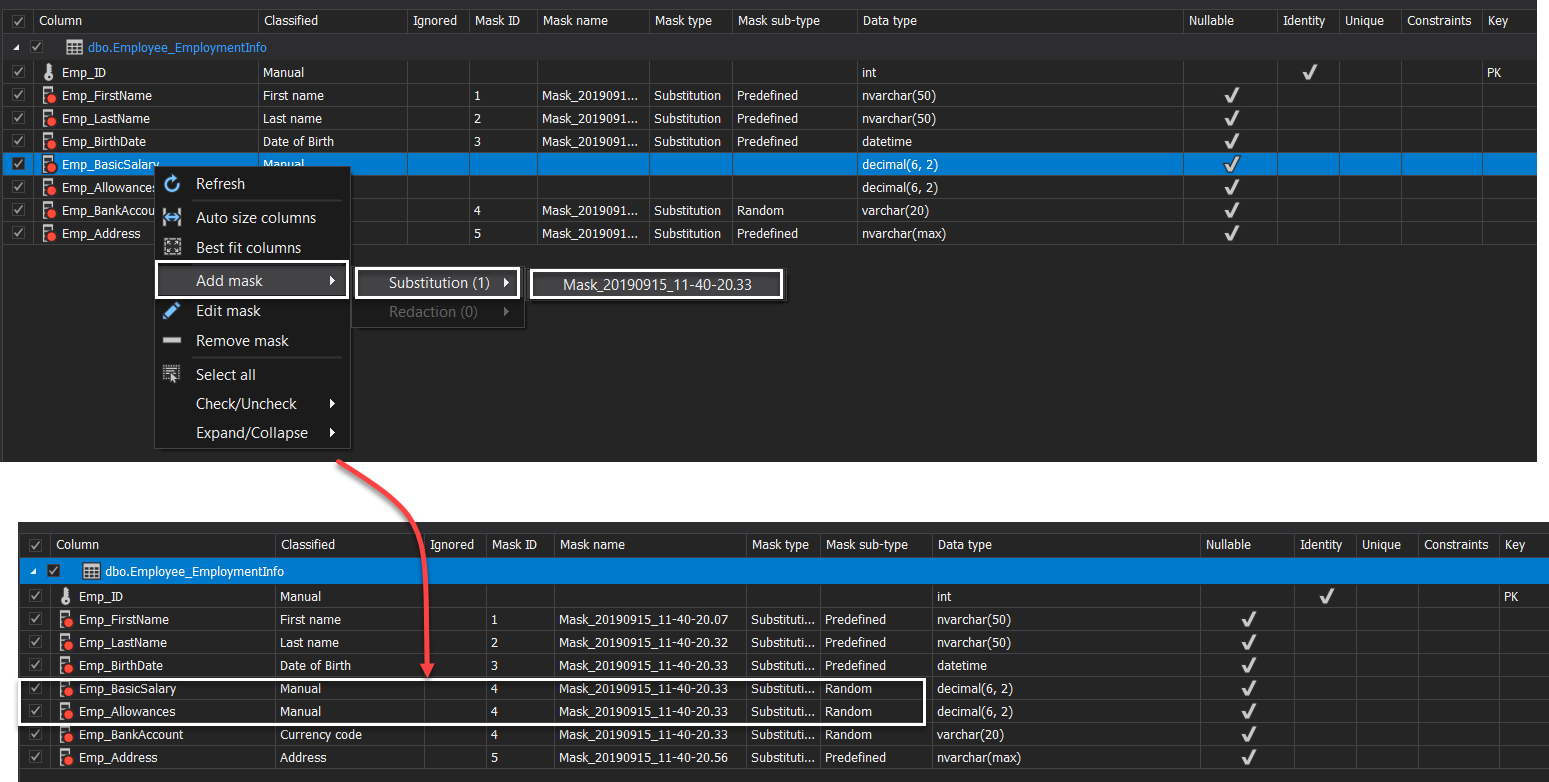
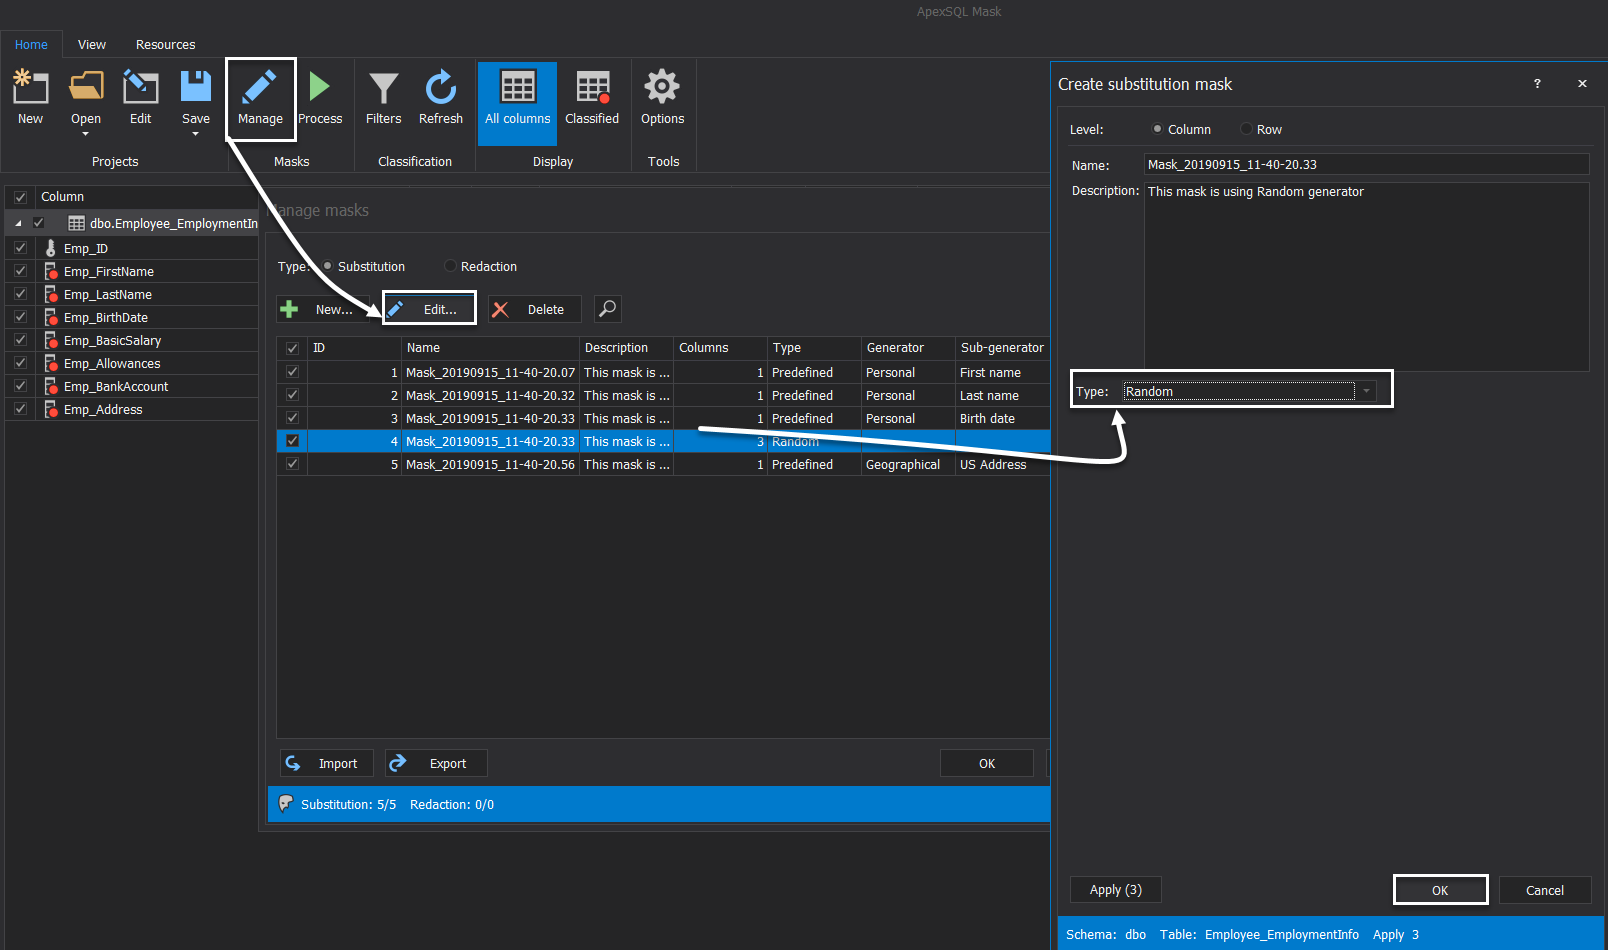
To edit the chosen masks, click on the Manage option from the Masks functions group under the Home page. From the opened Manage Masks window, select the mask that you plan to edit and click on the Edit option, then choose the type of the action that will be performed on the columns using that mask, as shown below:
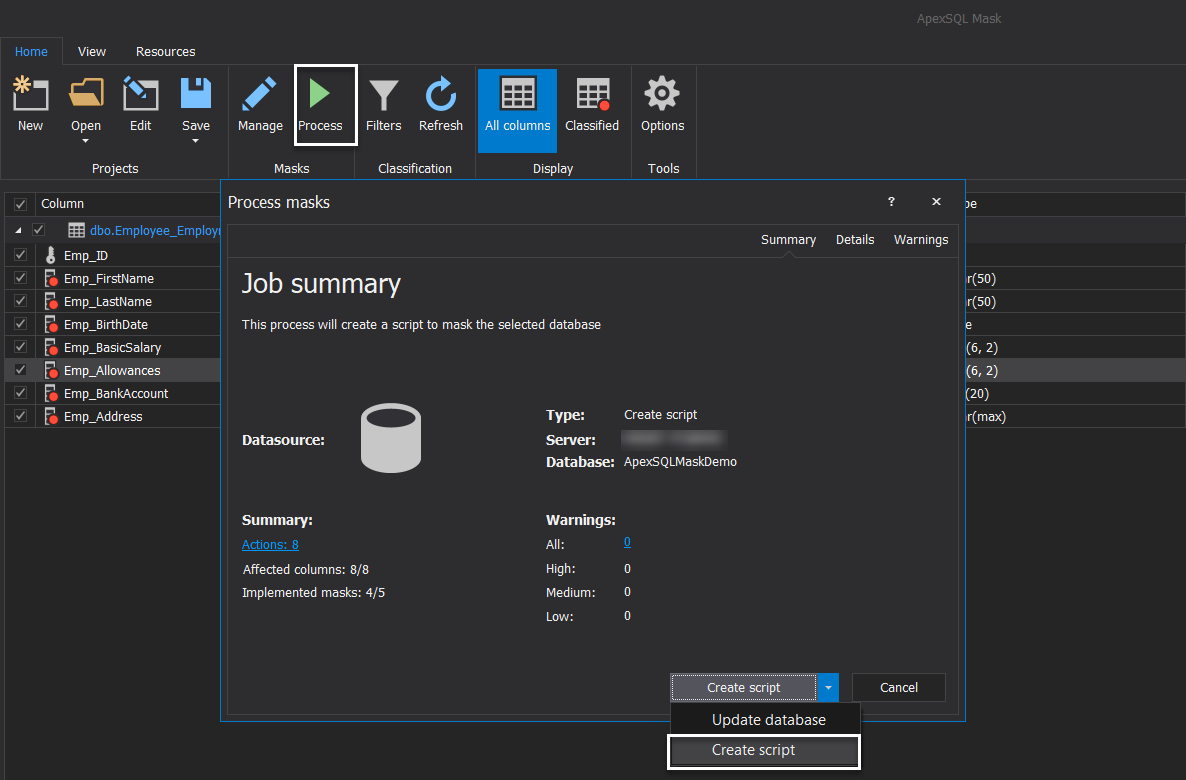
After reviewing all the masks that will be used to mask the tables data, click on the Process button from the Masks functions group under the Home page, and select whether to perform the masking changes directly to the original database, where ApexSQL Mask tool will automatically take a backup from the original database before performing the masking process based on the configurable settings of the current project, or simply create a T-SQL script of UPDATE statements that can be used to perform the masking changes in the database later. In our case to clone SQL Server database, we will choose to Create a script for the masking changes in order to apply it to the database on the development environment that is restored from the production database backup, as below:
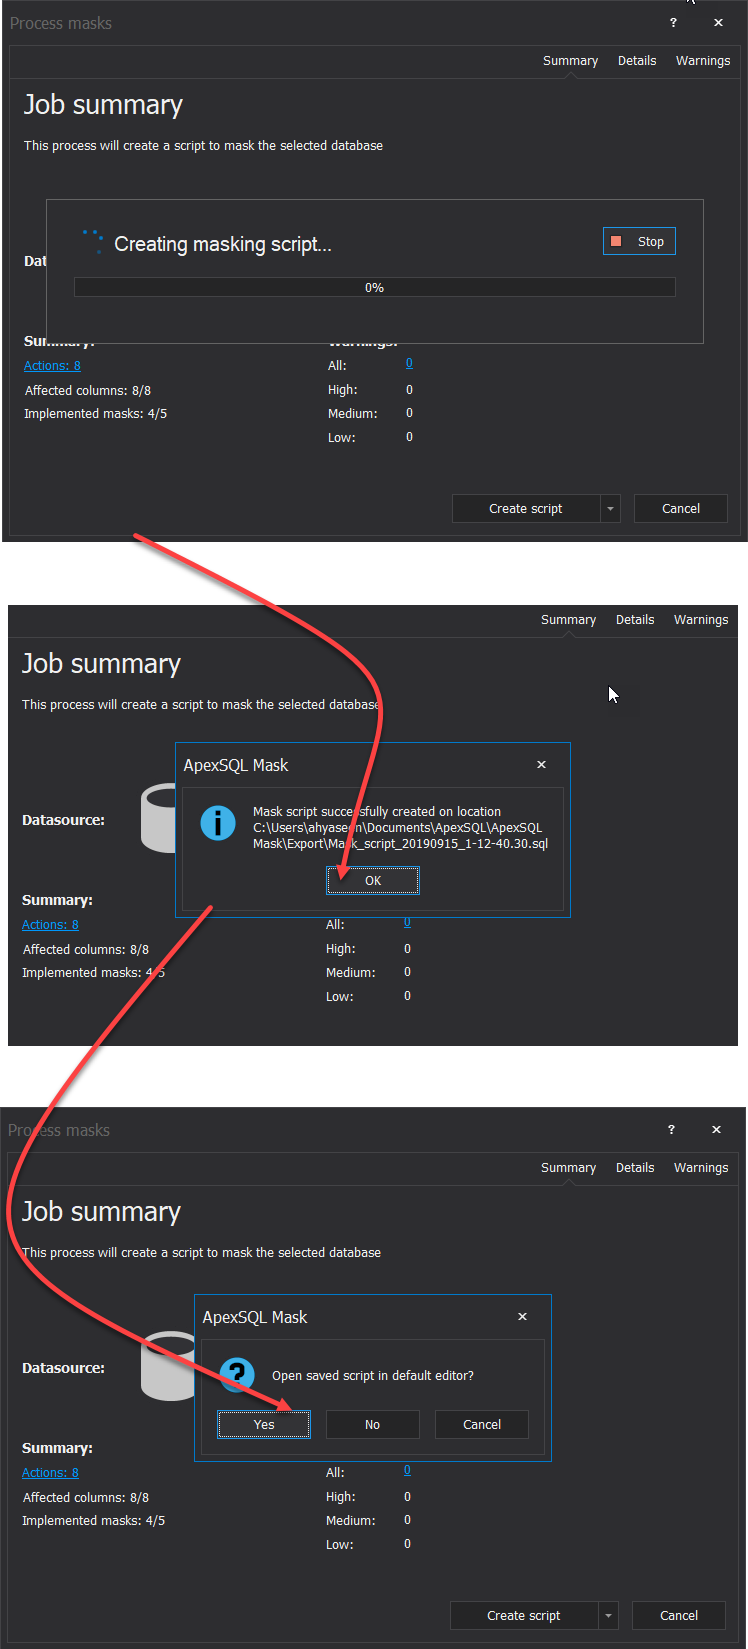
When you click on the Create Script option, ApexSQL Mask will show you the progress of the script generation process and notify you with a message when the script creation process completed successfully, providing you with the path of the generated script file. After that, ApexSQL Mask notifies you with a message to ask whether you plan to open the generated script file in the tool default editor directly, as shown below:
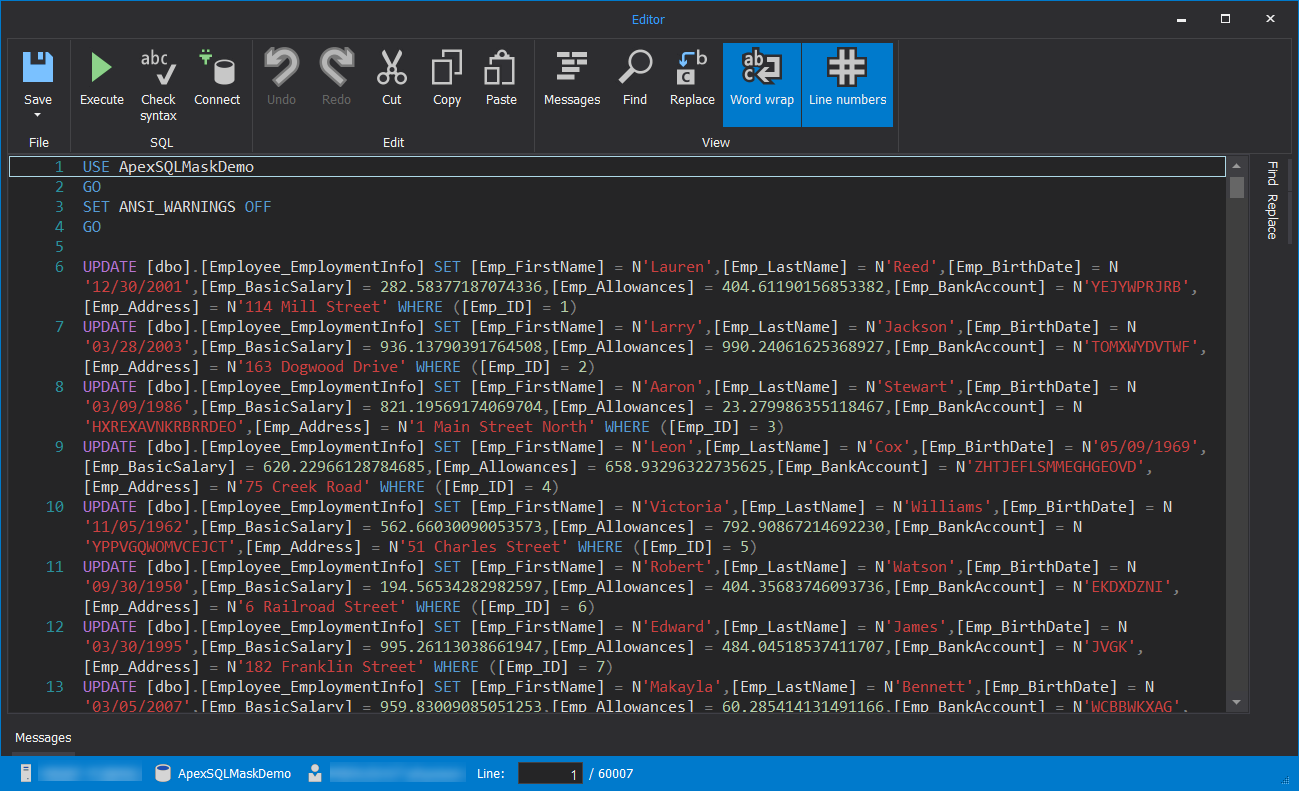
When you are ready to clone the SQL Server database, the generated script will be in the form of UPDATE statements that perform the masking changes to the database columns, under the mentioned database, as shown below:
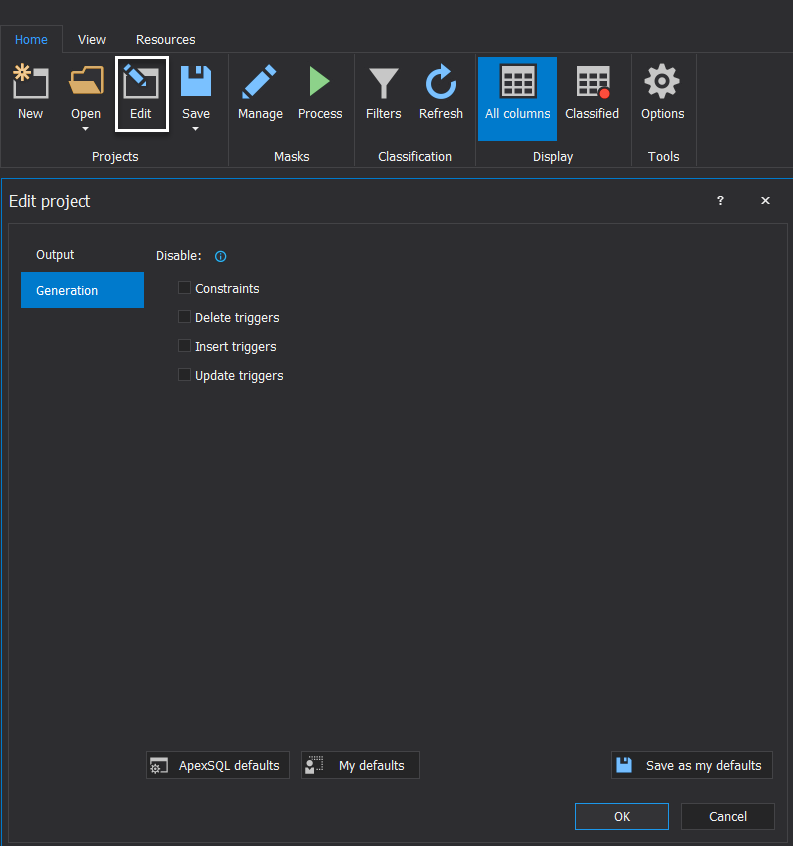
If the database table contains any constrain that checks the values before changing or inserting it, or contains a trigger that is used to perform an action in case of any insert, update or delete operation, ApexSQL Mask allows you to disable these constraints or triggers before performing the masking changes, at the tool level from the Options button from the tools functions group under the Home page, or at the project level from the Edit button from the Projects functions group under the Home page. In this case, to clone the SQL Server database, an additional T-SQL script will be added to the script to perform the disable action, as below:
The remaining steps are very common for all SQL Server database administrators, where you need to:
- Take a backup from the original database in the production environment
- Copy the backup file to the development server
- Restore the database to the development SQL Server instance
- Run the generated masking script to mask the critical employee’s data
- Allow the developers to use the database to test the new system changes
This was an example of how to clone the SQL Server database from production to development environment safely.
October 25, 2019


