


Working with sensitive data raises the need to protect them at all costs. Even though there are many ways to do that, all of them can be time-consuming.
Using ApexSQL Mask to mask data in SQL is a perfect way to protect certain SQL data in the SQL database in just a few clicks. This way, if the database has to be provided to the 3rd parties, and we don’t want to provide the legit information from the database to them, the data will be protected.
The data masking process using ApexSQL Mask will be explained with the AdventureWorks database.
Upon starting the application when the connection options to the SQL Server and database are fulfilled, using the Connect button, the main grid with loaded tables/columns from the specified database will be shown:
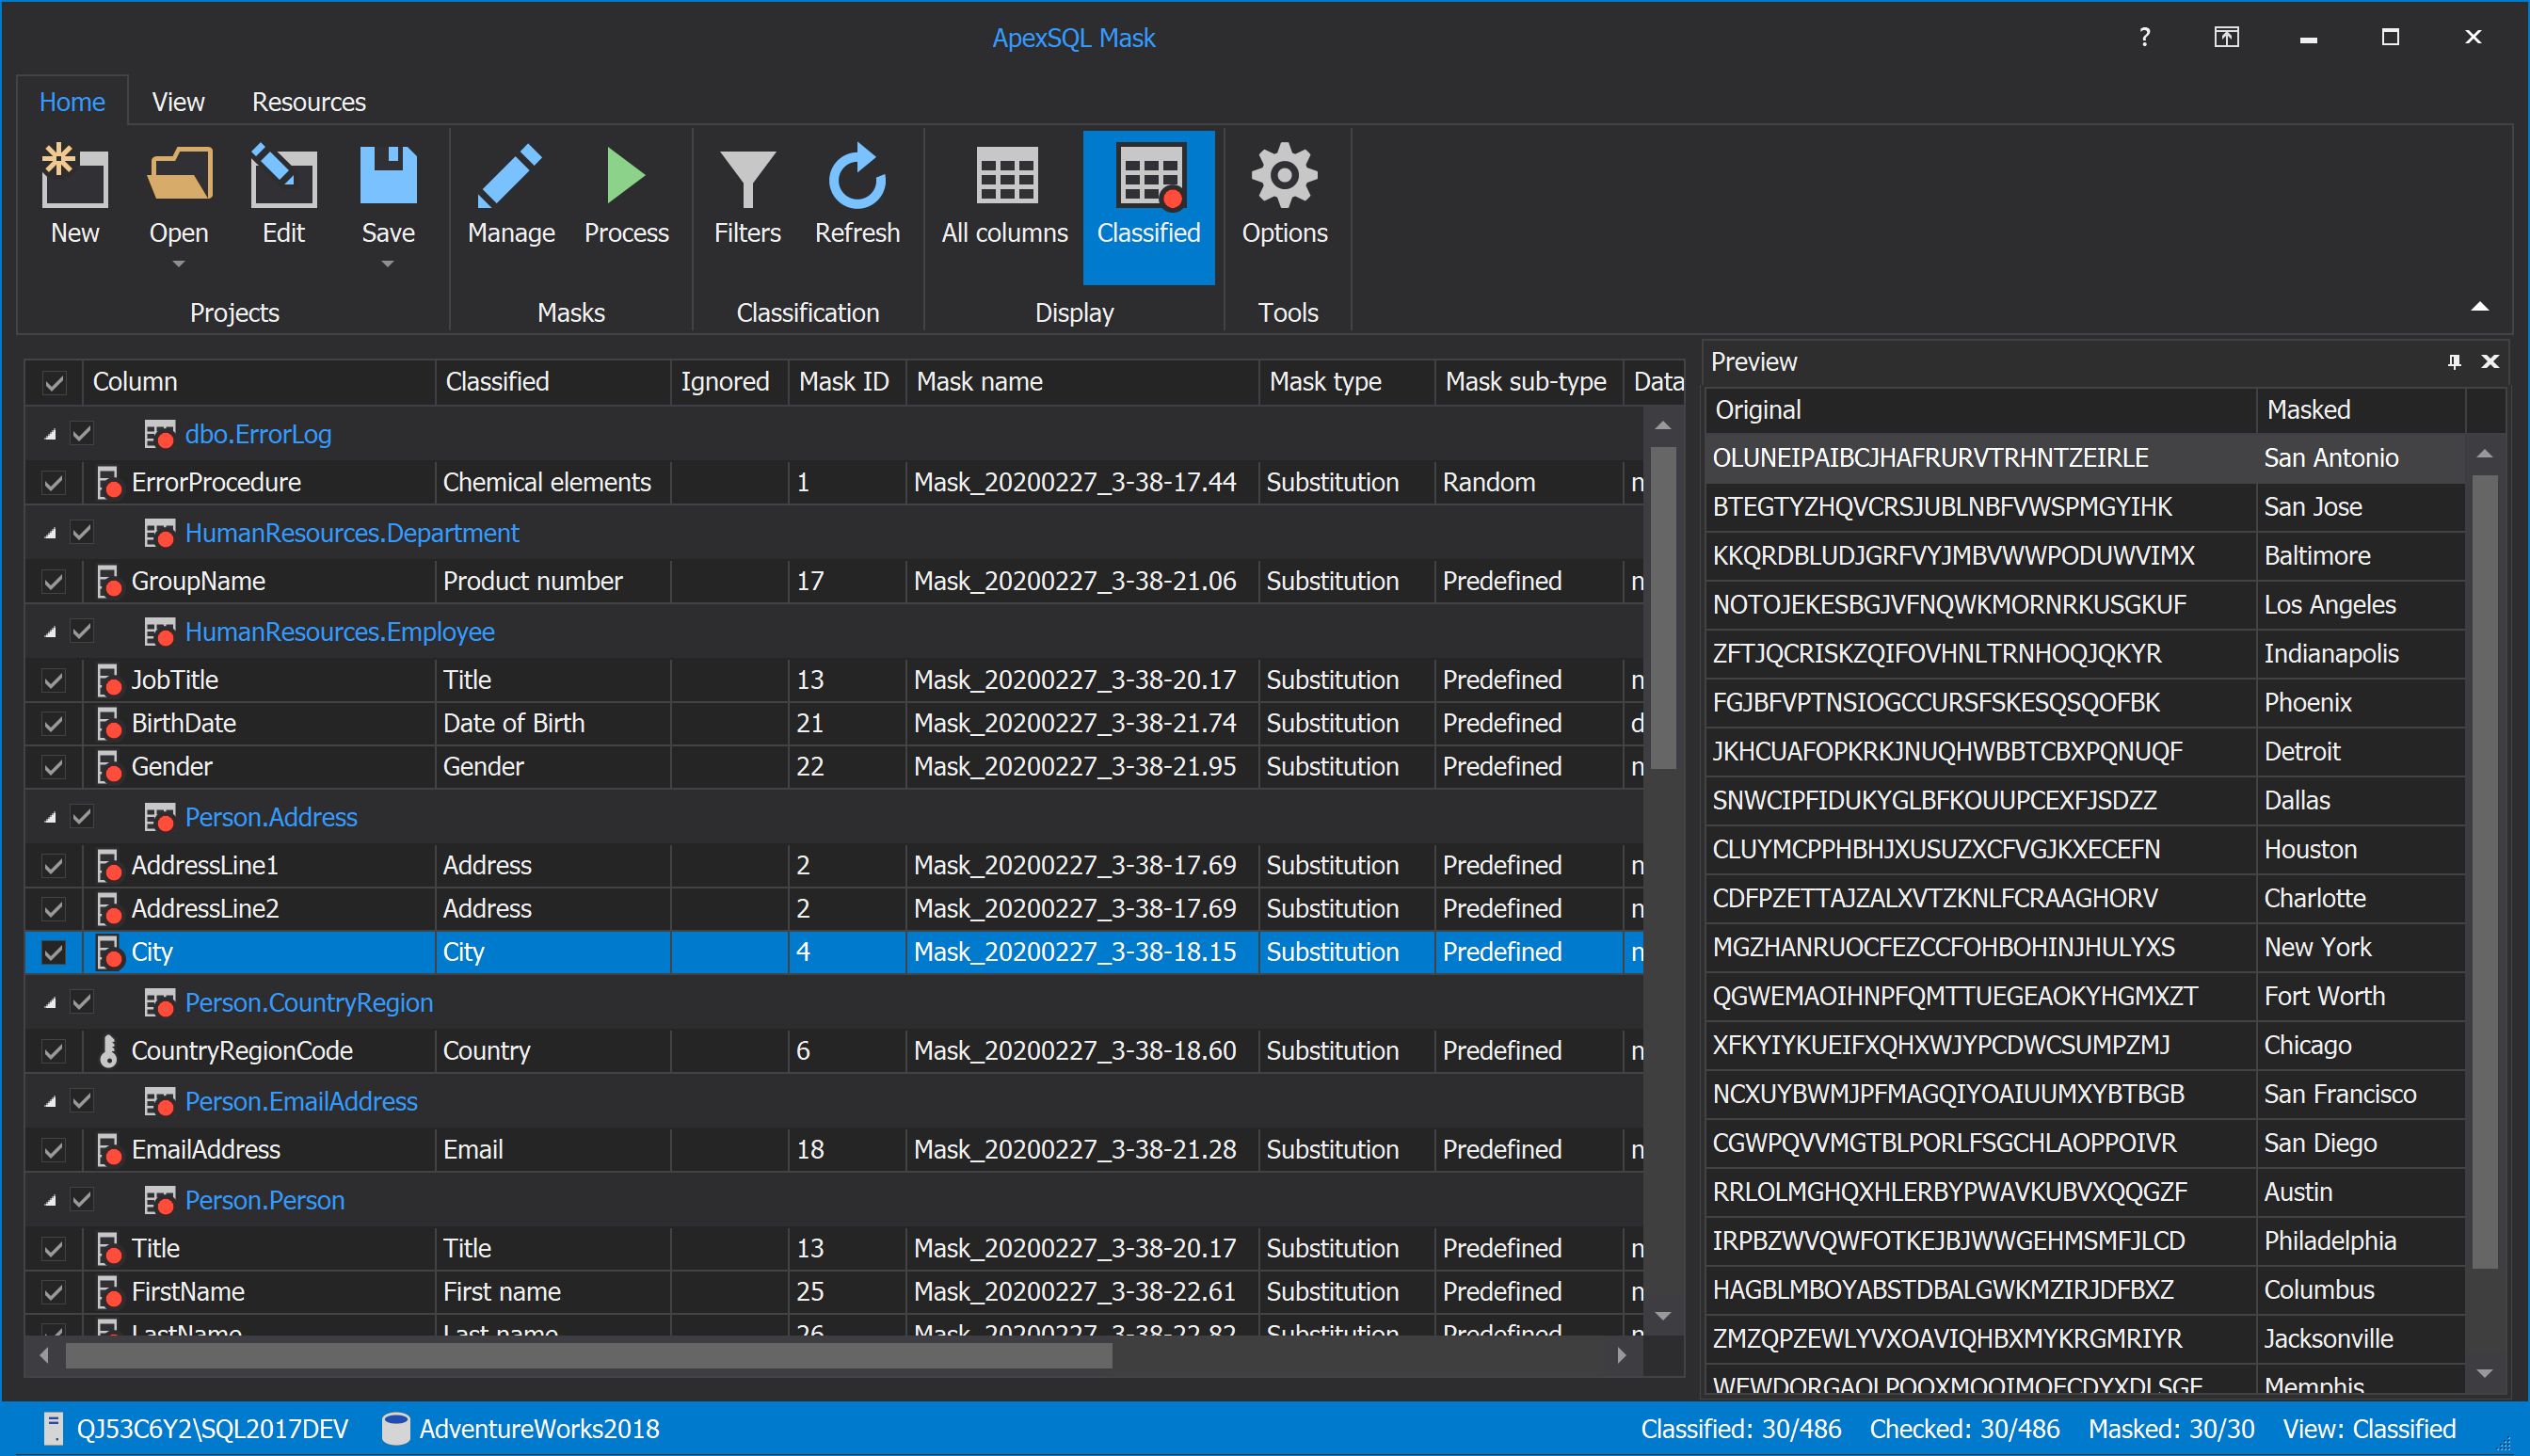
The application can automatically scan the sensitive data and propose which data in the SQL database should be replaced from original to the masked one.
Selecting any listed table/column from the gird will show the masked data in the Preview panel on the right side of the main window, as shown in the above image.
This option can be turned off from the Options button under the Home button by unchecking the checkbox Automatically scan for sensitive data if we want only manual selection from the SQL database:
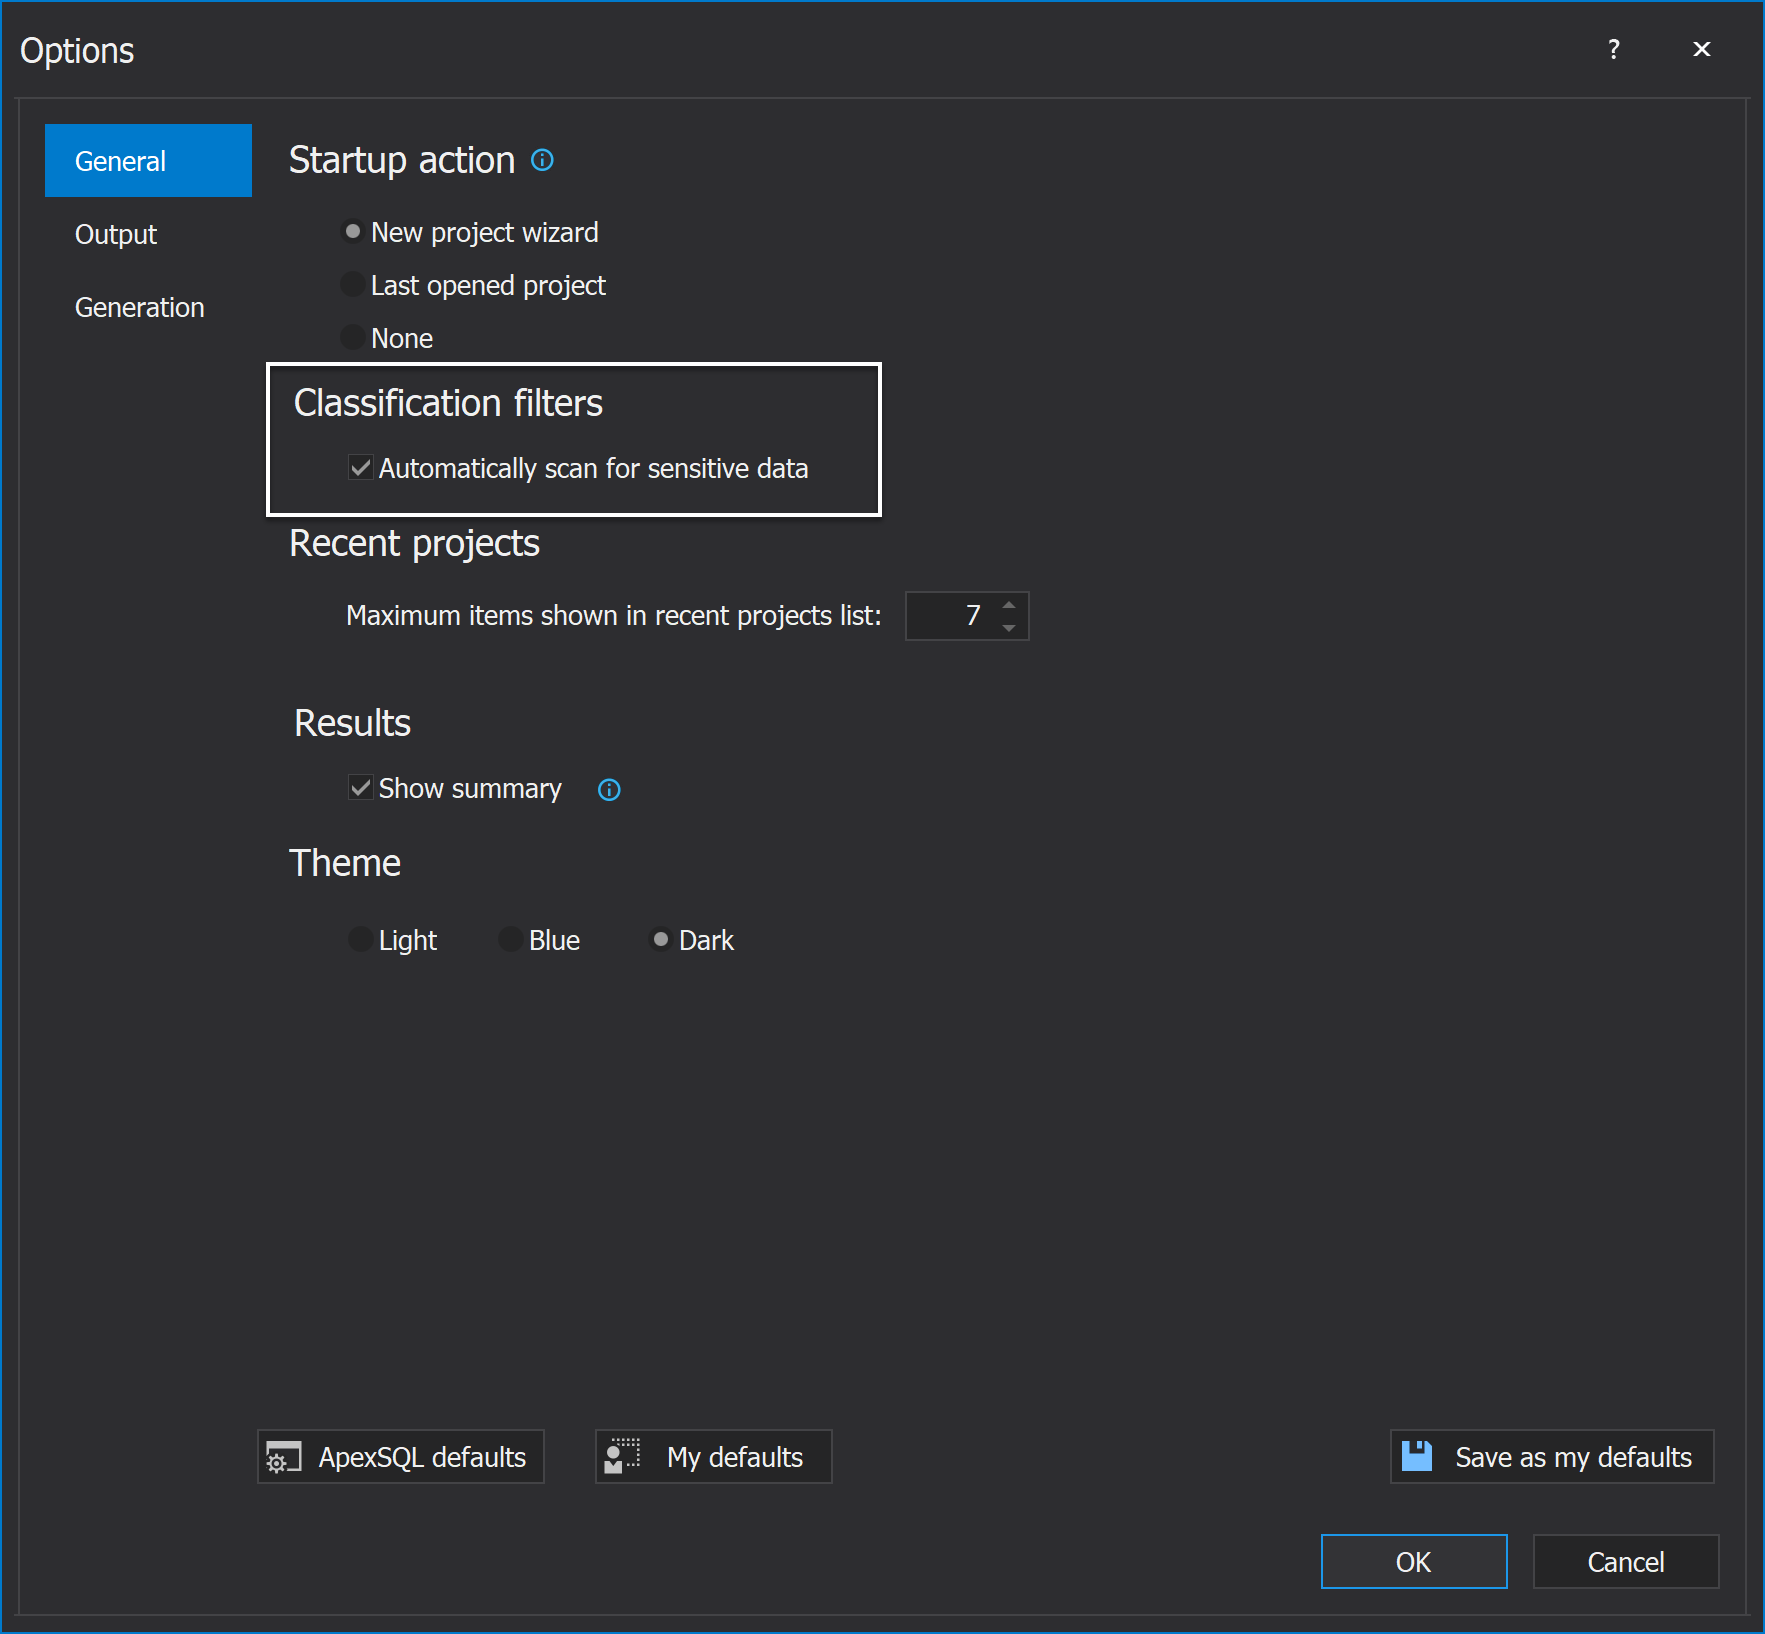
On the other hand, if the option is turned on and the application didn’t find the desired columns and tables in the specified database, there is a possibility to manually add them.
If for some reason the desired tables/columns are not listed in the grid after the connection to the SQL Server and database is done, click on the All columns button from the Home tab:
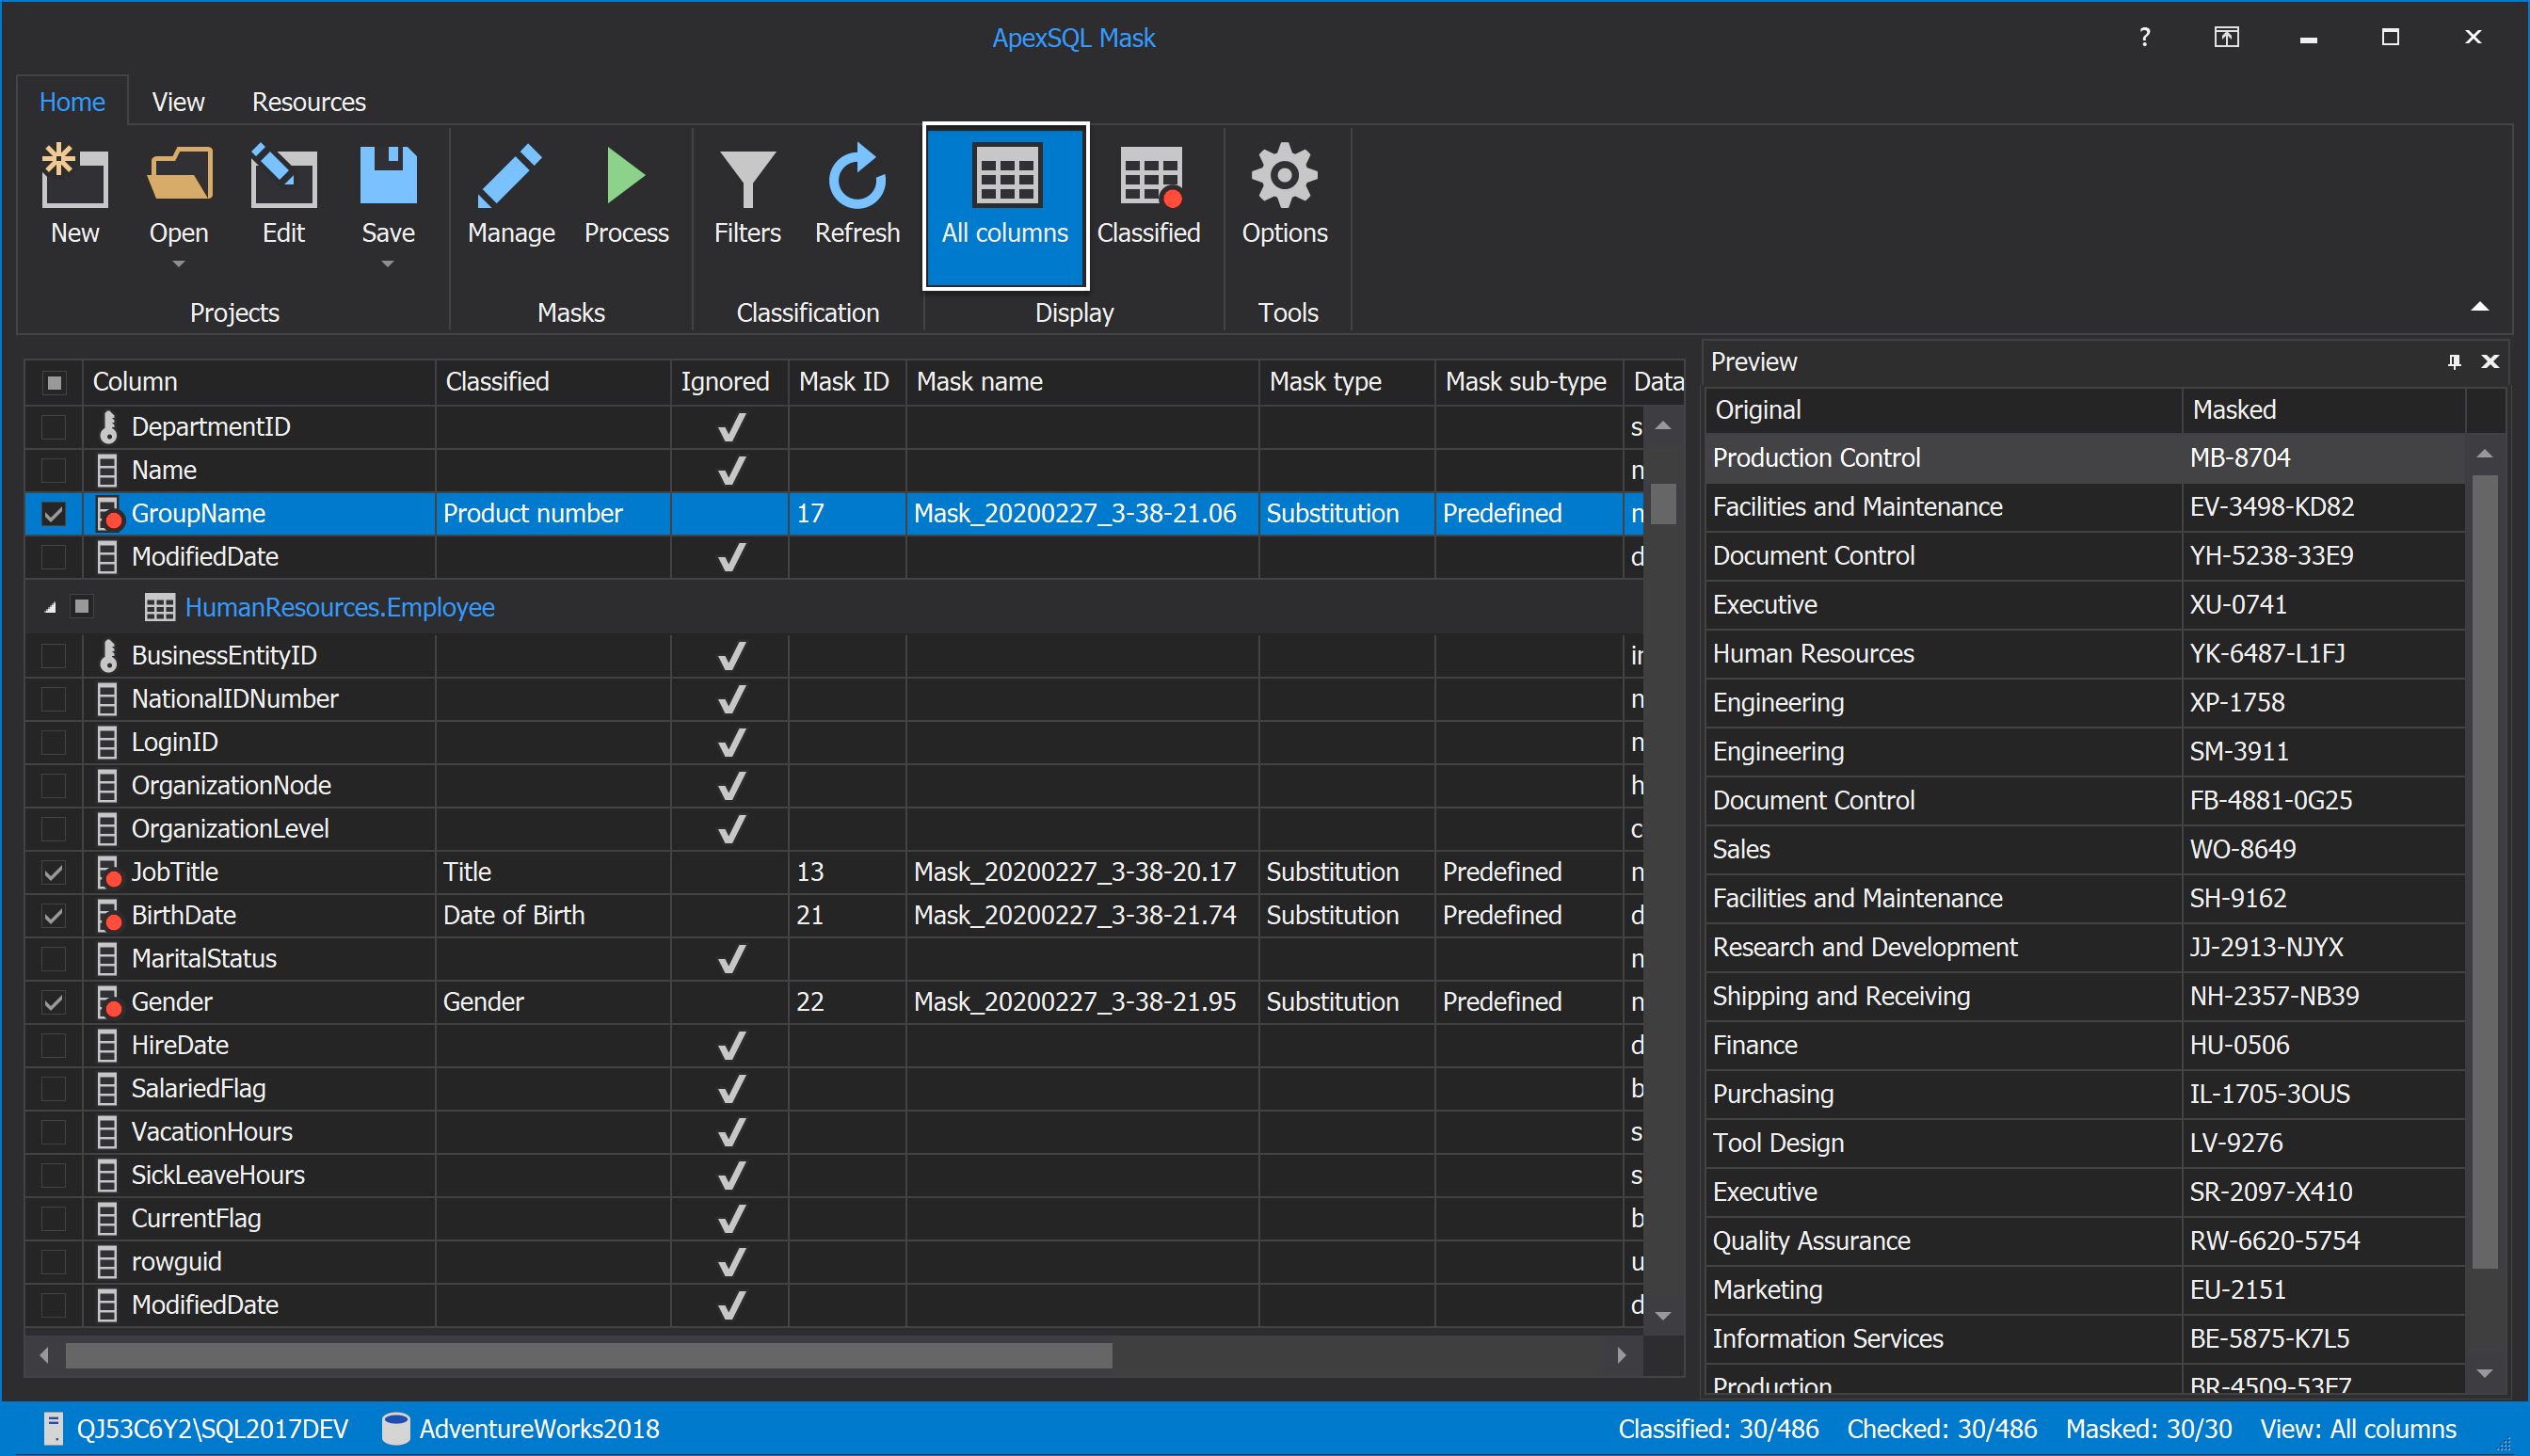
In the shown grid will be listed all columns present in the specified database, in our case, the AdventureWorks database. In order to mask data in the SQL database, check the desired column, in our case, the Name column, from the grid. In the Classified column, for the checked column will be written ‘’Manual’’:
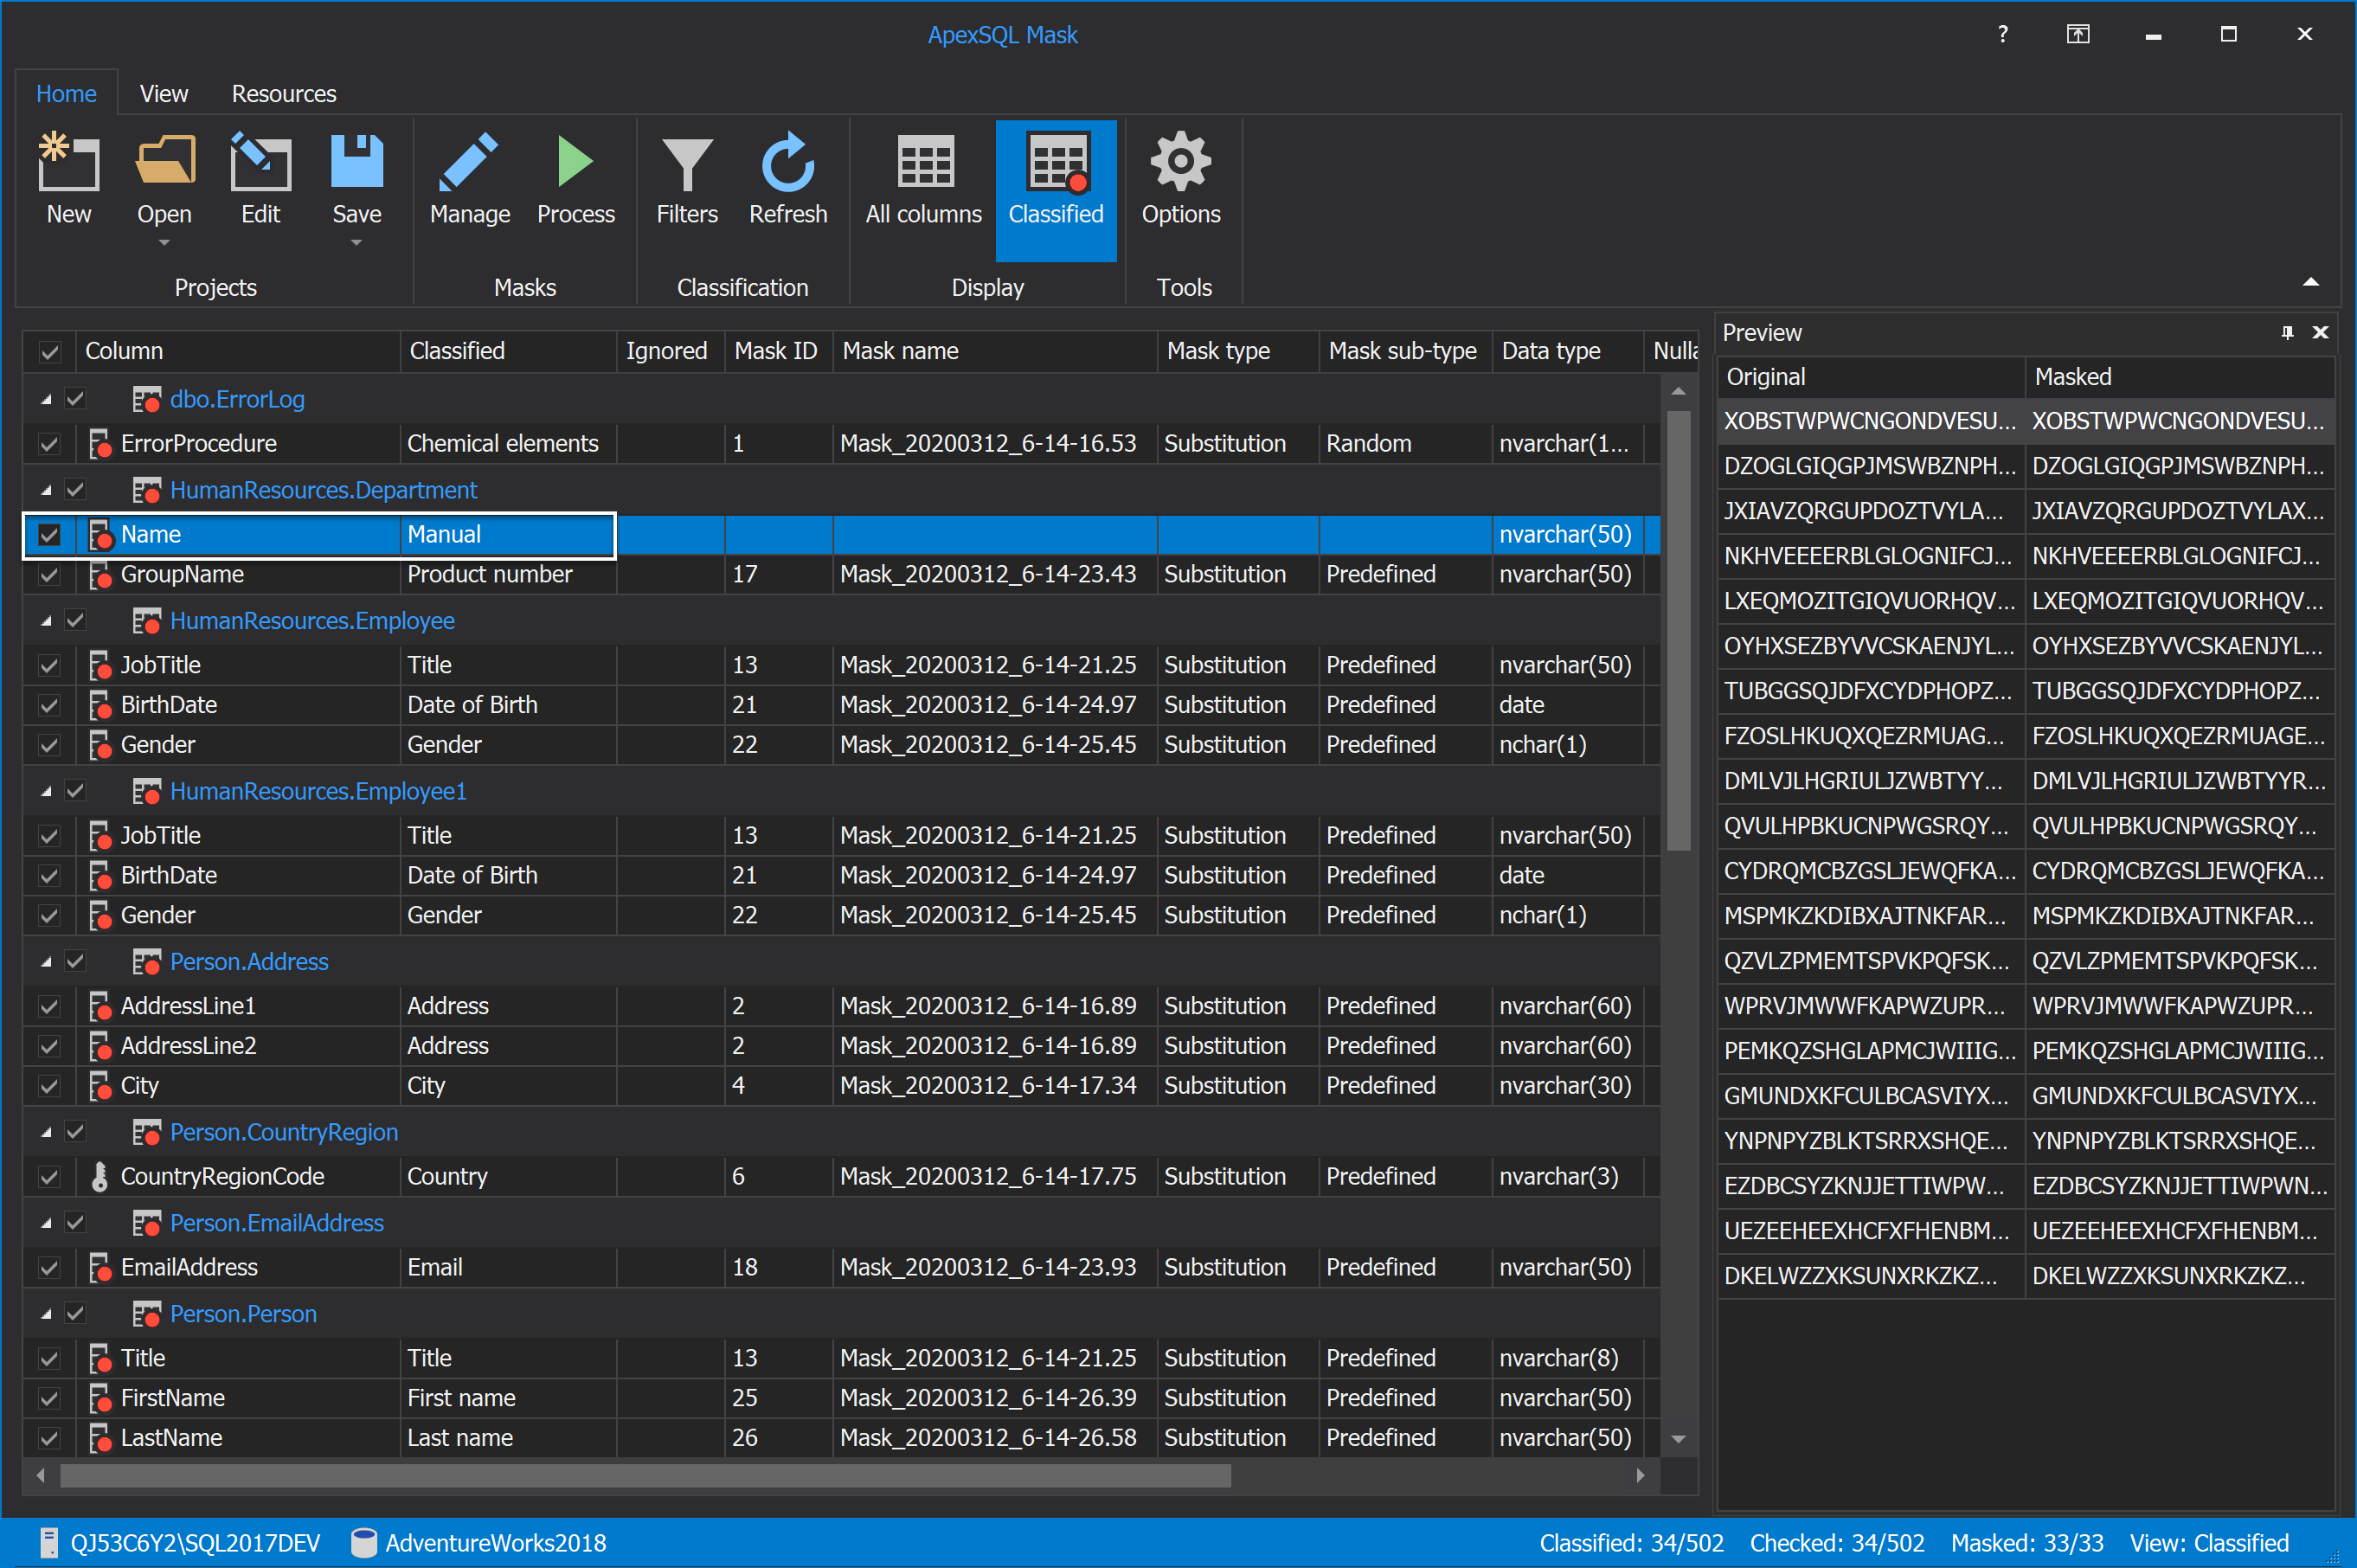
When the column is checked, it can be seen immediately that is added by showing the red circle to the column icon, and, in the Ignore column, the checkmark will be gone:
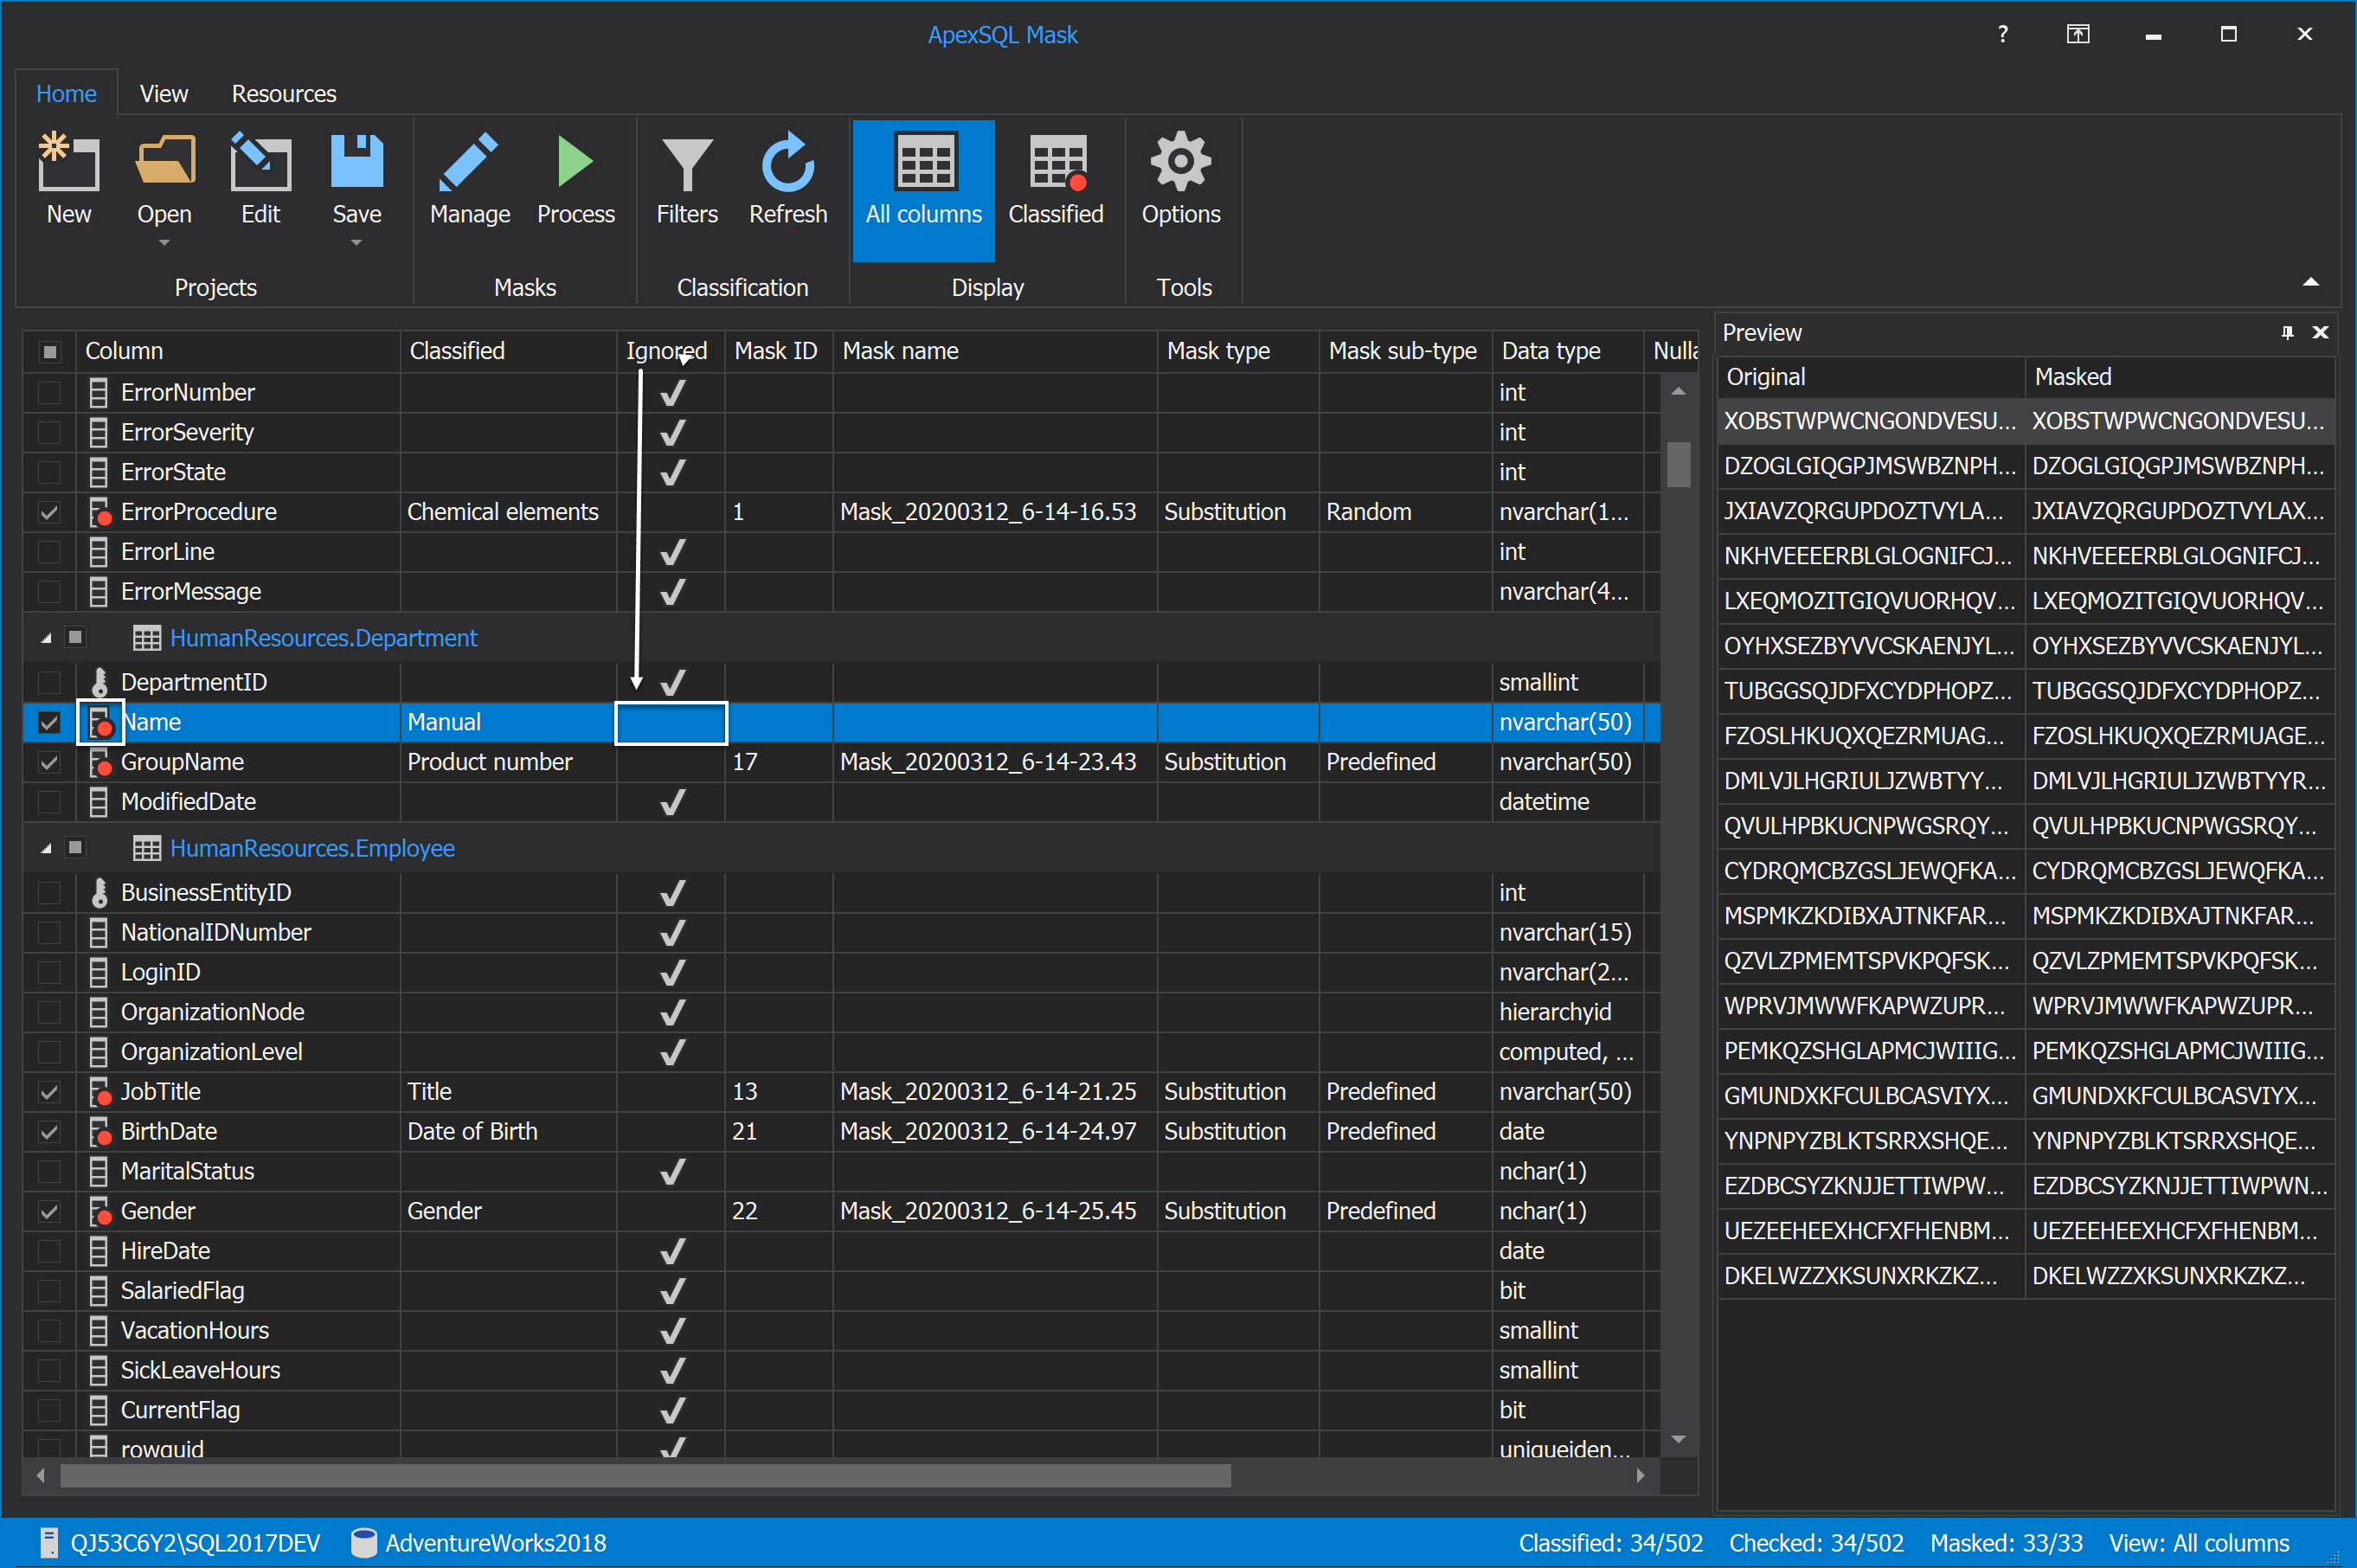
The added columns will not be masked by default, the Mask name, Mask type, Mask ID, and Mask sub-type columns will be empty:

Before the masking process can be started, the mask must be specified. Right-click on the added column, and from the context menu choose the Add mask option and the Substitution from the already listed substitutions:
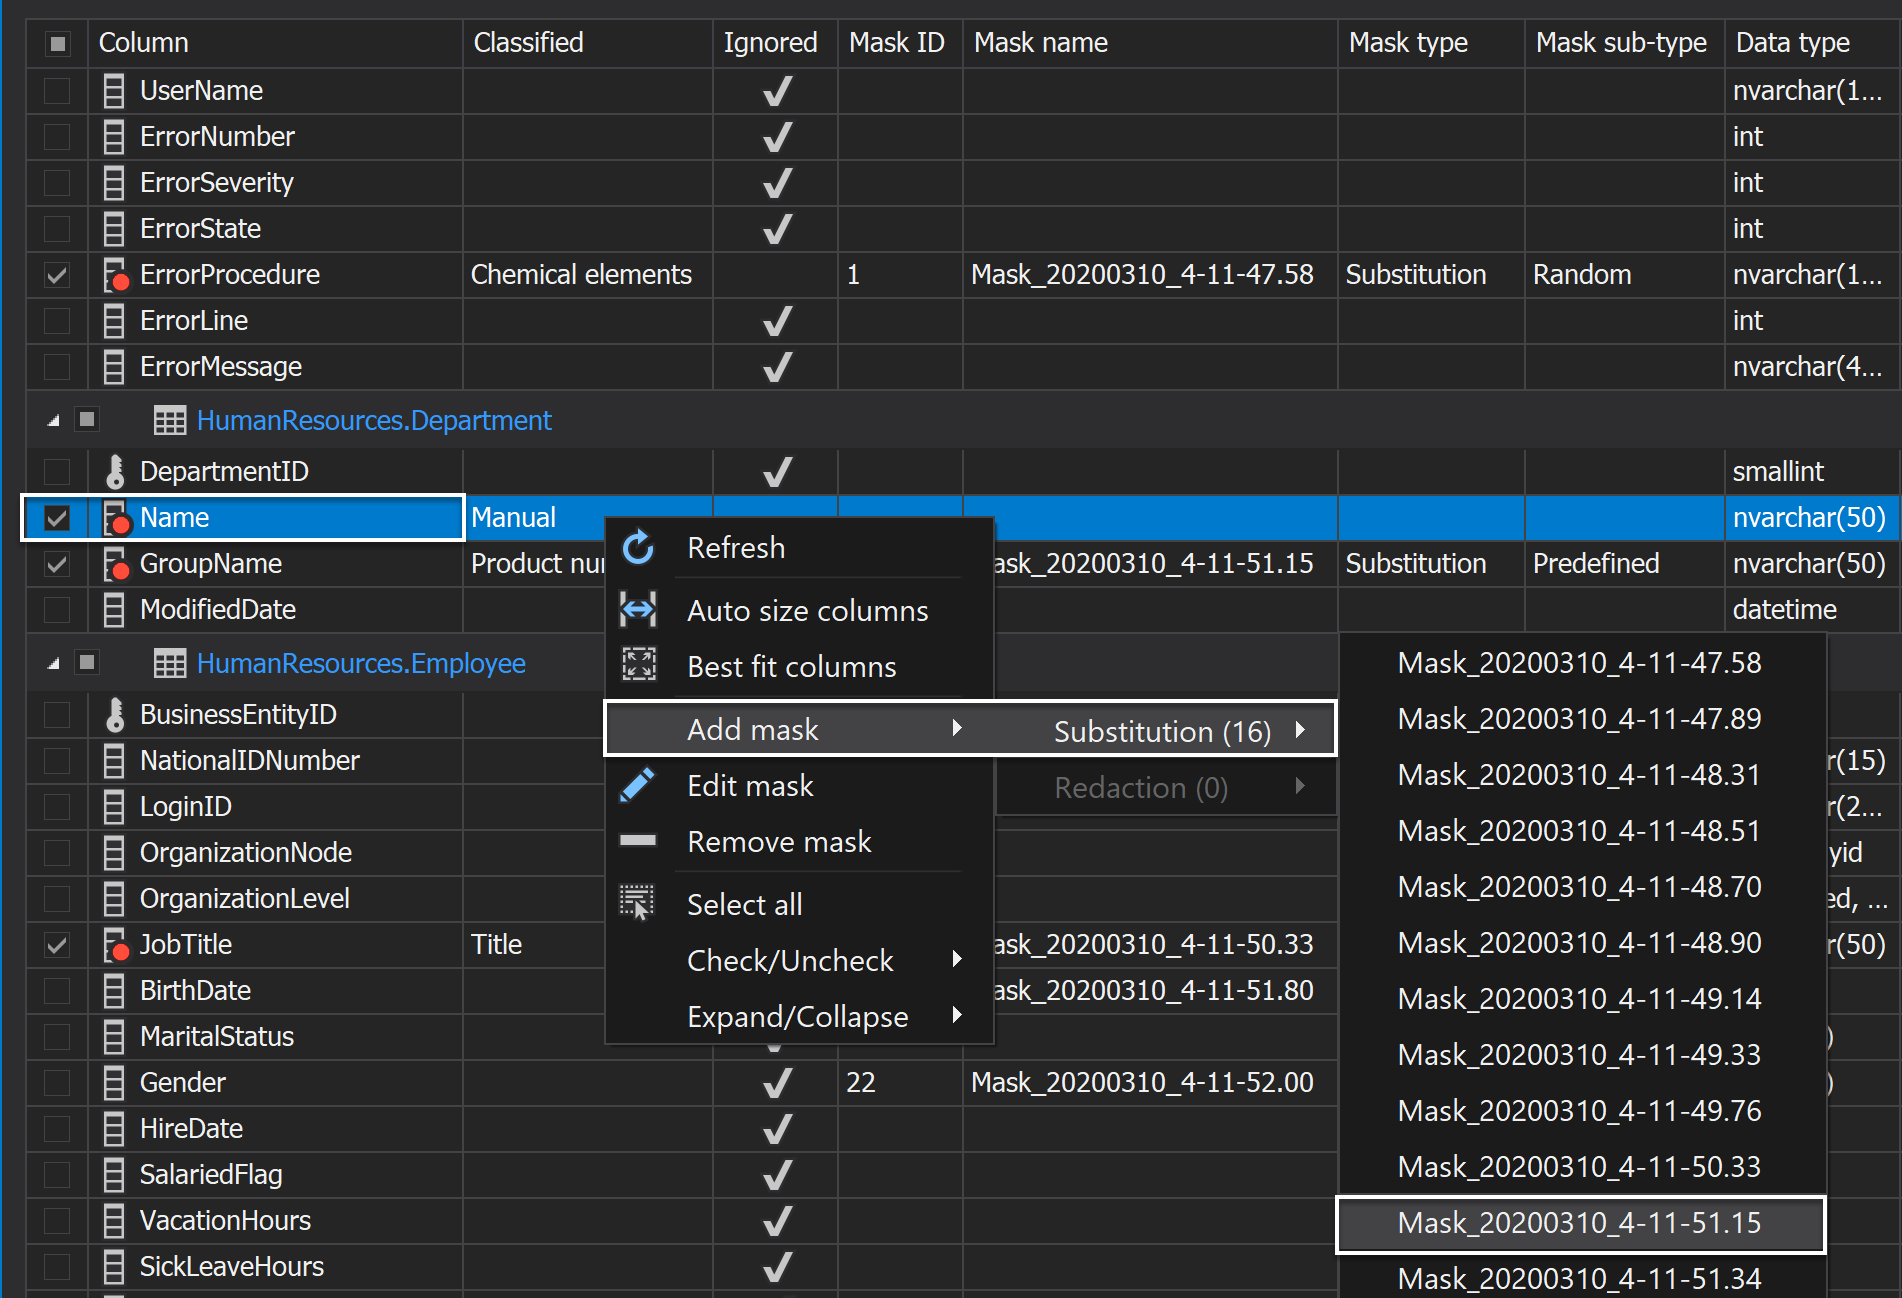
In our case, we will choose the same substitution predefine generator for the GroupName and Name columns:

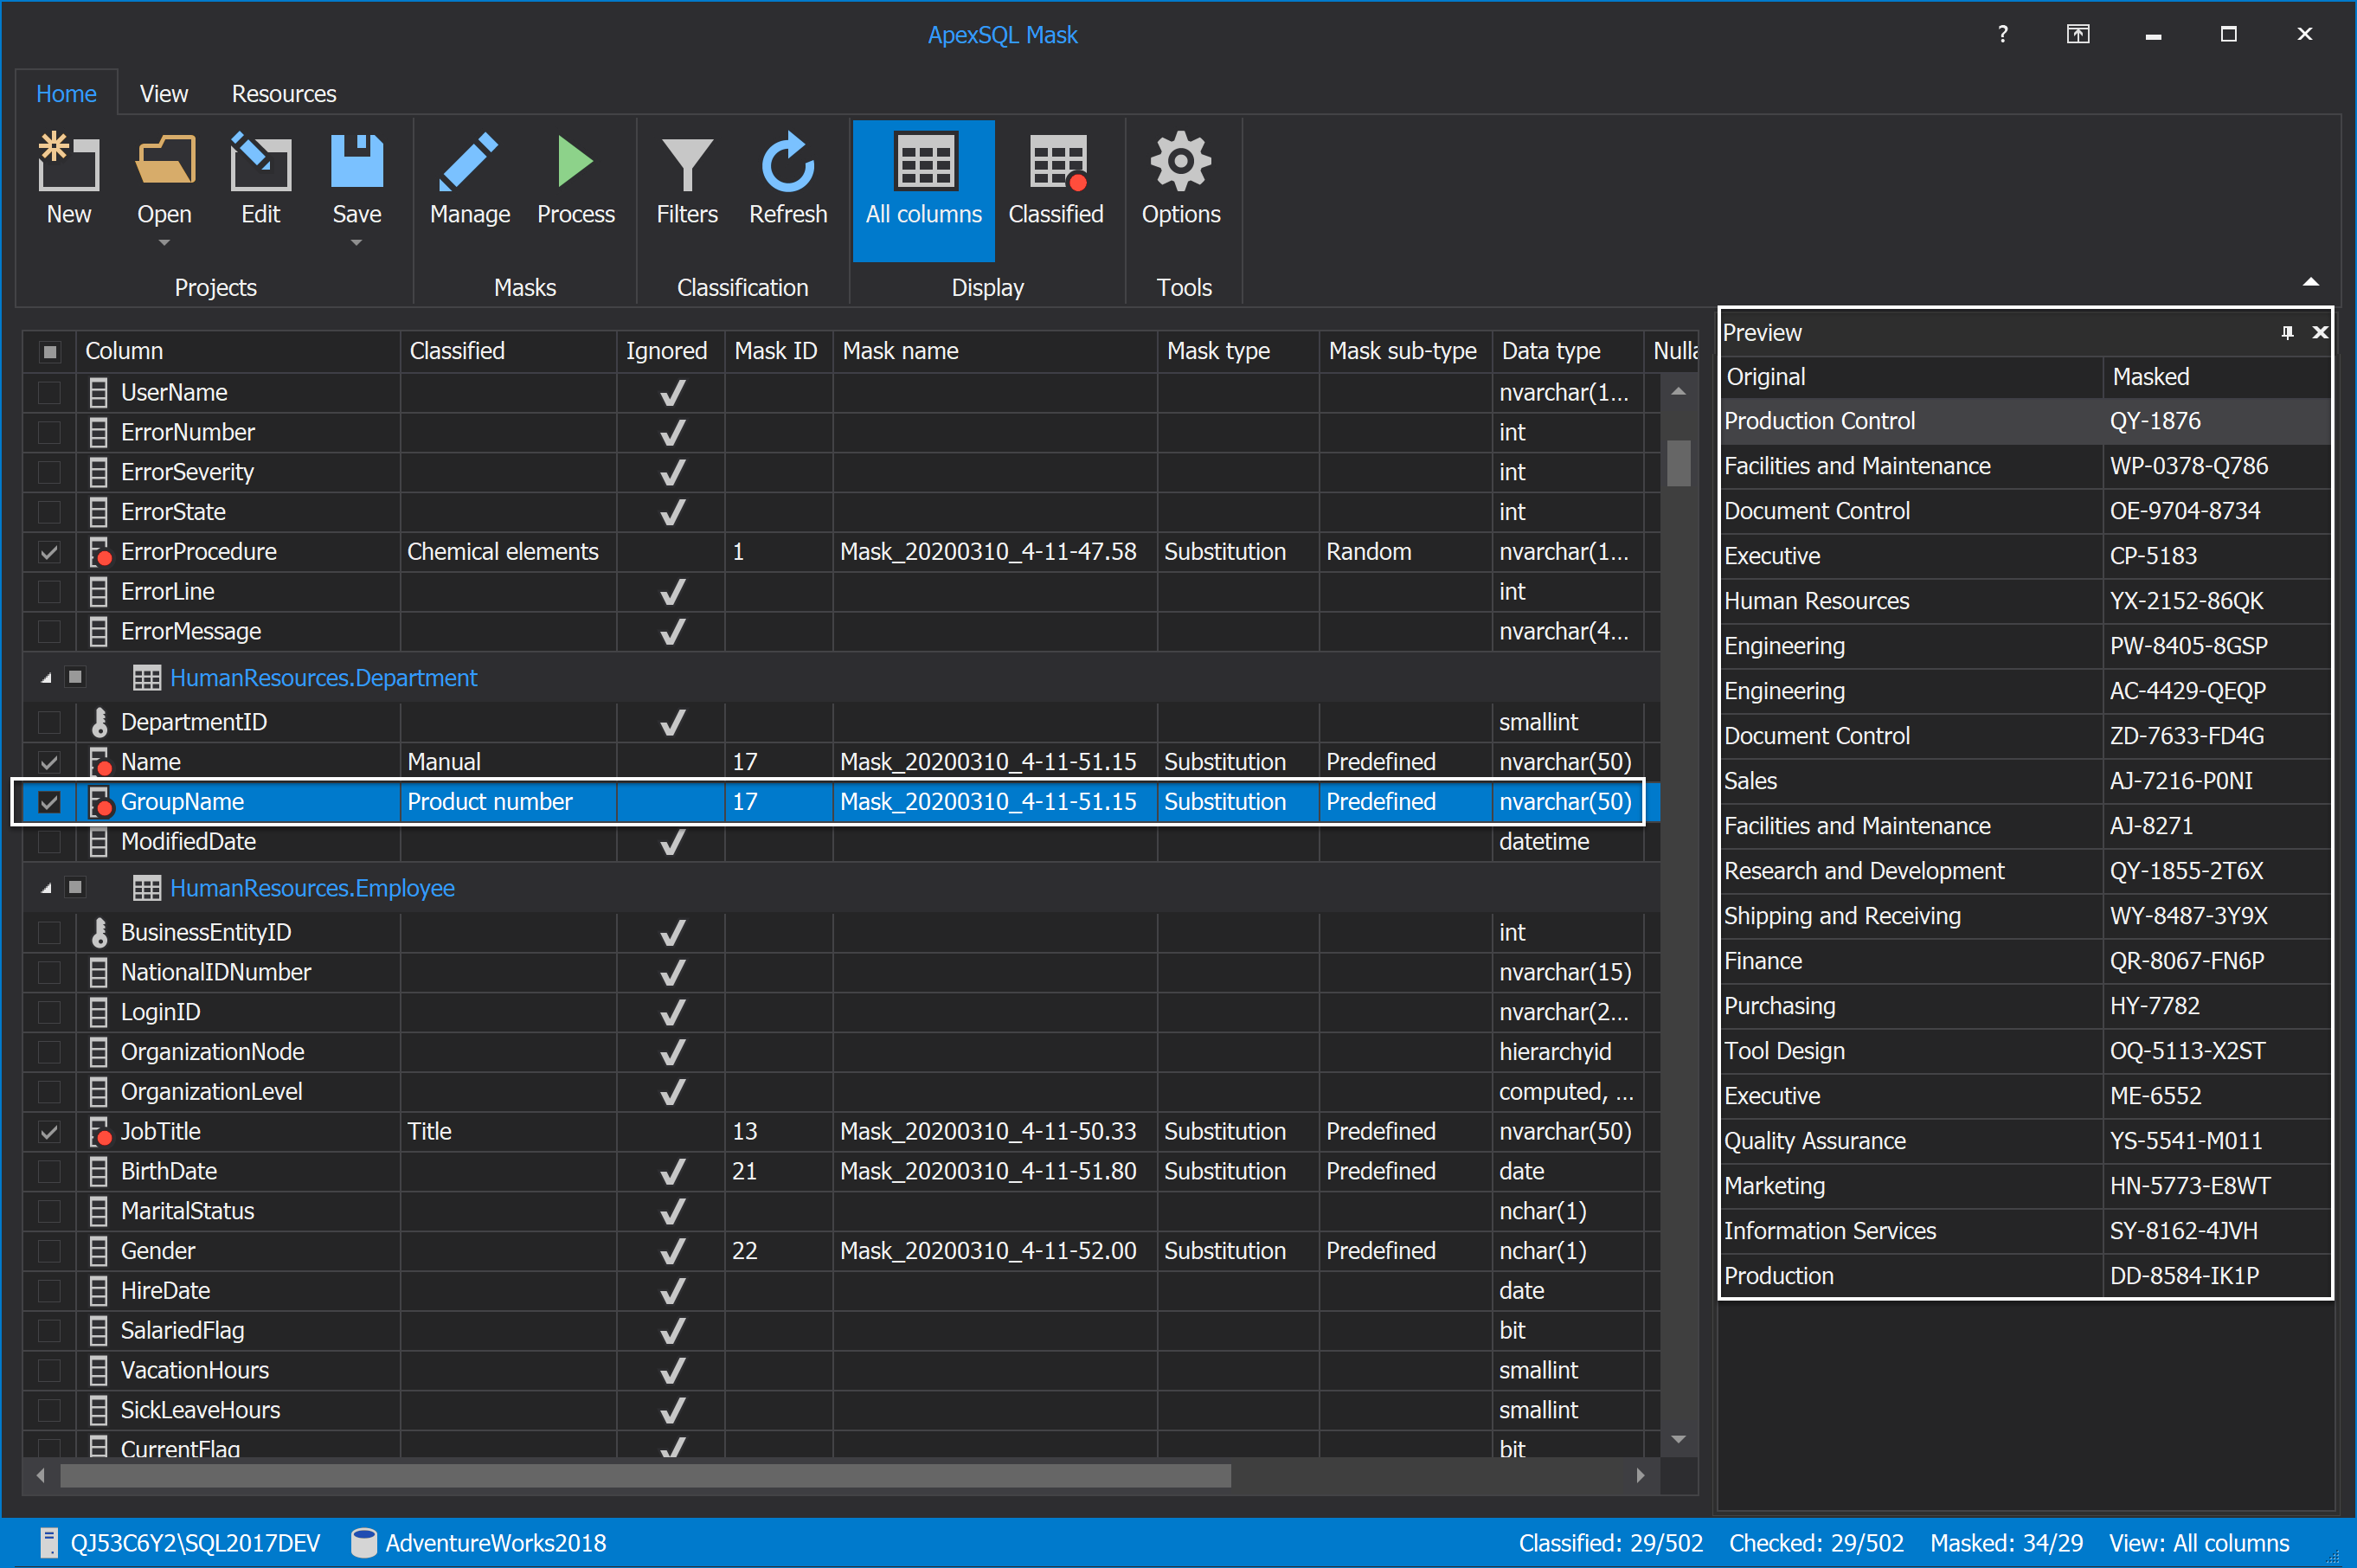
Note: The masked SQL data will be different no matter if the same substitution predefined generator is used for two or more columns, meaning it cannot be applied the data with the same names in the two or more columns.
In our example for the GroupName column is applied the same substitution predefined generator as for the Name column. Masked data for the GroupName column will look like this:
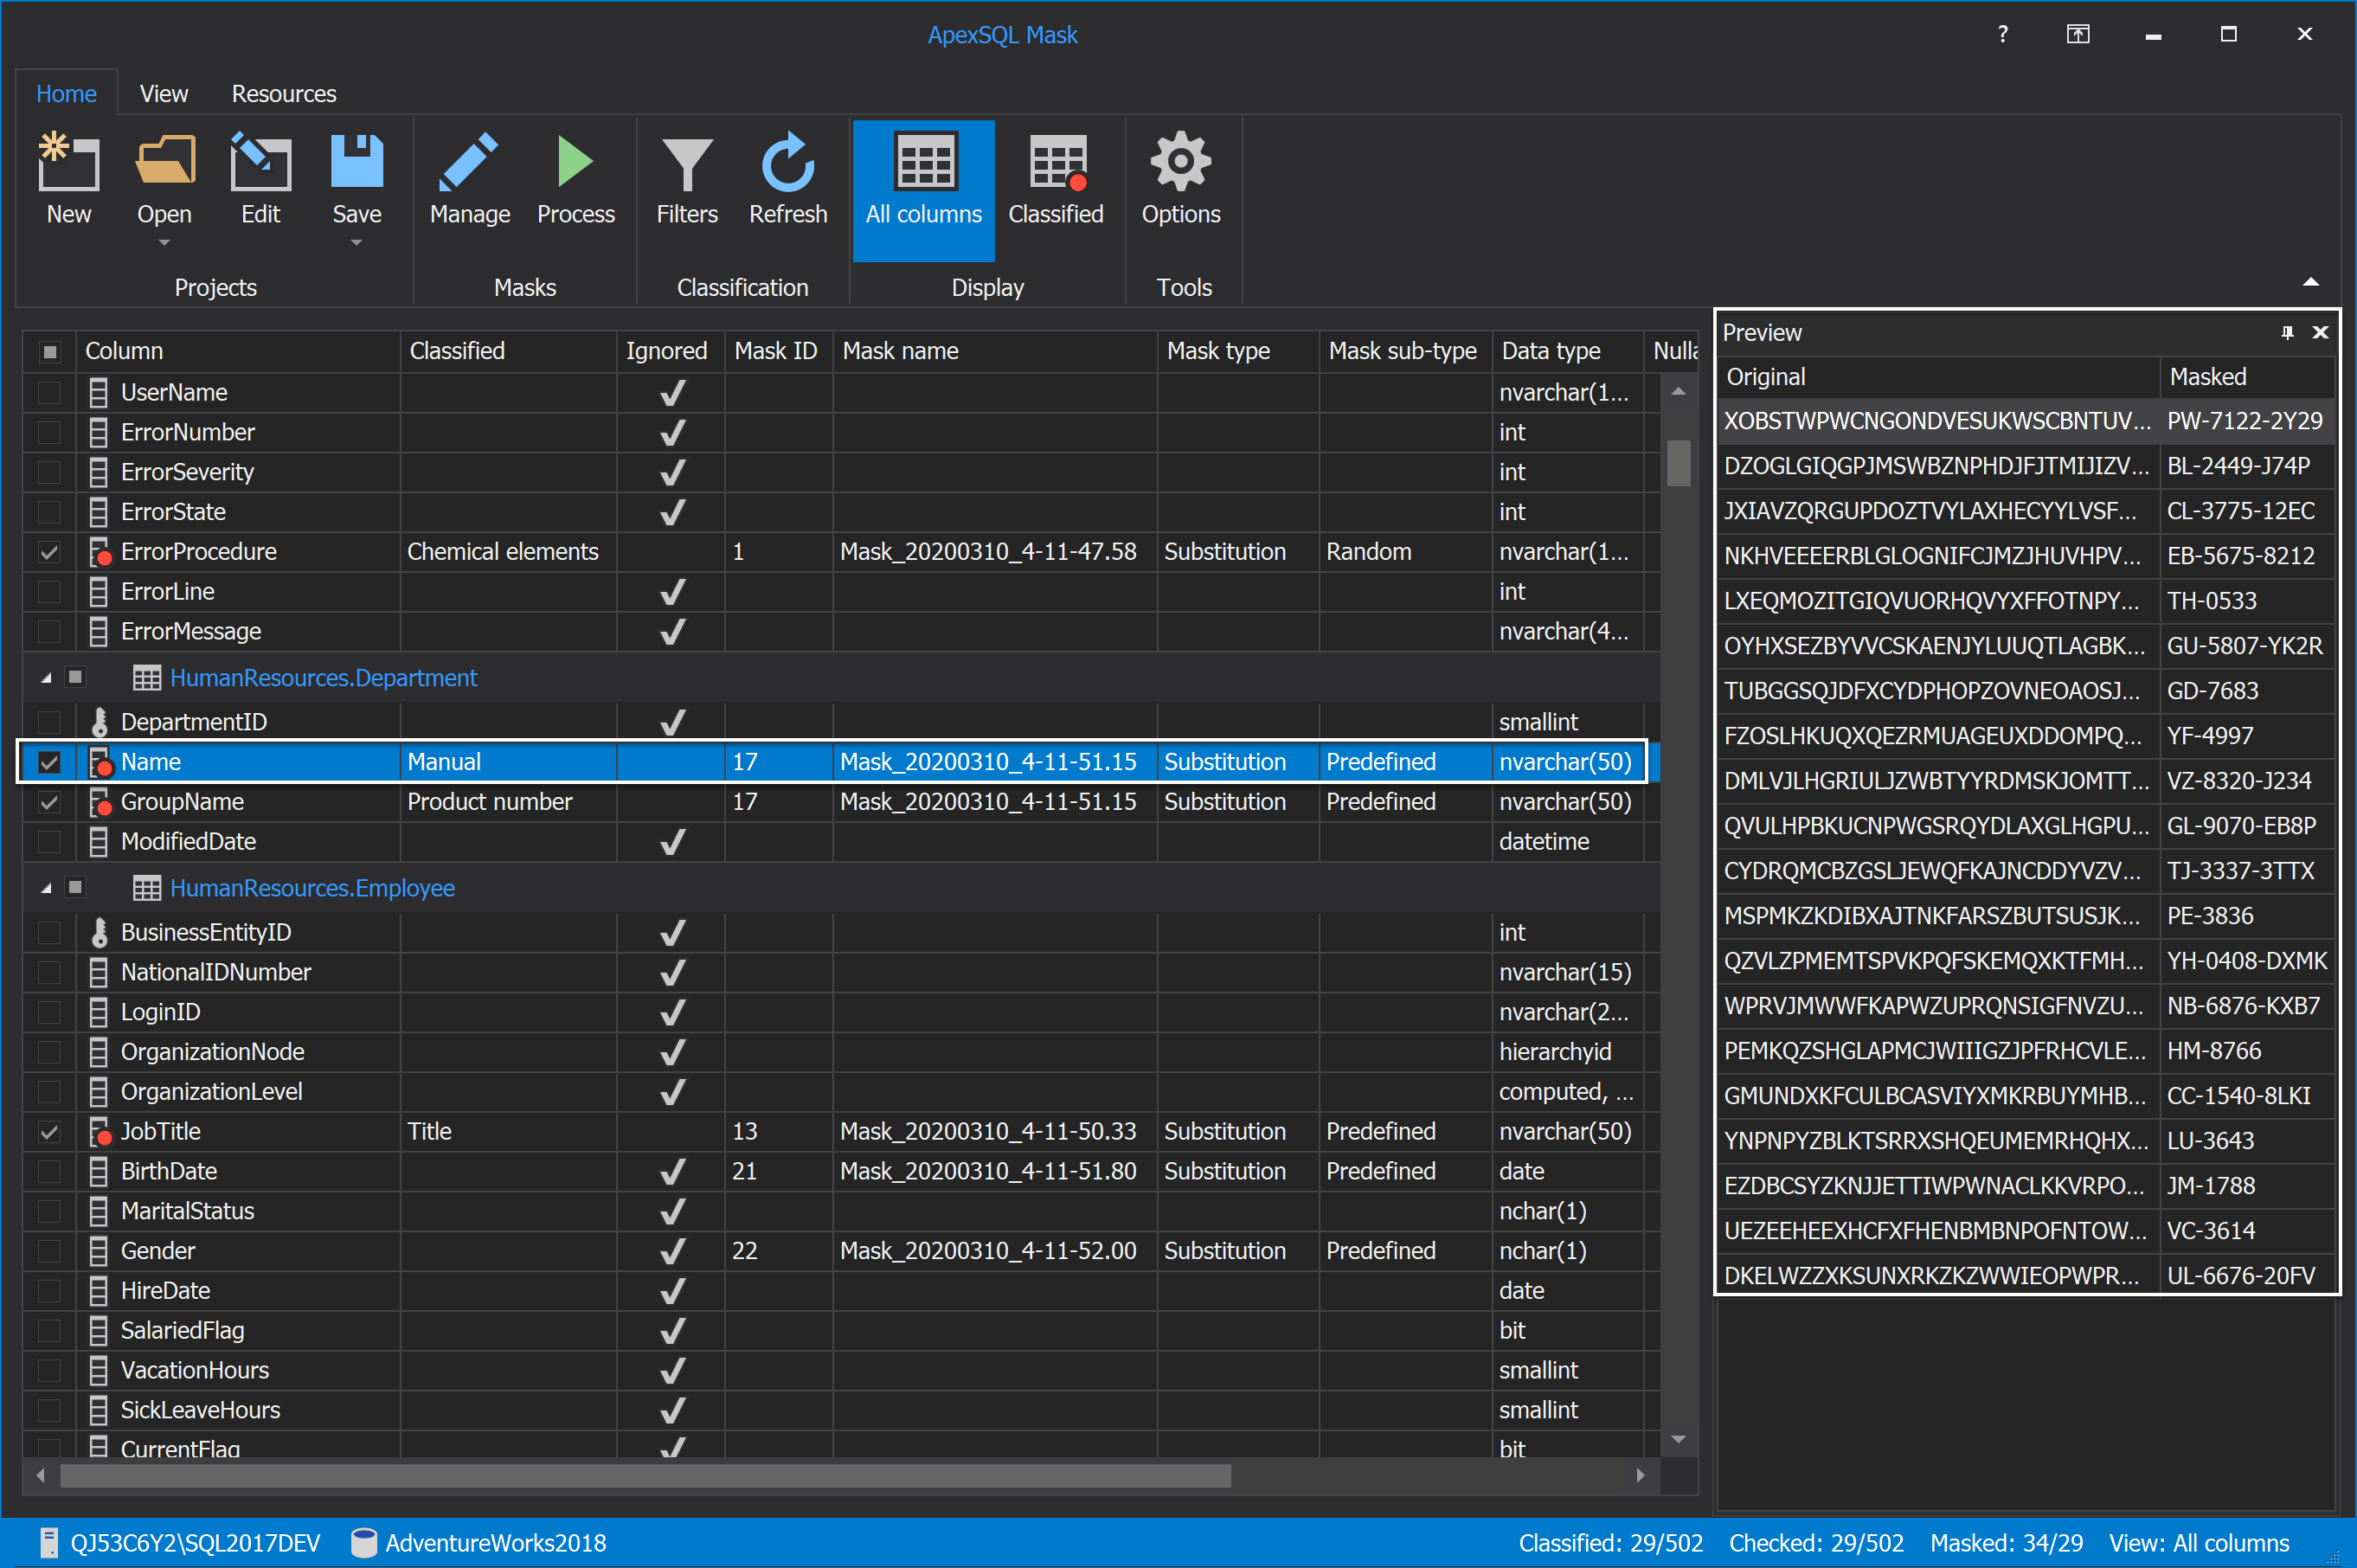
And for the Name column where the same substitution generator as for the GroupName column is applied but different data is entered:
When everything is set up, and the masking process can be started. Under the Home tab, click the Process button:

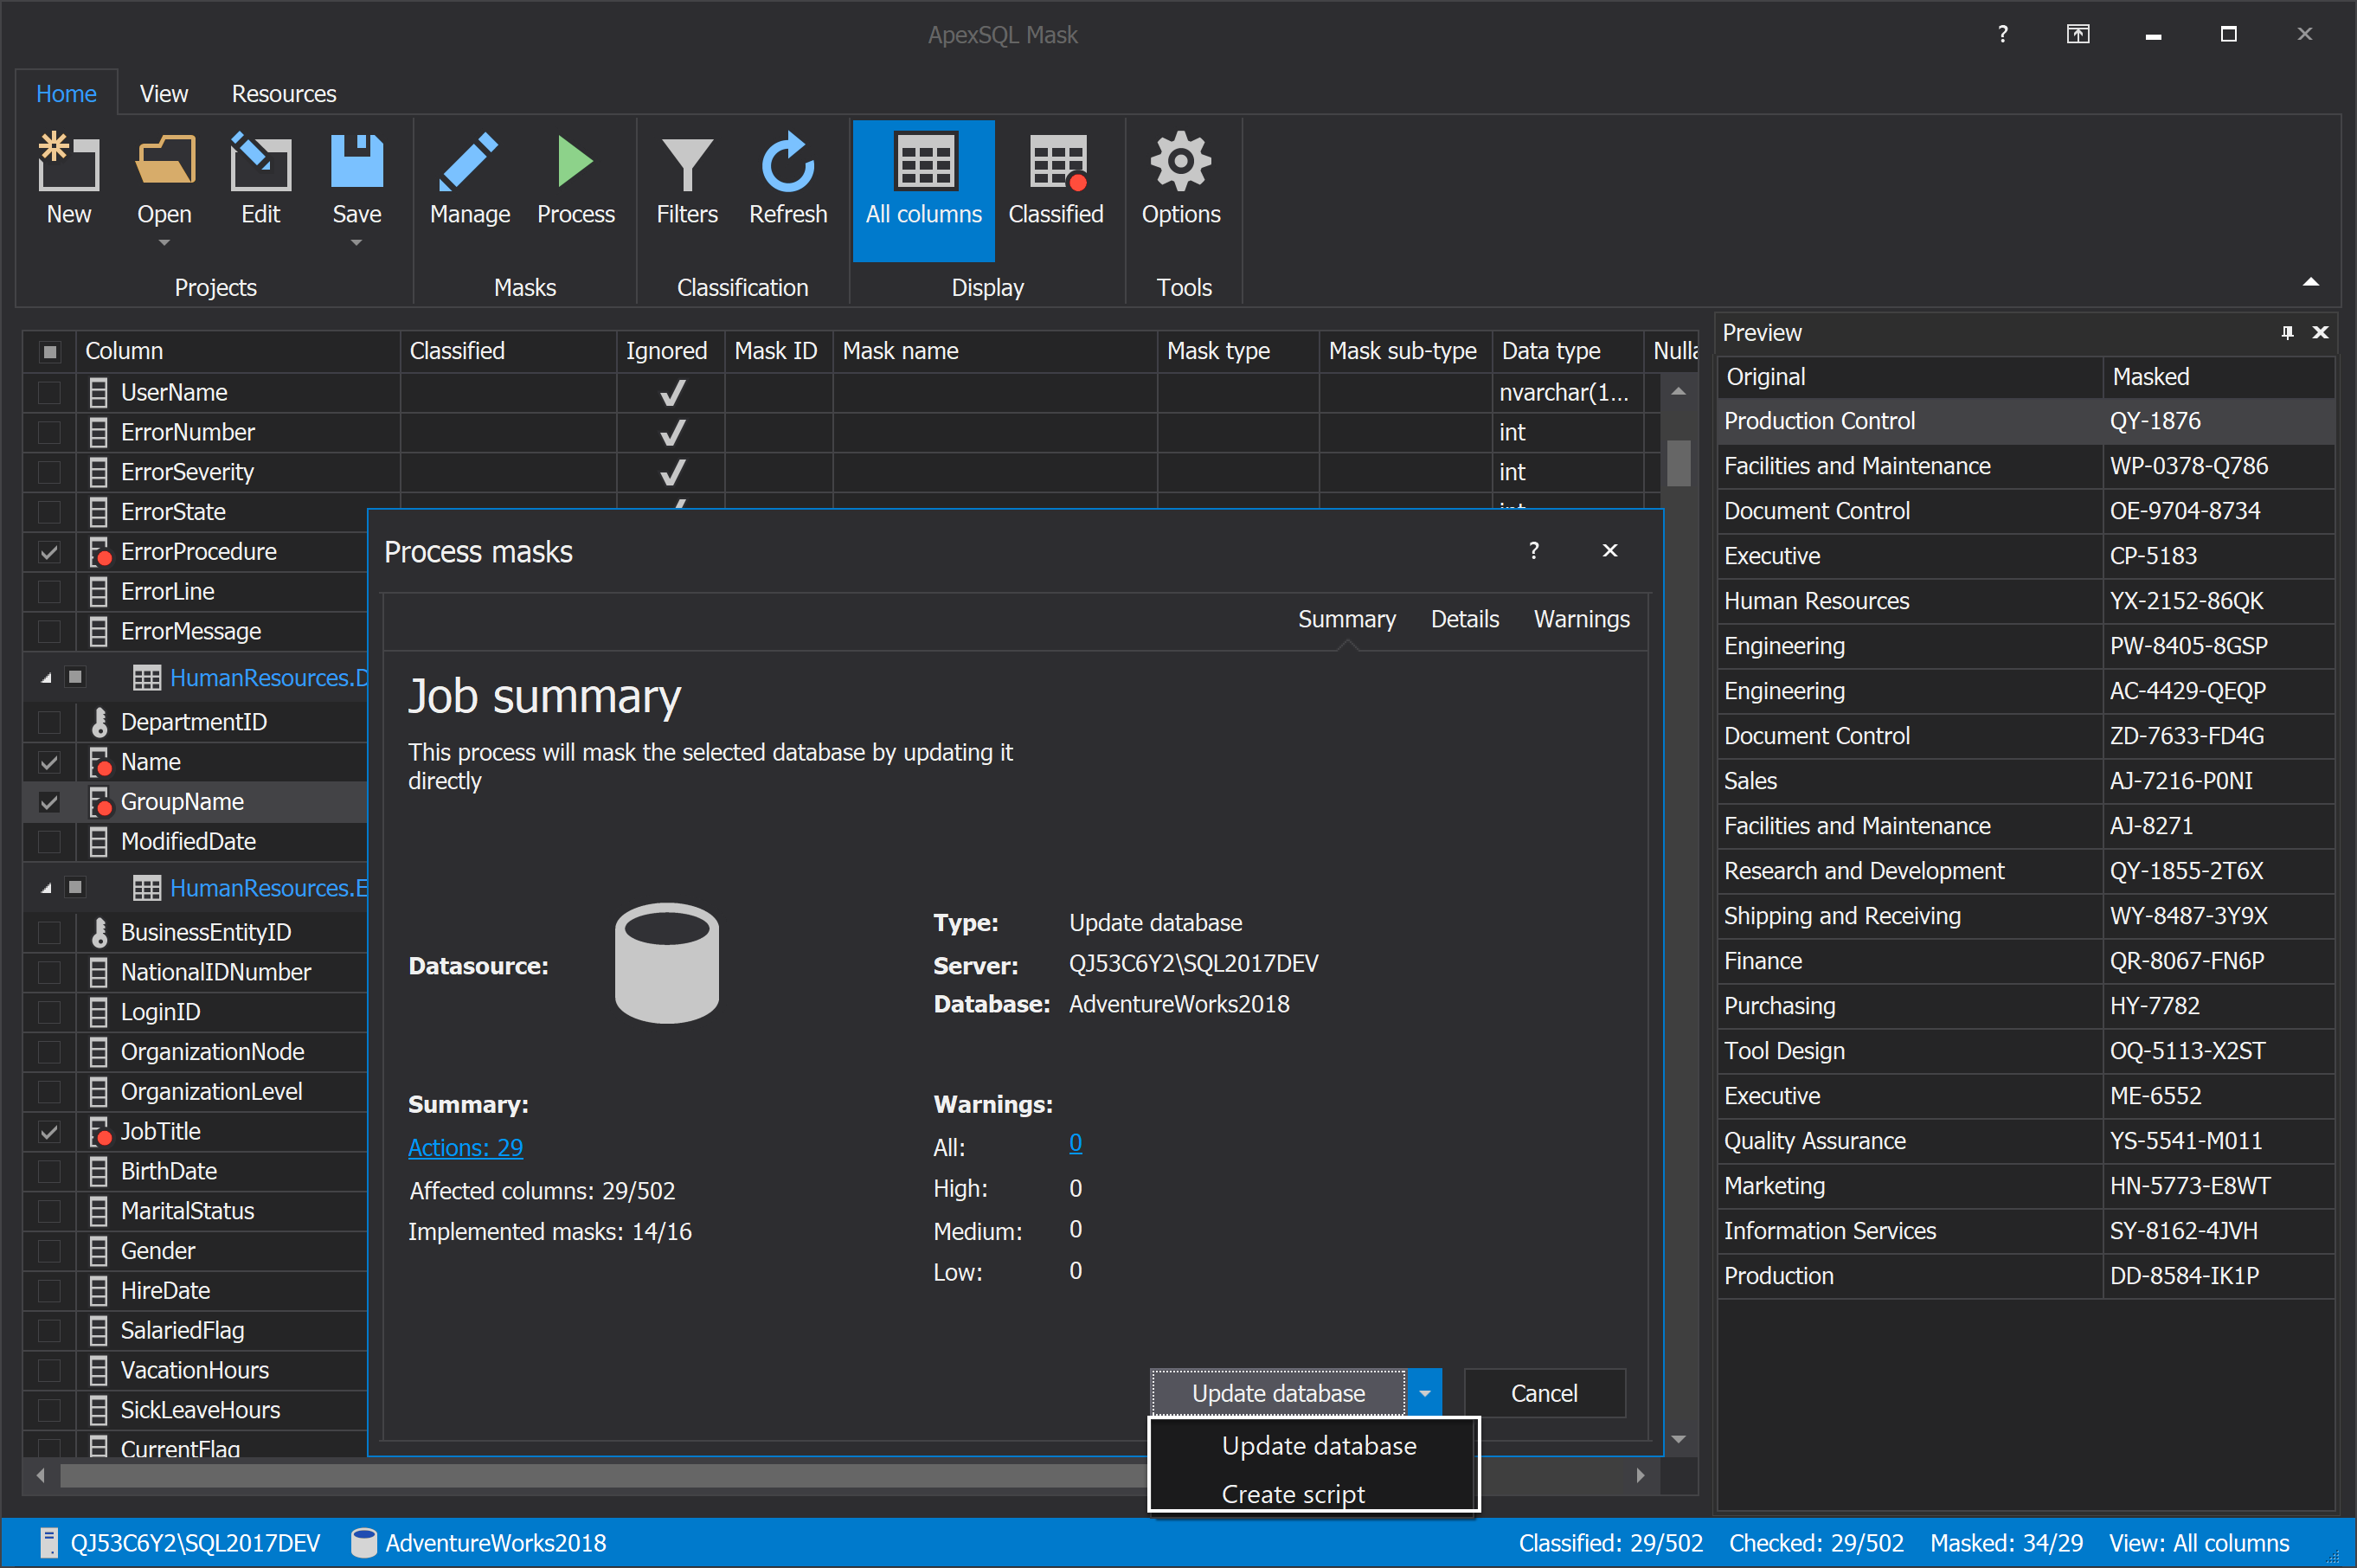
Under the Process masks window, there are two possibilities to apply the mask data in SQL. The first one is to directly update the database where the data is applied when the masking process is finished and the second one is to create the script which can be run whenever is needed to apply the mask data to the SQL database:
March 16, 2020


