


Compliance and regulatory
In general, the SQL Server Compliance concept is used to describe the ability to conforming to the ordered instructions, policies or the rules that are internally or externally drawn.
The regulatory compliance concept describes the plan with the clear steps that the company uses to ensure that it is complying with the confirmed compliance rules and policies.
The same concept applies to SQL Server compliance. The worldwide company that uses the SQL Server database engine to store the critical customer’s or employee’s data should abide the requirements of the compliances that control the process of storing the critical data or the internal rules and policies that are instructed by the local security team of the company to control the data transit and access operations.
The SQL Server compliance regulation process requires cooperation from all the company departments, starting from the SQL Server database administration and development team, visiting the system development, IT infrastructure and the last and not least the financial department.
On the other hand, SQL Server compliance should cover most of the actions that affect data access and transit. For example, the auditor will ask for evidence about all data access and changes that include the failed logins, the login permission changes, the user’s permission changes, the schema changes, and finally the audit system changes. This information can be provided by an auditing system that you can develop by yourself or simply use one of the third-party tools that collects all the required information and generate useful reports to be provided as evidence for the auditors. For more information about the SQL Server third-party auditing tool check ApexSQL SQL Server Audit and Compliance.
Based on the business area of the company, the company can decide which SQL Server regulatory compliance standard should be abided to achieve related compliance. These standards include:
- The Health Insurance Portability and Accountability Act compliance (HIPPA) which ensures that all the healthcare information related to the workers covered by the health insurance is protected
- The Payment Card Industry Data Security Standard (PCI DSS) compliance ensures that all information related to the debit, credit or prepaid cards is protected
- The Sarbanes-Oxley Act compliance (SOX) that is used to protect from accounting errors and fraudulent practices in the company, in order to improve the accuracy of company disclosures
- The General Data Protection Regulation compliance (GDPR) which ensures that all the personal data is protected
- Food and Drug Administration compliance (FDA) which ensures that the data stored in the SQL Server database engine and used in that FDA compliance should be compliant with Title 21 CFR Part 11 standard
- The Federal Information Security Management Act compliance (FISMA) ensures the protection of all data related to the federal agencies
- The Gramm – Leach – Bliley Act compliance (GLBA) which ensures that all data related to the financial organizations’ consumers is protected
- The Basel Capital Accord compliance (Basel II) ensures the protection of the banking systems data
SQL Server compliance
It is clear from the compliance standards listed previously that, we need to have the critical data stored, moved and accessed in a secure way. One of the most important requirements for all these compliances is moving the data for any purpose in a secure way. For example, we need to ensure that the data will not be fallen in an unauthorized person’s hands while moving it to a local or remote testing or development environment. To achieve that SQL Server compliance goal, the critical data that is stored in that database should be masked to become meaningless for any unauthorized user.
The data masking process can be performed using your own developed queries that modified the existing data, or simply using a third-party data masking tool from the market. One of the easy to use 3rd party SQL Server data masking tool that can be used to achieve that is ApexSQL Mask.
Getting started
ApexSQL Mask is a data classification and masking tool that you can easily use to classify and mask sensitive data stored in the SQL Server databases. Using ApexSQL Mask, you can create customized data classification filters based on the target SQL Server compliance and masks or simply modify the available filters and masks with the ability to browse the data before and after applying the masking process.
ApexSQL Mask tool can be downloaded from the ApexSQL download page and installed on the server by following a straight-forward wizard. After a few clicks, ApexSQL Mask will be ready to use.
When ApexSQL Mask is launched automatically after the installation process or manually by clicking on the Desktop tool icon, the first step that you need to perform is to connect to the target SQL Server instance that contains the database to be classified and masked.
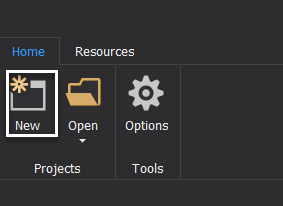
To initiate a new masking session, click on the New button, under the Home page, as shown below:
In the Connect to SQL Server window, you need to provide the name of the SQL Server instance, the authentication method that you will use to connect to that SQL Server instance, and a database that will be classified and masked, as follows:
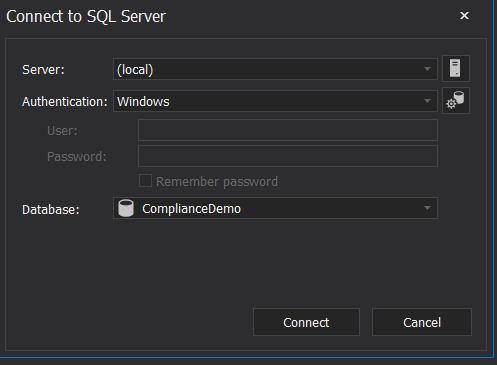
After providing the connection information, click on the Connect button to connect to the SQL Server instance. If the connection is established successfully, ApexSQL Mask will Automatically classify the sensitive data in the selected database, based on the built-in classification functions by checking if the data that is stored in the table columns matches the type defined in the classification functions, as a base view for the SQL Server compliance process. The result in our case will be as shown below:
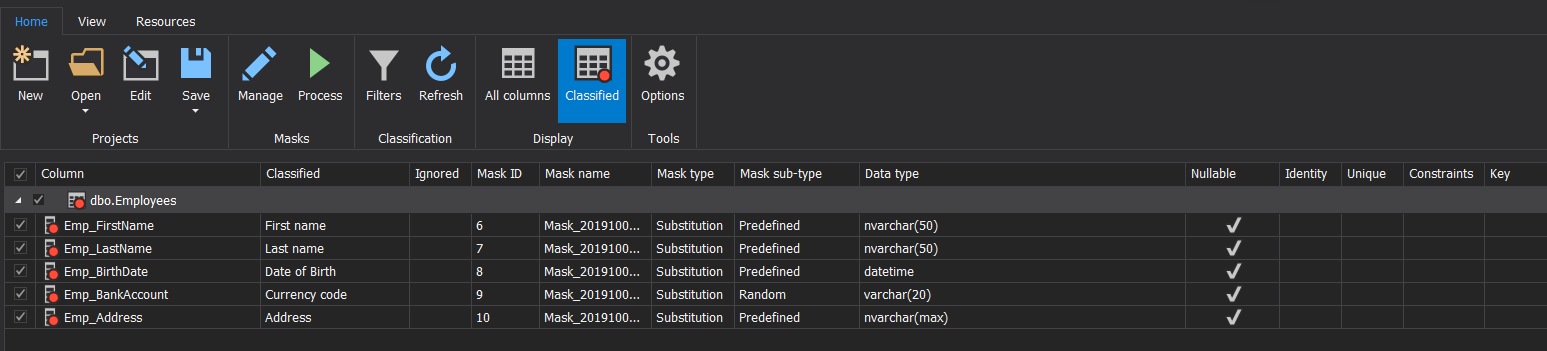
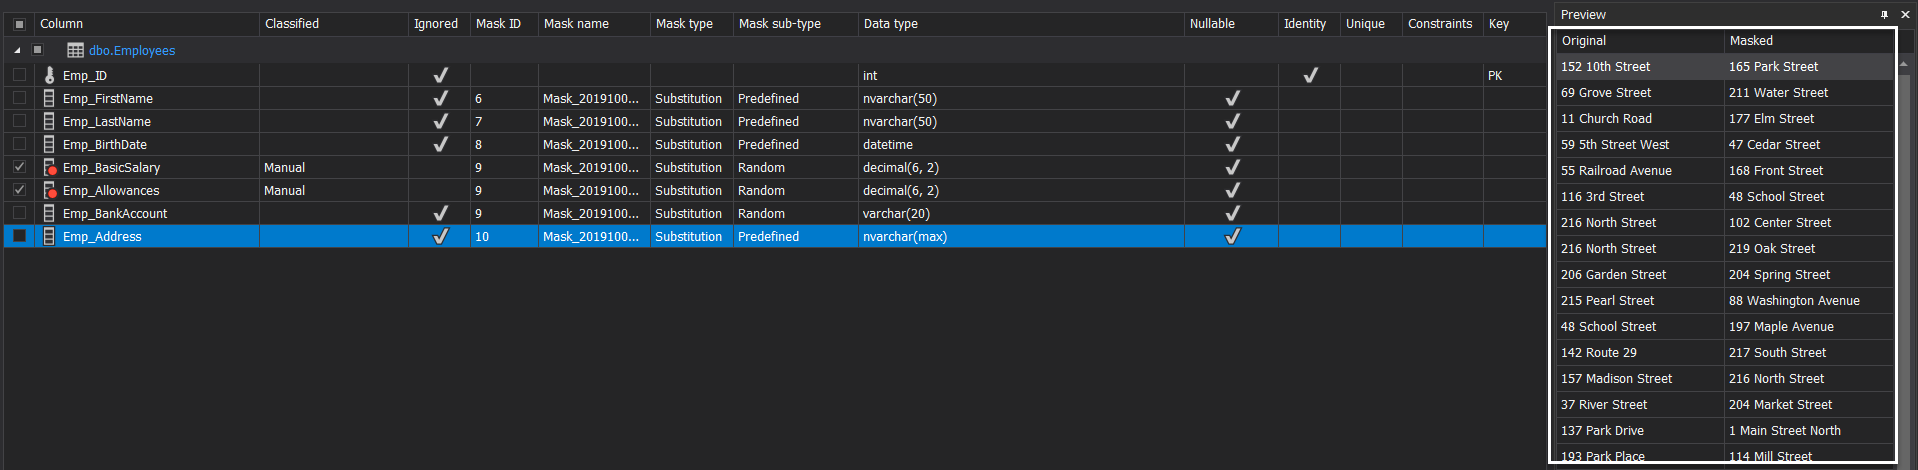
If one of the table columns that contain critical data is not listed here, such as the Basic Salary and Allowances columns in our example, this is because the type does not match any built-in classification function. To show that column, change the Display of that table from Classified to All Columns as below:
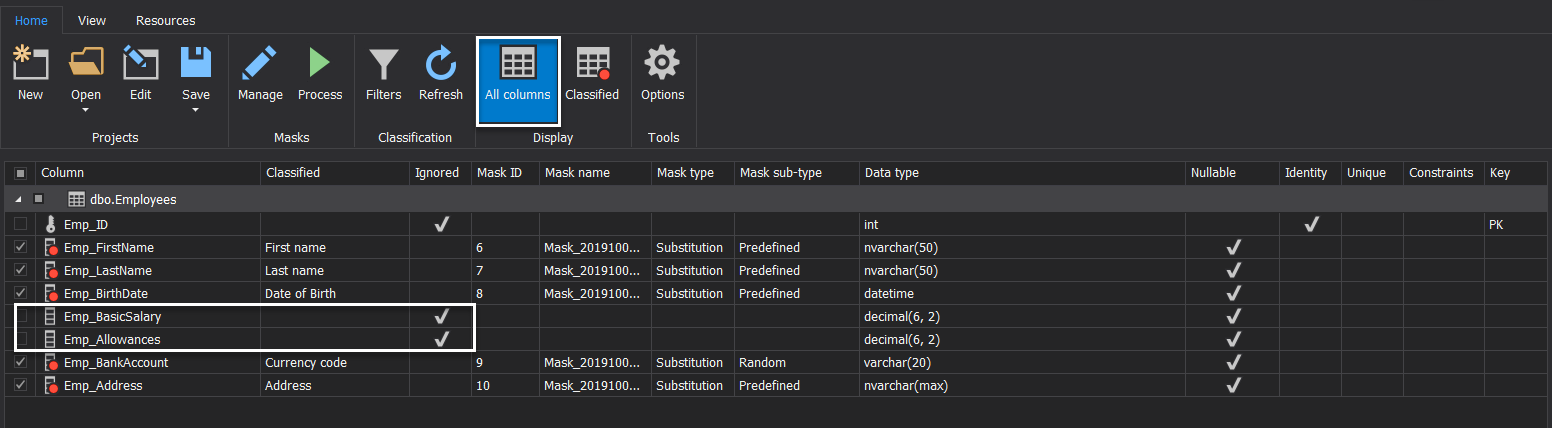
In order to include these two columns that contain critical data to the list of columns to be masked, we need to mark them as critical columns by ticking the checkbox beside each column, and ApexSQL Mask will indicate that these columns are classified manually, as shown below:

You can see from the previous snapshot that all the columns that are classified automatically will be assigned a specific mask that will be used to mask the data stored in that column. However, the columns that are classified manually will not be assigned any mask and we need to perform the mask assignment manually, based on the target SQL Server compliance. This can be achieved by right-clicking on that column and choosing the Add Mask option, as shown below:
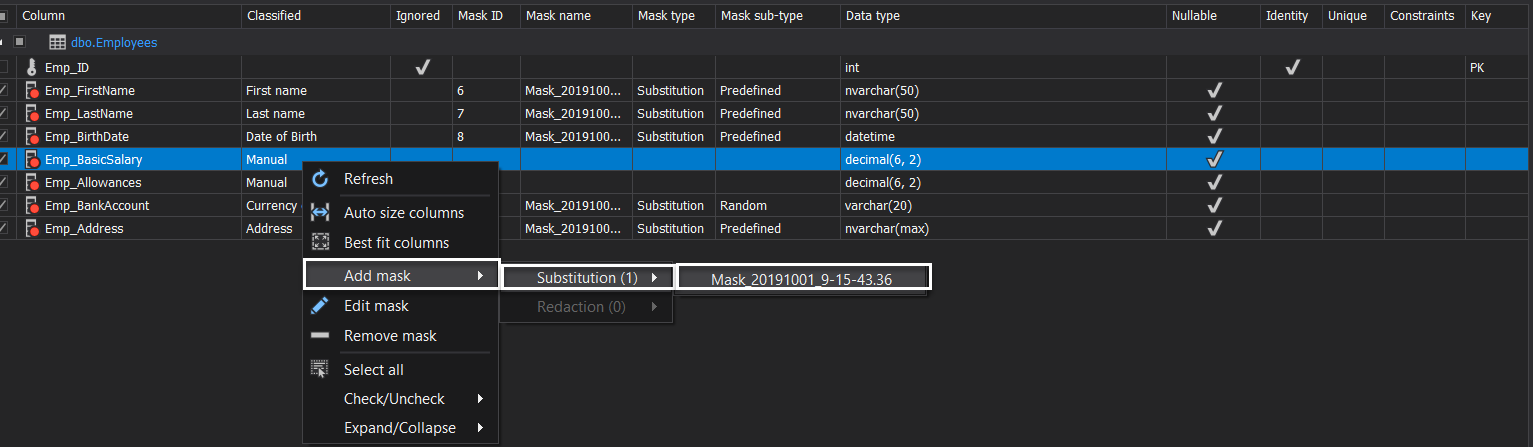
And the added masks will be assigned to these columns, as shown clearly below:

Before applying the masks on the selected columns, we should see why we need to mask these columns. First of all, you can see that the table contains critical information about each employee that is divided into the categories below:
- Personal information: includes the employee’s first name, last name and the birth date
- Geographical information: includes the address of that employee
- Business Bank account information: that is stored in the employee bank account column
- Financial personal information: includes the employee’s basic salary and allowances
So that, before providing a copy of that database table to any team for testing or development purposes, we should mask this critical information to abide by all SQL Server compliances listed previously in this article.
ApexSQL Mask applies the masks on the critical data using the list of predefined generators for each classified data type. To review and edit the assigned masks, click on the Manage option under the Masks functions group, as below:

And the Manage masks window will be displayed as shown below:
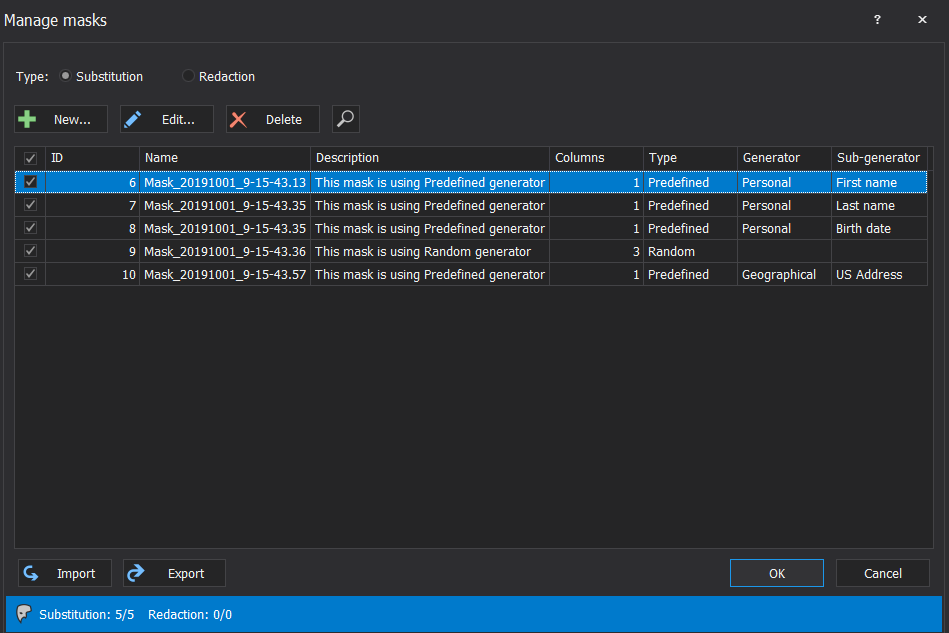
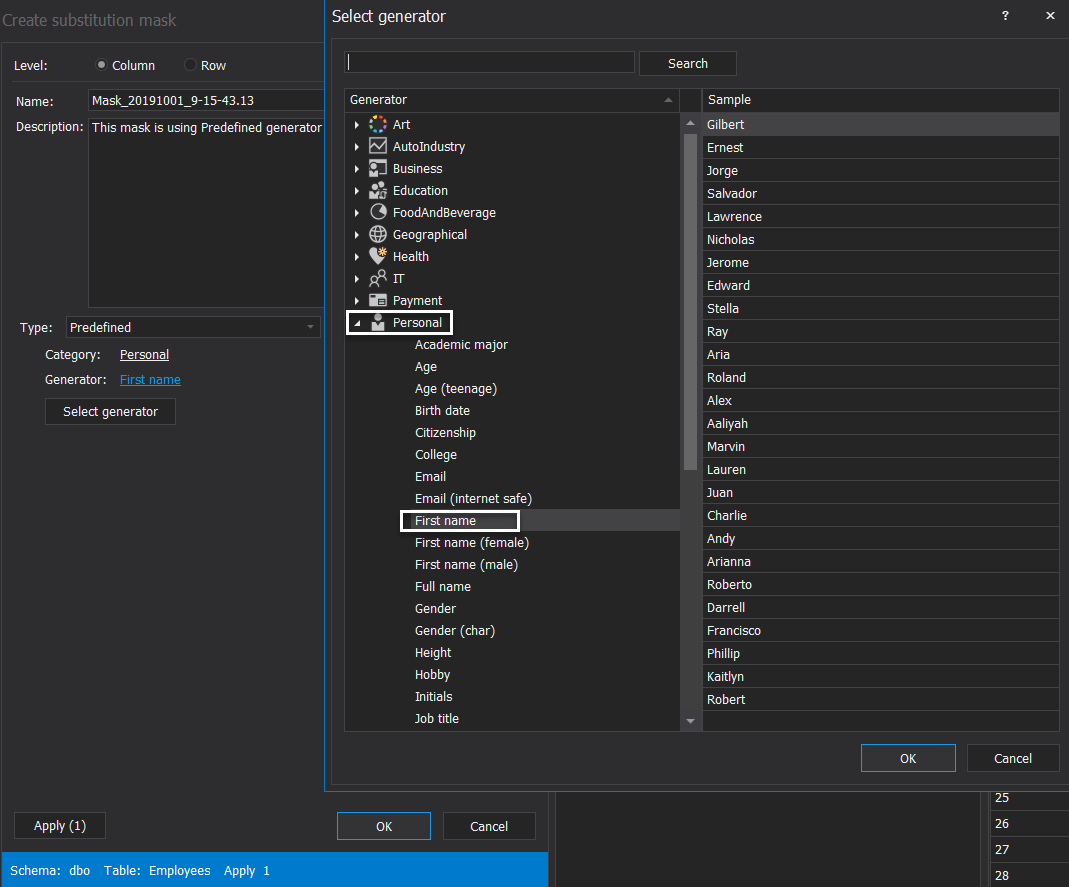
From the displayed Manage masks window, choose the mask name then click on the Edit button. For example, the mask that is used for the FirstName column is categorized as Personal data, that is considered as critical data in all SQL Server compliances, and use the built-in First Name data generator to replace the original name with masked one, as below:
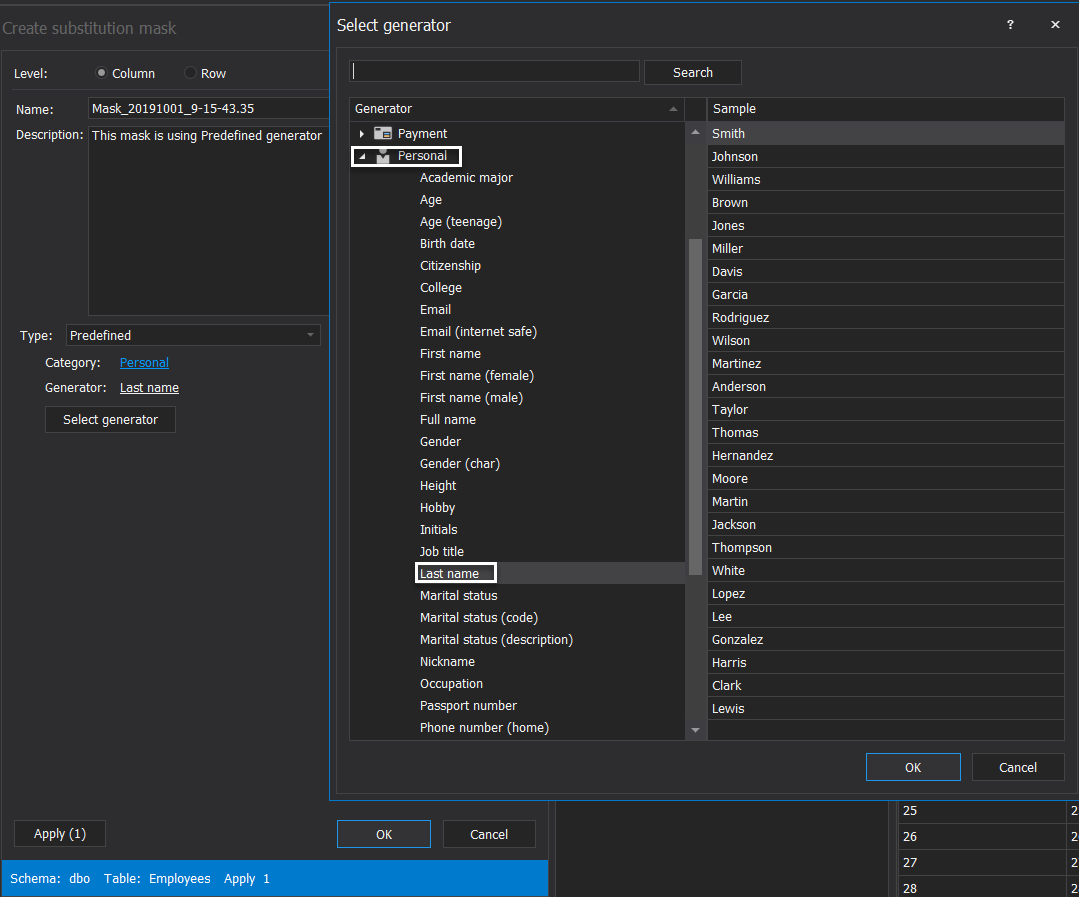
Also, the mask that is used for the LastName column is categorized as Personal data and use the built-in Last Name data generator to replace the original name with masked one, as follows:
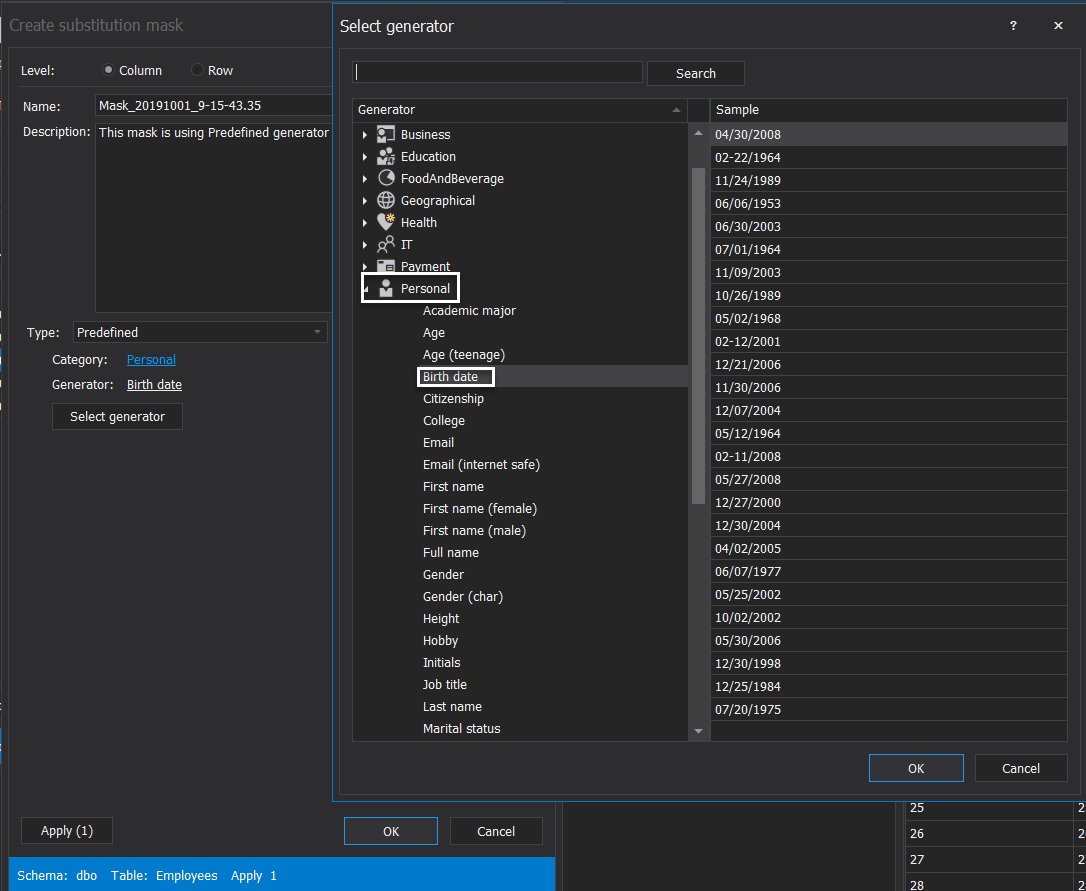
In addition, you can see that the mask that is used for the BirthDate column is categorized as Personal data, that also considered as critical data in all SQL Server compliances, and use the built-in Birth date data generator to replace the original dates with masked one, as shown below:
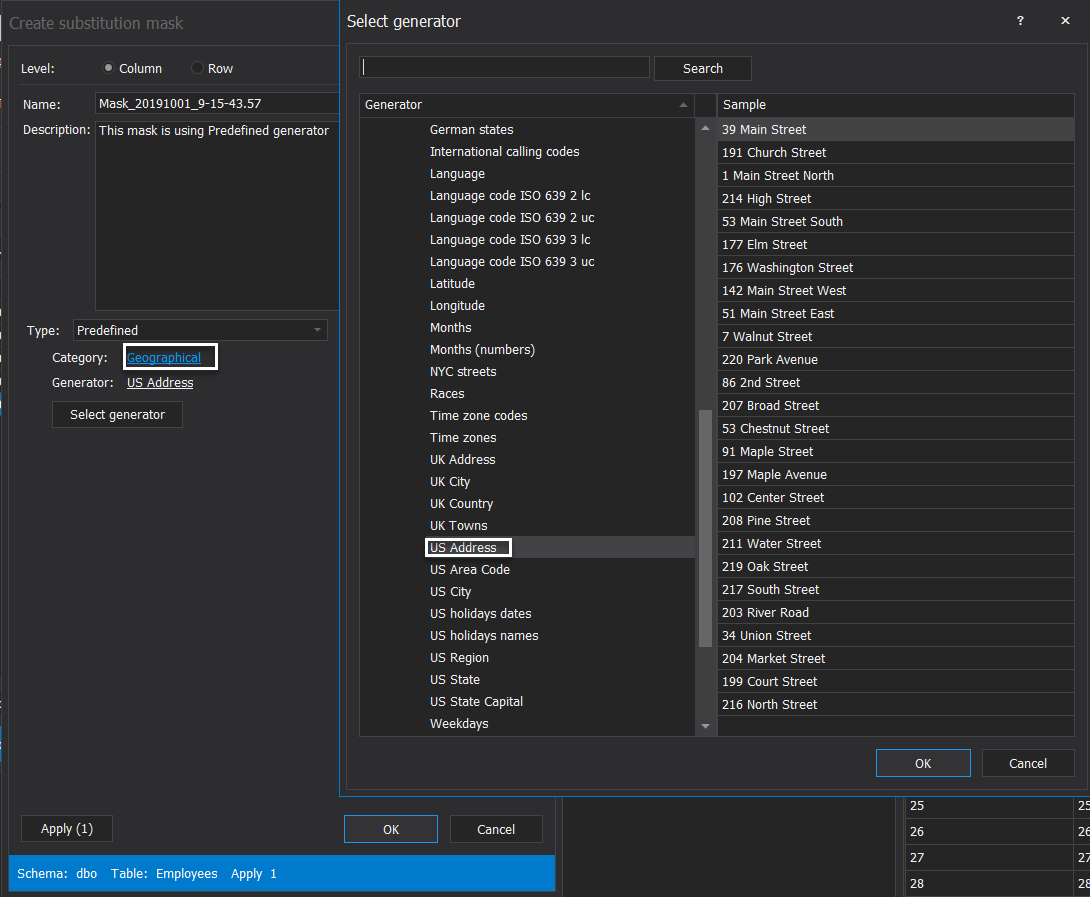
For the employee Address, categorized as a geographical column, the data will be masked using the built-in US Address data generator to replace the original addresses with masked one, as shown below:
ApexSQL Mask – New Session
For the Bank Account column, that stores an extremely critical data in all SQL Server compliances, you can modify the random number generator in the assigned mask with the International Bank Account Number generator, classified under Business category, and use it to mask the data stored in that column, as below:

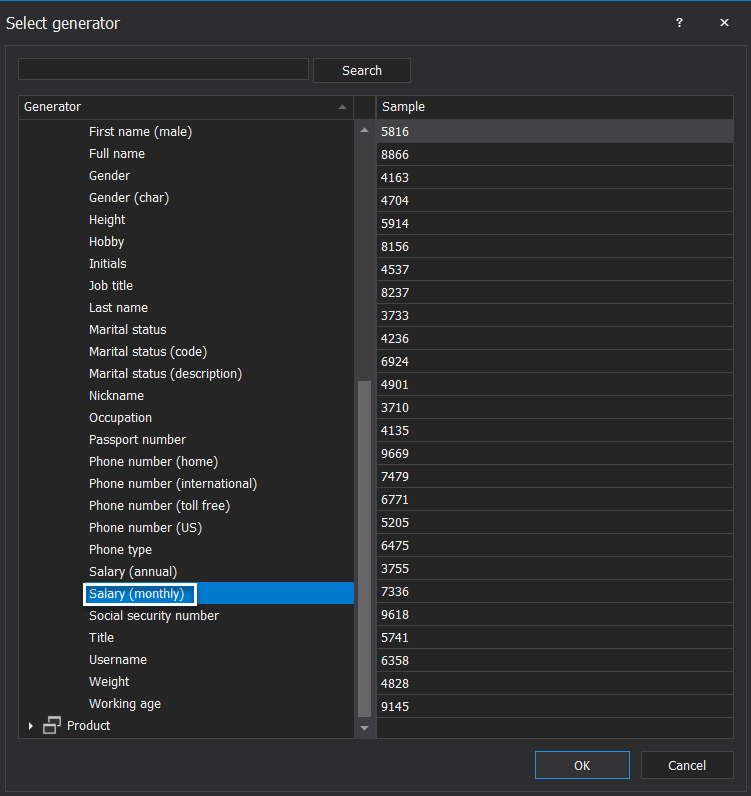
And finally, modify the mask that is used for the Basic Salary and Allowances columns to use Salary (monthly) generator, under the Personal category, instead of the default Random data generator, as shown below:
ApexSQL Mask provides us with the ability to preview how the original data will be modified after applying the selected masks, one column at a time, under the Preview window located at the right side of the tool, as shown below:
Masking
After reviewing all the masks and sample result from the masking operation, you can apply the selected masks on the original data, as required by the SQL Server compliances, by clicking on the Process button, under the Masks functions group, as shown below:

In the Process masks window, review if there is any warning that may affect the masking process, and specify to apply the masking changes directly to the original database or just create a script that can be run later on the moved database copy to mask the data manually, as shown below:

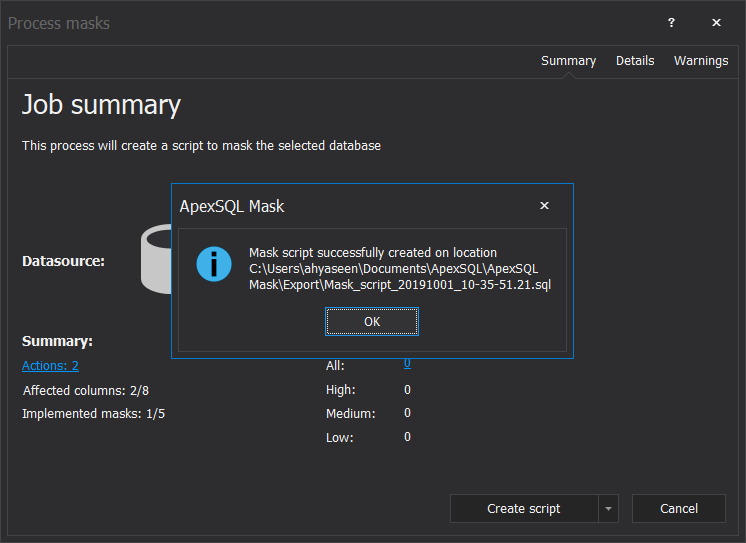
In our case, we will use to Create a Script to be applied later. When the script is created, ApexSQL Mask will notify us that the script generation is completed successfully and provide us with the location of the generated script file, as shown below:
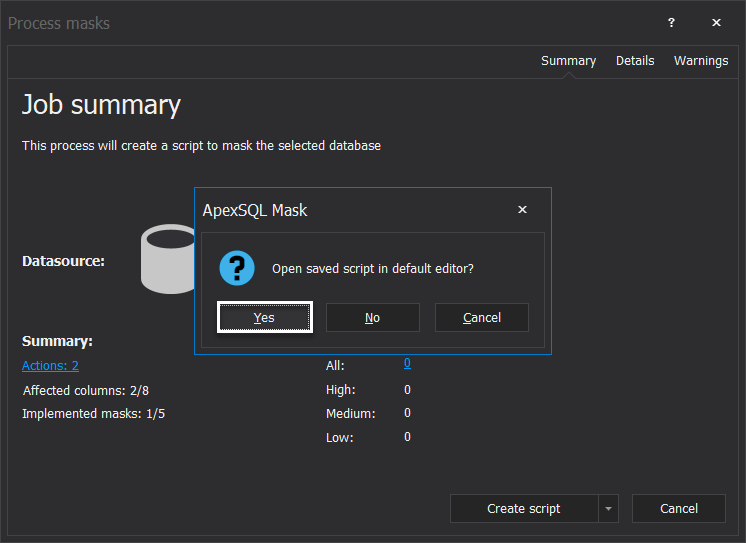
If you click OK in the previous step, ApexSQL Mask will ask you if you want to open the generated script file in the configured script editor tool, as follows:
Choosing to open the generated script file, a script of UPDATE statements that will be used to replace the original data with the masking data will be displayed, as shown below:
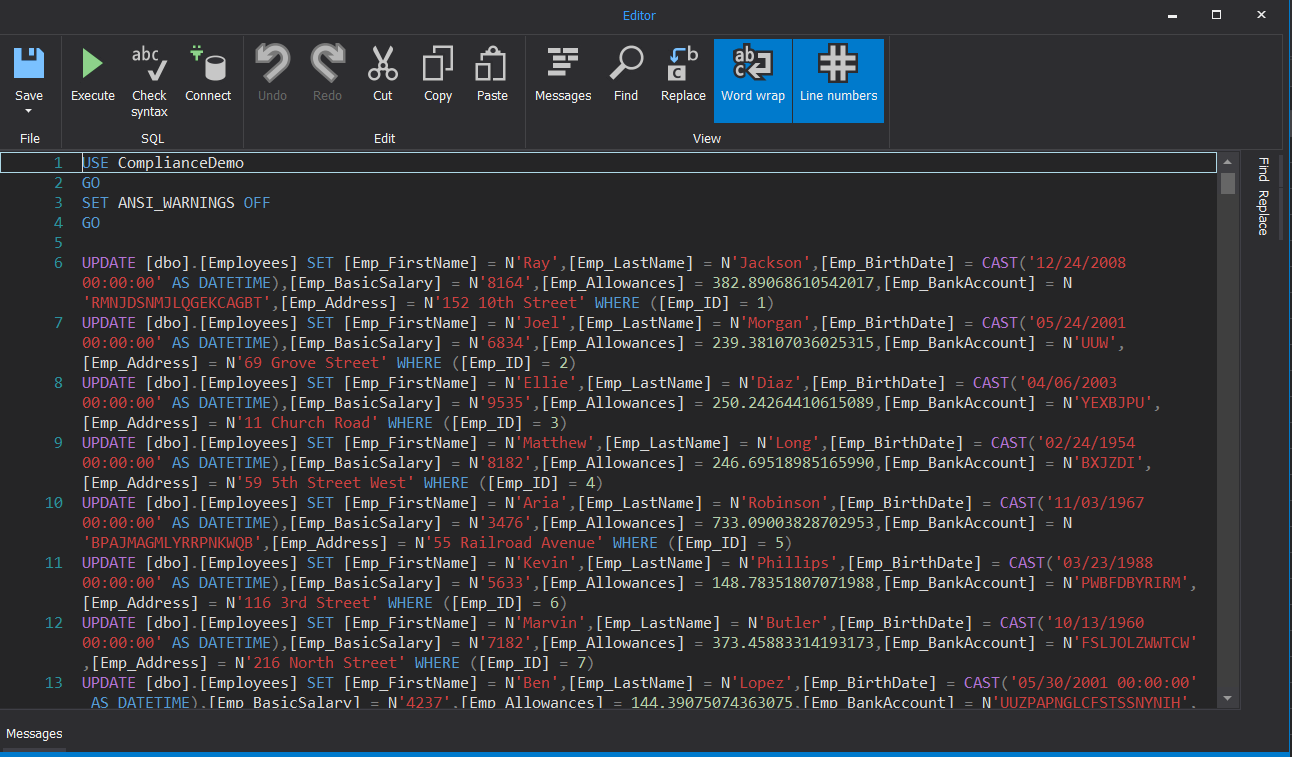
Now, you can use this masking script to mask the database directly after restoring a copy of that database to the development or testing team and before allowing them to access it. This way, we can guarantee that we are abiding all the listed SQL Server compliances when talking about the database movement.
October 16, 2019


