


One of the challenges SQL Server development teams face is whether to version control a database and if so how to keep the development database in sync with the source control repository.
There are tools like ApexSQL Source Control, which integrate with SSMS and VS to allow developers to update a source control repository, iteratively, as soon as objects are “checked in”, in real time. But for teams that haven’t yet made the leap to integrated SQL source control for each developer, they still a simple and easy way to version control a database and keep it up to date in near real time, and ideally, fully automate the whole process.
For example, a developer made some changes on a database, e.g. created a new table, dropped a procedure, and updated a view. Instead of creating scripts or doing any manual work to commit those changes to a source control repository, there should be a mechanism that will automatically compare a database to a source control repository and if any changes are detected, it should commit those changes to a source control repository, and it that way keep them in sync. Also, it should allow an error free commit and to be able to manage any dependency issues.
Solution
In this article, we’ll describe how a system including a SQL Server database schema compare tool, along with some PowerShell and a scheduler can keep a source control repository in sync and up to date, in near real time, and run automatically and unattended.
In this system, we’ll poll the database and the source control repository every 15 minutes, which provides near real-time synchronization of the repository. Since we are using a SQL Server database schema compare tool, we can ensure that only changed objects are updated in the synchronization and that if nothing is changed, the job will go back to “sleep” without doing anything.
For this system we’ll use ApexSQL Diff as our SQL Server database schema compare tool. ApexSQL Diff is a 3rd party tool that can perform the comparison and synchronization of SQL Server database, backups, source control projects, script folders, and ApexSQL snapshots. Additionally, it can create SQL database installer packages and it can allow automation and scheduling of SQL database schema comparison and synchronization process. ApexSQL Diff natively supports all popular source control systems, such as Git, Mercurial, Perforce, Subversion and Team Foundation Server.
In the following example, ApexSQL Diff will create an error free commit script of changes from a SQL Server database to a source control repository and automating the process using the PowerShell script that will be scheduled to run the comparison every 15 minutes. If any changes are detected the synchronization will be performed and the data stamped output summary will be created.
Requirements
To execute this system, the following requirements are needed:
- A SQL Server database version 2005 or above
- A Git source control repository
- Integrated security. The script can easily be modified to use SQL Server authentication and the stored and encrypted credentials (for both the database and the repository) of an ApexSQL Diff project file
- An ApexSQL Diff project file called MyProject.axds save in the same location as the PowerShell script. The PowerShell script will need to be edited, if name or location of this file needs to be changed
- The provided PowerShell script, itself CommitChanges.ps1
Setting up the job
As mentioned in the Requirements part, a prerequisite for the whole process is that there is already an existing source control repository that will be used. Find out How to create a new Git repository.
In order to set up the whole process, follow these steps:
- Run ApexSQL Diff
-
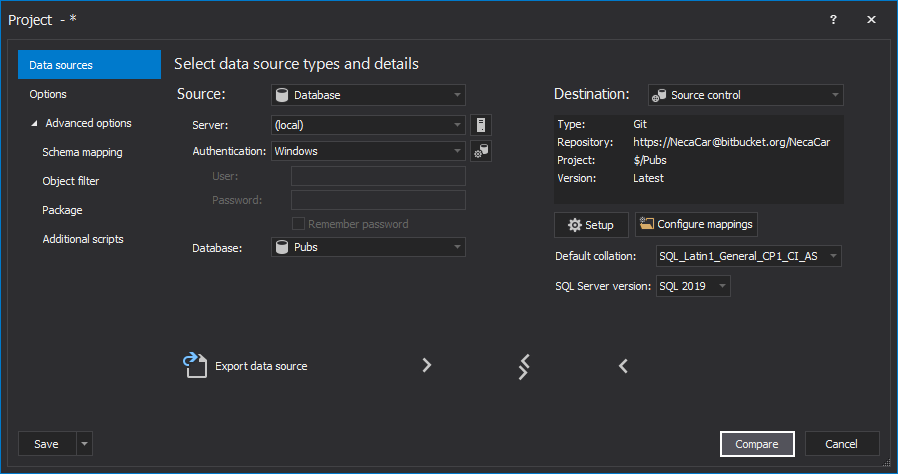
In the Data sources tab, of the New project window, set a database that will be used as a source:
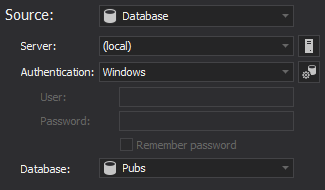
In this example, Windows authentication is used, but as mentioned in the Requirements part, it can be easily change to SQL Server authentication and the login credentials will be encrypted.
-
Change destination data source to Source control, click the Setup button, and set up the source control login credentials:
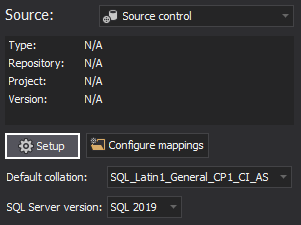
Learn more about Setting up source control wizard. Also, if there is a need to compare a specific source control label, find out more about How to work with SQL database source control labels.
-
Switch to the Options tab, and scroll down to the Synchronization options section. In order to make sure that the synchronization script is error free and all dependent objects are included, please check the below options:

- Disable DDL triggers – DDL triggers that may cause problems during the synchronization are disabled before the synchronization starts and enabled upon finishing the synchronization process
- Include transaction handling in synchronization script – Error handling statements with Rollback/Commit statements, depending on the success or failure of the synchronization, are added to the synchronization script
- Include dependent database objects – Dependent database objects will be included in the synchronization script, even if they were unchecked for the synchronization process
-
Once everything is set, click the Compare button from the bottom-right corner of the New project window to initiate the comparison process:
-
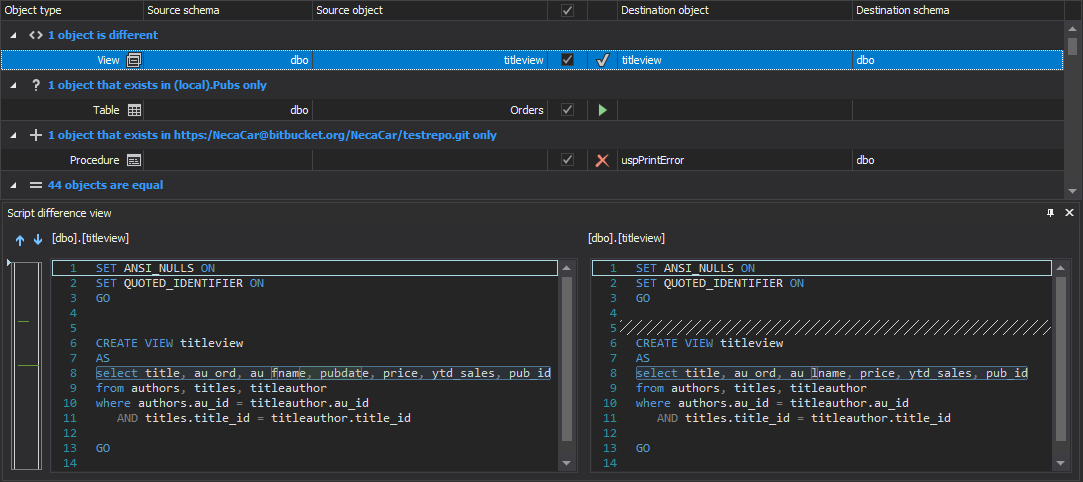
Upon finishing the comparison process, results will be shown along with differences between compared objects:
-
Since all changes should be committed to the source control repository, check all objects from the Results grid and click the Save button to save the project file that will be used in the automation process:

-
Once everything is set for the commit process, click the Synchronize button from the Home tab:

-
In the Outputs options step, in the Synchronization wizard, switch the action to the Synchronize to source control:
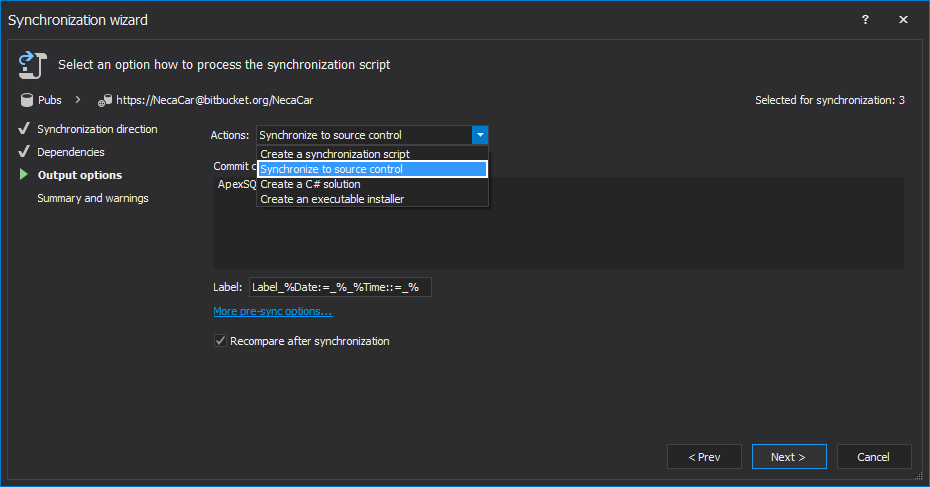
Additionally, a label for this commit can be entered with a date stamped variable.
-
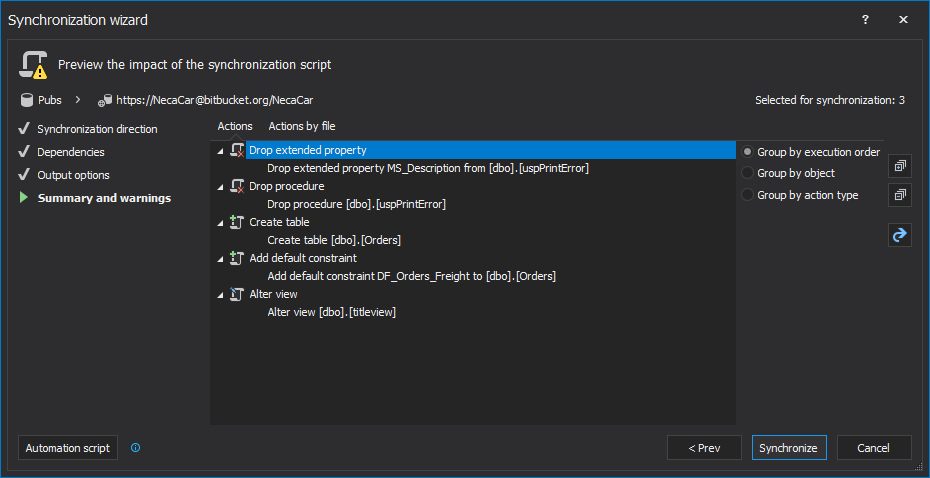
In the last step, the Summary and warnings, actions that will be taken can be reviewed:
-
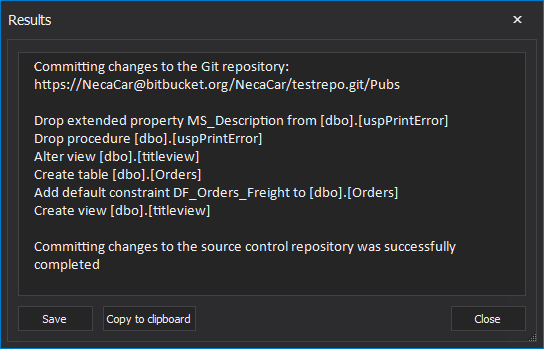
Click the Synchronize button and committing changes to the source control repository will be initiated:

- Once the committing changes is finished, the commit results will be shown in the Results window:
Options explanation:
Automating the process
After the first commit was successfully executed with ApexSQL Diff and the project file was saved, the whole process can be automated with a PowerShell script.
This automation example will assume that Integrated security is used, but stored and encrypted database and repository credentials from can be easily used via the project file. To learn about options for handling credentials in the context of unattended jobs, please see the article: Four ways of handling database/login credentials during automated execution via the CLI
The following are just some highlights of the PowerShell script used to automate this process, that may be interesting. Otherwise, skip right to downloading the script (see below) and testing it out in environment.
The first step will be to define a root folder along with the date stamped commit summaries location:
#root folder for the commit process
$rootFolder = "Commit"

#commit summaries location
$outLocation = CheckAndCreateFolder $rootFolder -Outputs
Next, let’s define ApexSQL Diff location, data stamped variable, application’s parameters, and the variable for the return code:
#application’s location, defining the date stamped variable, application’s parameters
$appLocation   = "ApexSQLDiff"
$datestamp = (Get-Date -Format "MMddyyyy_HHMMss")
$appParams = "/pr:""MyProject.axds"" /out:""$outputsLoc\CommitOutput_$datestamp.txt"" /sync /v /f"
$retCode = $LASTEXITCODE
The following expression in the PowerShell script will call ApexSQL Diff, process its parameters, initiate the commit process, and write the return error code at the end of the date stamped commit summary:
#initiate the schema commit process
(Invoke-Expression ("& `"" + $appLocation +"`" " +$appParams))

"`r`n ApexSQL Diff return error code: $LASTEXITCODE” >> "$outLocation\CommitOutput_$dateStamp.txt"
The last part is to add a code that will show the commit summary upon finished execution:
Invoke-Item "$outLocation\CommitOutput_$datestamp.txt"
Additionally, utilize the “no differences detected” return code by adding it to this PowerShell script, so that the appropriate return codes are shown for any potential outcome.
Scheduling the commit process
Since the PowerShell script is created and everything is automated in a desired way, this job can be easily scheduled in several ways. Learn from the following article about the ways of scheduling ApexSQL tools.
Reviewing job summaries
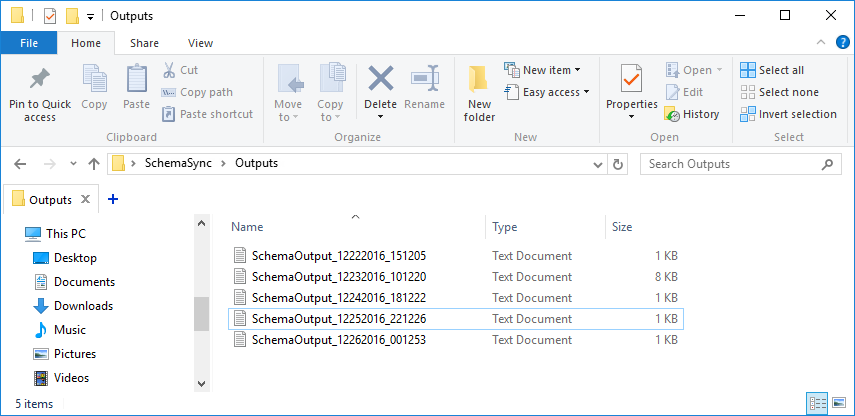
Job summary files are located in the $rootFolder\$outsLocation and they can be reviewed whenever it’s needed. In this example, they are located in the Commit\Outputs:
If a provided source control project was deleted/moved to other repository, for example, an error will be raised and the opened commit summary file will show:
Analyzing parameters:
No output format was specified, so T-SQL will be used by default
No output encoding was specified. Unicode will be used by default
Loading project:
Connecting to (local).Pubs
Connected successfully
Loading and parsing source control folder
Specified source control project path “$\Pubs” does not exist
ApexSQL Diff return error code: 9 – An error was encountered
If we check the list of return error codes in the article from this link, we’ll get the information that return error code 9 is provided due to an invalid folder path.
The complete PowerShell script can be downloaded from here.
Hopefully, this system will meet a tough challenge, head on, without requiring team members to work directly with the repository. The kit here should be very easy to set up and use, and once set up, it should run effortlessly for years. If there are any questions or problems setting this up or using it, please contact us a support@apexsql.com.
January 9, 2017


