


One of the main aspects of modern business is gathering and sharing information with others.
In this article, several ways to export/import MySQL data to an Excel file will be explained. The first method will show the exporting process when the SELECT INTO … OUTFILE statement is used. After that, the Excel features for export/import MySQL data, as well as MySQL add-in for Excel, will be explained, and in the end, the Export to Excel option from the ApexSQL Database Power Tools for VS Code extension will be shown.
The following methods will be used:
- The SELECT INTO … OUTFILE statement
- The From Database feature in Excel
- The MySQL for Excel add-in
- Export to Excel using a third-party software
Export/Import MySQL data to Excel using the SELECT INTO … OUTFILE statement
One of the commonly used MySQL statement which can be included in the SELECT statements for exporting data to specific (e.g., .txt, .CSV) file format is SELECT INTO … OUTFILE statement. This statement writes a selected row to a file. Columns and line terminators can be specified to produce a specific output format.
In a query editor, execute a SELECT statement which results want to be exported, add the location where data should be exported, and specify the file format. In the example below, the .txt file format is used:
SELECT `actor`.`actor_id`
   ,`actor`.`first_name`
   ,`actor`.`last_name`
   ,`actor`.`last_update`
 FROM `sakila`.`actor`
 INTO OUTFILE 'C:/ProgramData/MySQL/MySQL Server 8.0/Uploads/actor.txt' FIELDS TERMINATED BY ',' ENCLOSED BY '"' LINES TERMINATED BY '\r\n'
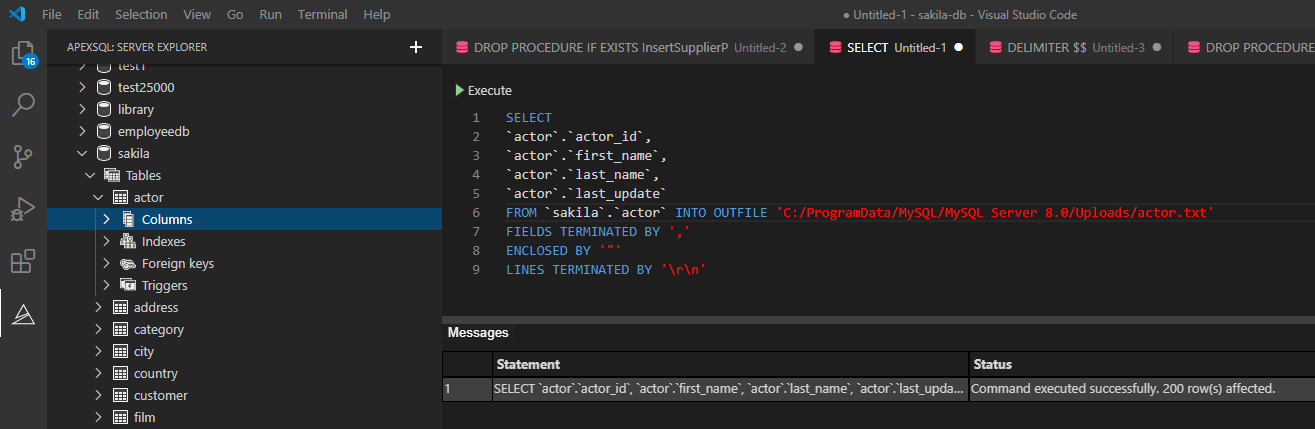
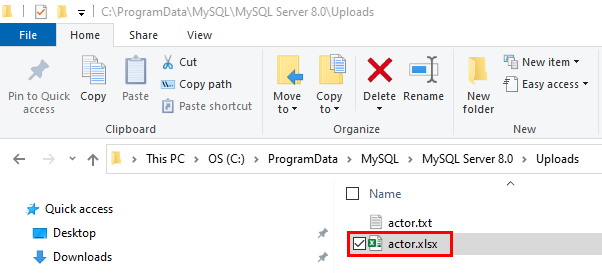
When the above statement is executed, all exported data will be in the actor.txt file:
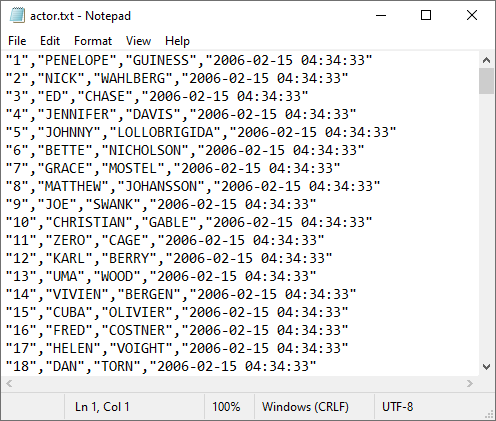
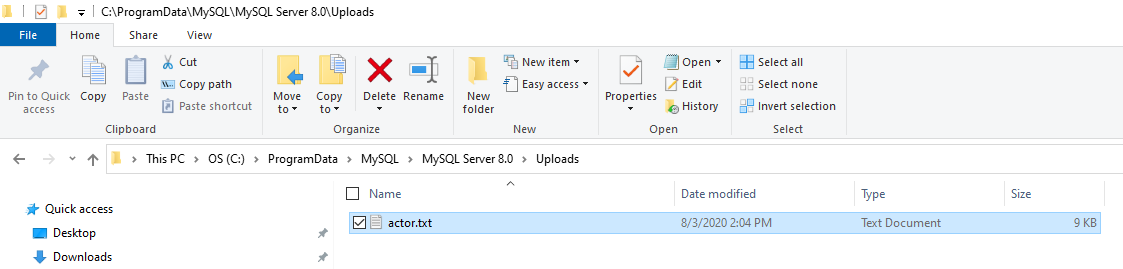
Under the specified location:
-
For more details about SELECT INTO … OUTFILE statement, see How to export MySQL data to CSV article.
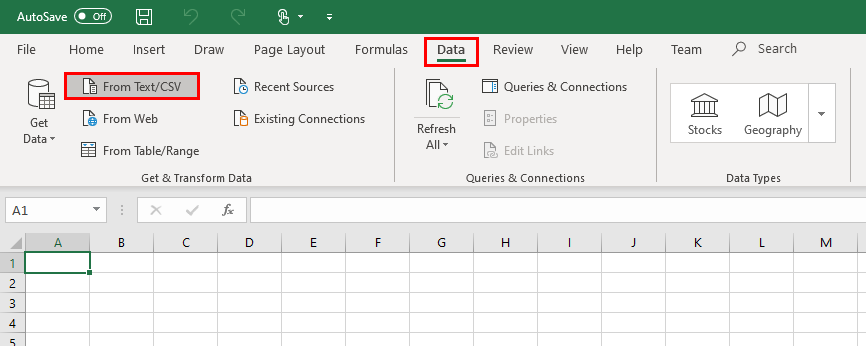
When the data is exported, let’s open it in Excel and save it in .xlsx file format.
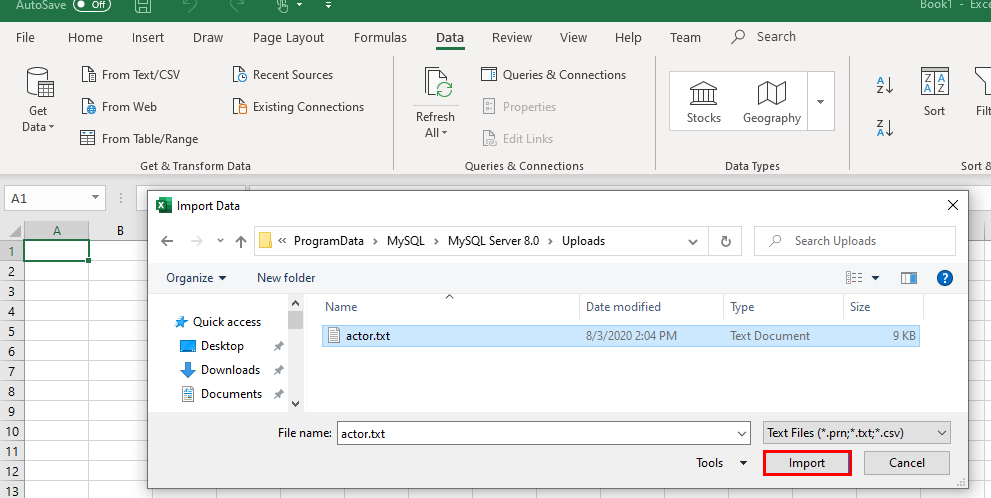
Open Excel and under the Data tab, click the From Text/CSV button:
Navigate to the location of the exported .txt file and click Import:
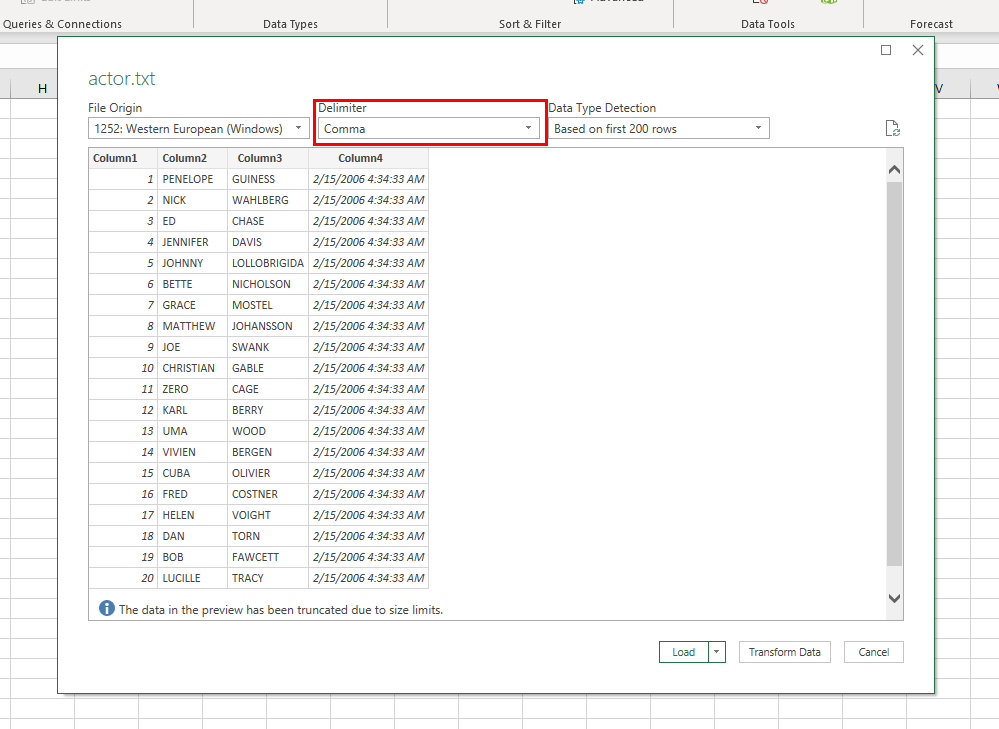
In the newly opened dialog, choose appropriate delimiter and click Transform Data:
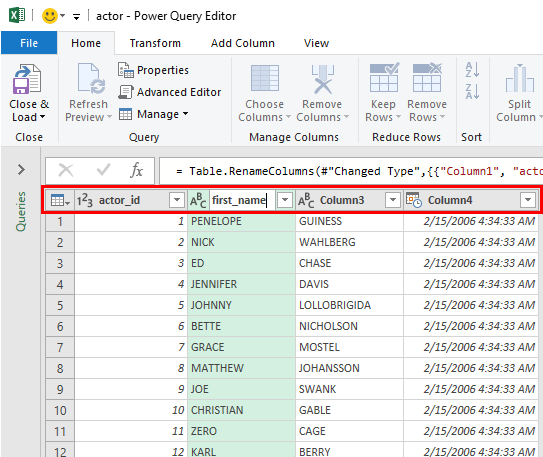
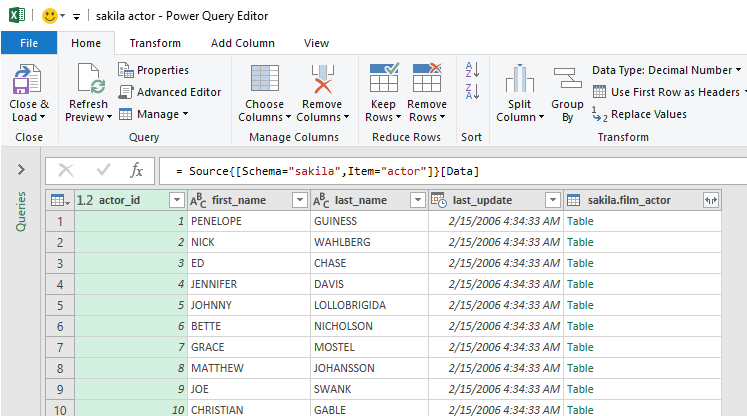
In the Power Query Editor window, it is necessary to set some additional settings (e.g., add the name of the columns):
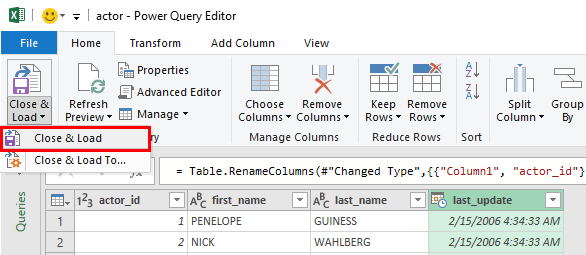
When all is set, click the Close & Load command:
The data will be loaded in a separate sheet:
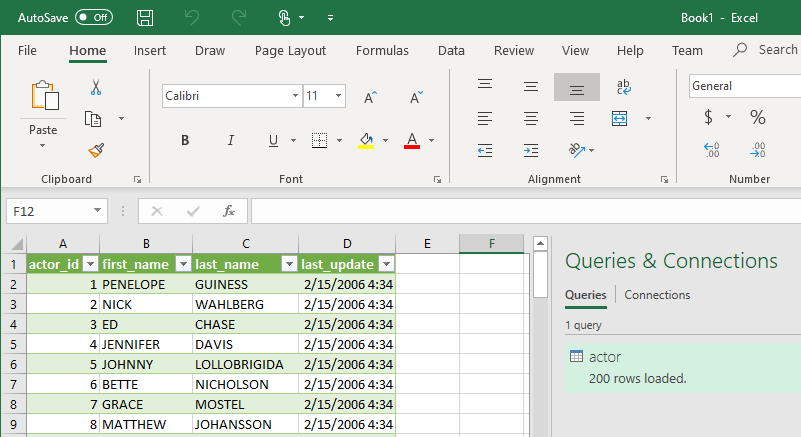
Save newly imported data in .xlsx file format:
Export/Import MySQL data to Excel using the From Database feature
Similar to the method in the section above, Excel provides one more option to load data from the MySQL database to Excel.
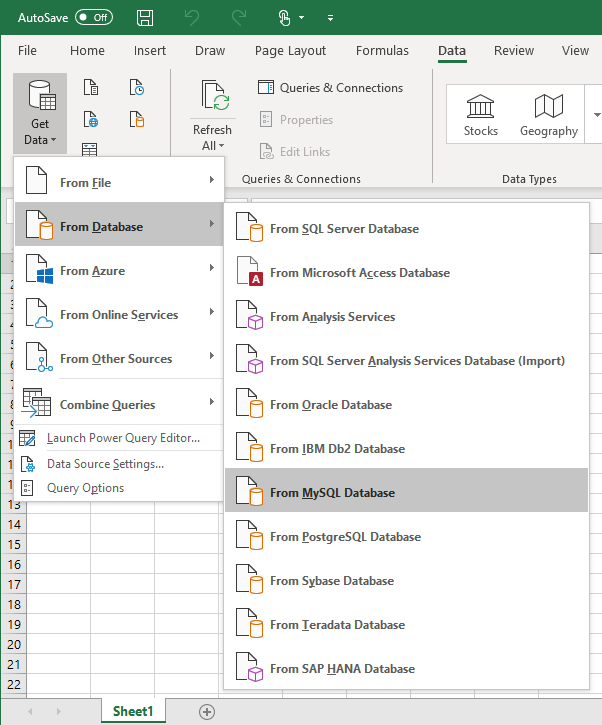
In the Data tab, under the Get Data list, choose the From MySQL Database command:
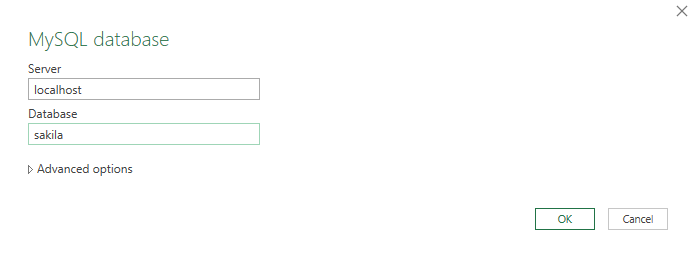
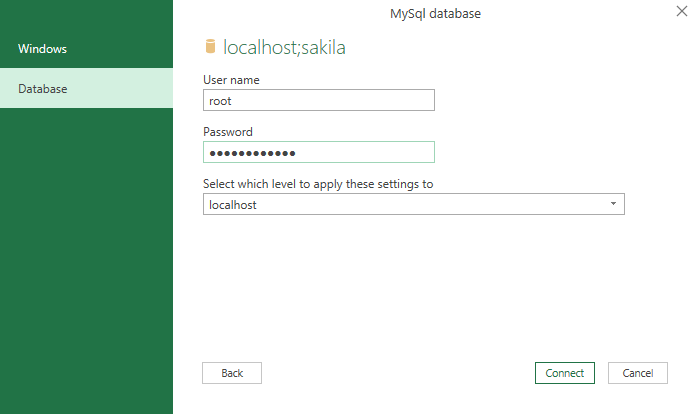
In the MySQL database dialog, enter server and database name from which you want to load data and click the OK button:
On the next window, under the Database tab, enter credentials for the user that have permission to access the targeted database and click the Connect button:
From the Navigator window, choose the tables, views, etc. from which to load data:
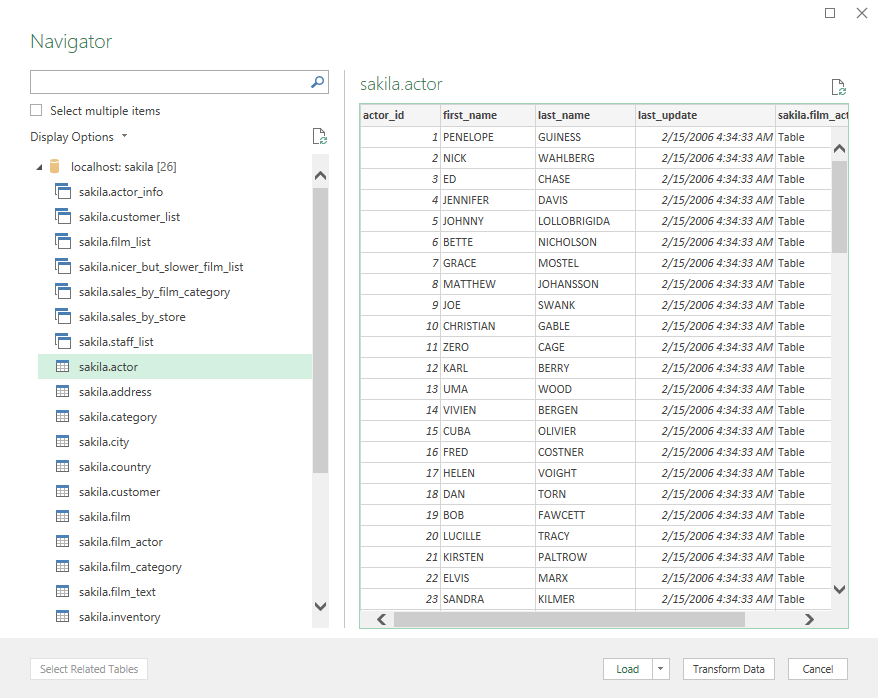
Click the Transform Data button. The Power Query Editor window will appear with desired data in it. Now, the steps for loading data are the same as we explained in the previous section:
Use MySQL for Excel add-in
MySQL for Excel is the Windows-based add-in that integrates into Excel under the Data tab that provides export/import MySQL data capabilities.
To install MySQL for Excel add-in first download the MySQL for Excel MSI file. Before starting with installation, please check that the following requirements are fulfilled:
- .NET Framework 4.5.2 (Client or Full Profile)
- Microsoft Office Excel 2007 or later (for Microsoft Windows)
- Visual Studio 2010 Tools for Office Runtime. MySQL Installer may install this for you. This requirement is different than Office Developer Tools for Visual Studio, which is not a substitute
- An available MySQL server connection
(source: MySQL for Excel Guide / Installation)
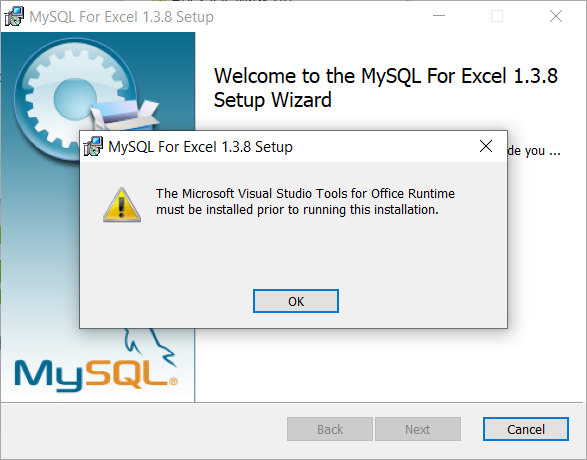
Otherwise, some errors may occur during the installation process, like that one from the image below, when the Visual Studio 2010 Tools for Office Runtime is not installed:
Note: The Microsoft Visual Studio Tools for Office Runtime must be installed prior to running this installation.
Installation
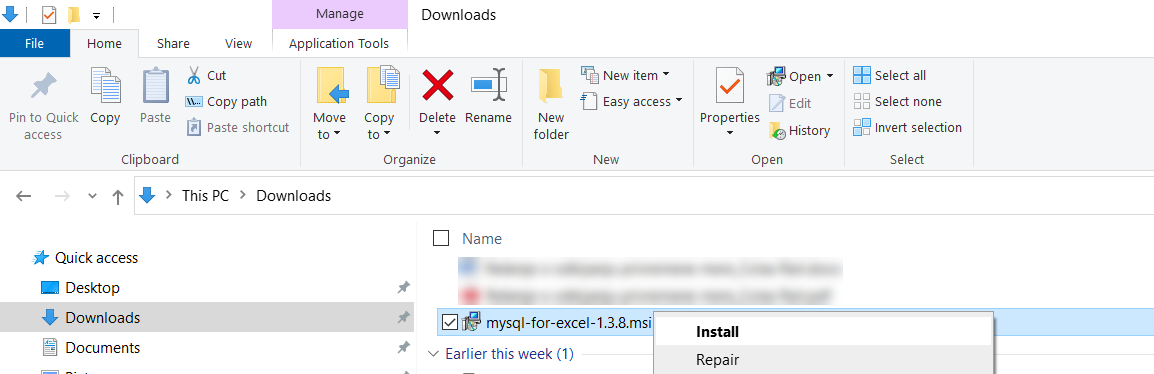
The installation process is straightforward. Go to the location where the installer (mysql-for-excel-1.3.8.msi) is downloaded, right-click on it, and from the context menu, choose the Install command:
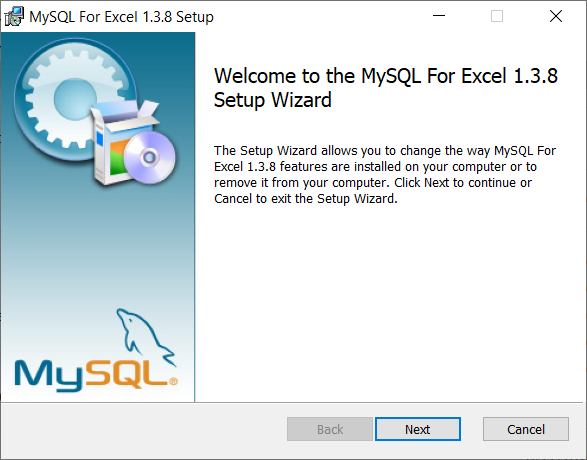
When the installation wizard is launched, click Next:
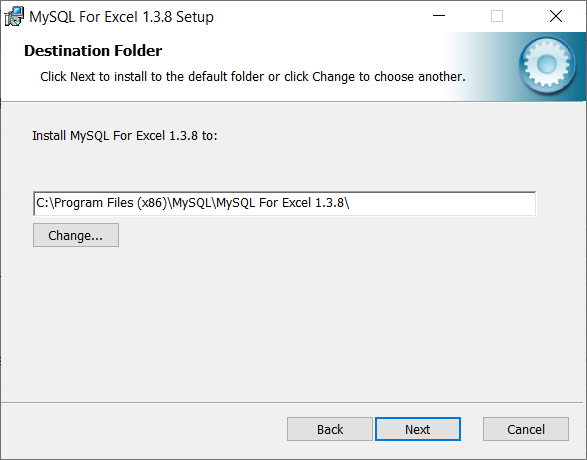
On the Destination Folder step, choose a location where the MySQL For Excel 1.3.8 will be installed and click Next:
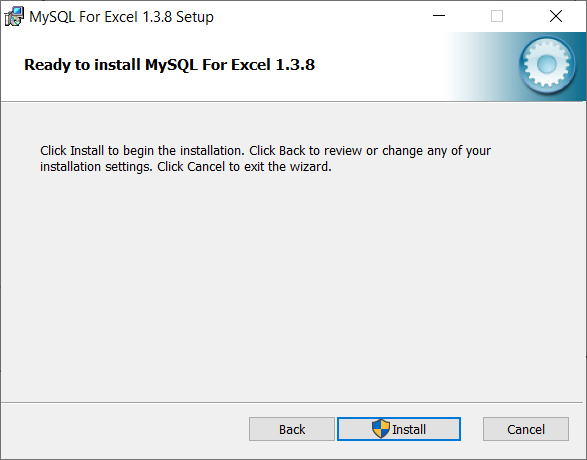
On the next step, click the Install button to start the installation of MySQL For Excel 1.3.8:
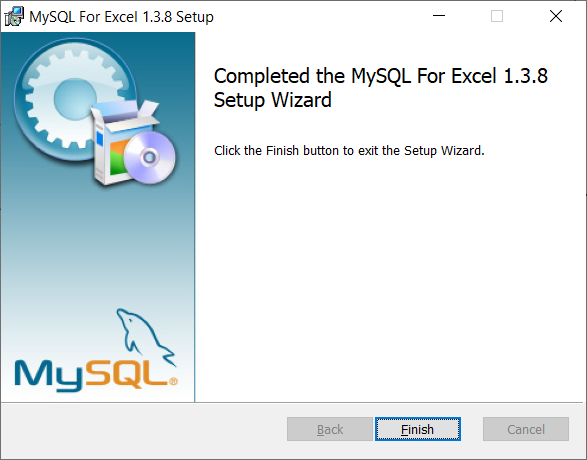
On the last step, click the Finish button to close the setup wizard:
Now when Excel is launched, the MySQL for Excel add-in will appear in the top-right corner of the Data tab:

Connect to MySQL database
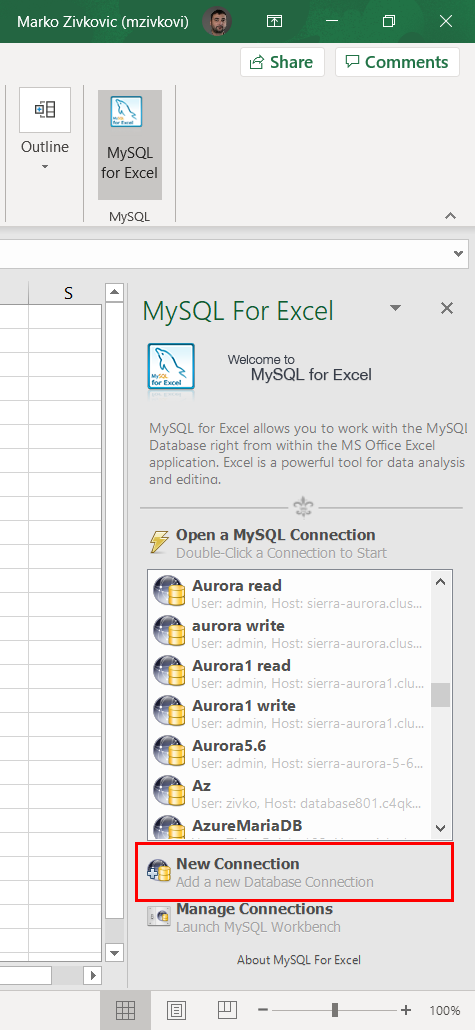
To start MySQL for Excel, click on the MySQL for Excel icon under the Data tab. In the panel that shows find and click the New Connection button:
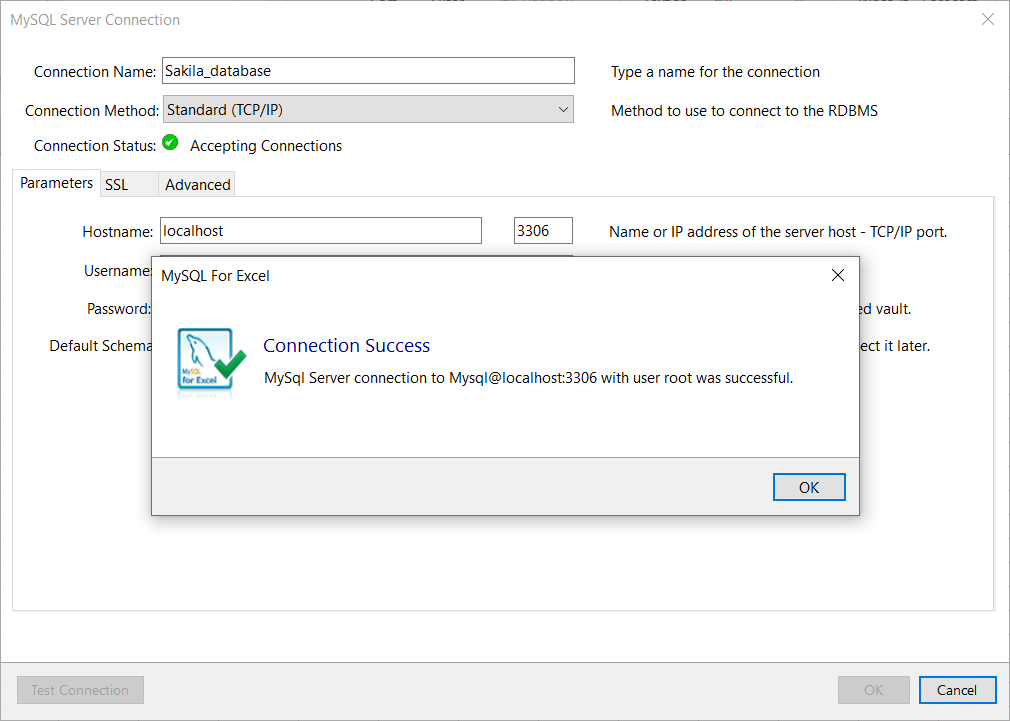
In the MySQL Server Connection window, enter the name for the connection in the Connection Name box (e.g., Sakila_database).
From the Connection Method drop-down list, chose the method to connect to RDBMS (e.g., Standard (TCP/IP)).
In the Hostname box, enter a name or IP address of the server host (e.g., localhost). Under the Port box, enter the TCP/IP port number (e.g., 3306). For the Username and Password fields, enter the credentials for the user that have access to the specified server in the Hostname field:

Optional, from the Default Schema drop-down list, the default schema can be selected.
To confirm that connection to the MySQL Server works properly, click the Test Connection button:
Click the OK button on the MySQL Server Connection window for MySQL for Excel to create a connection in MySQL for Excel panel:
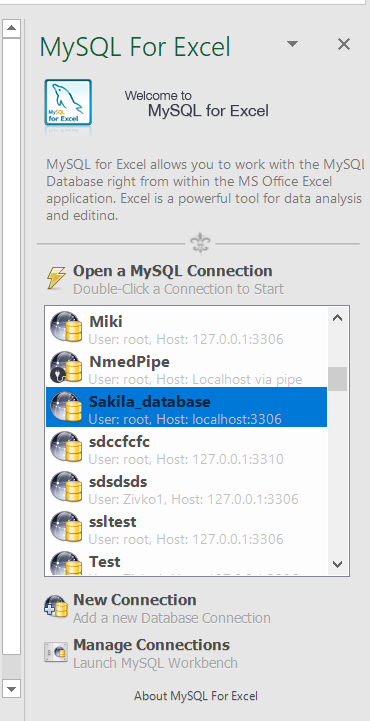
Double-click on the newly created connection will list all available databases from that MySQL server:
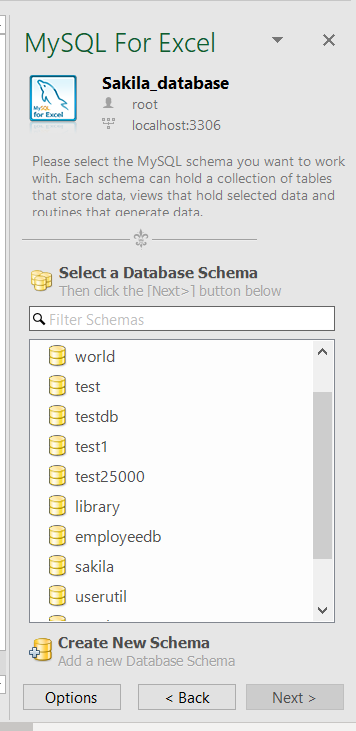
Double-click on a database, in the MySQL for Excel panel, will list all tables, views, and procedures from that database:
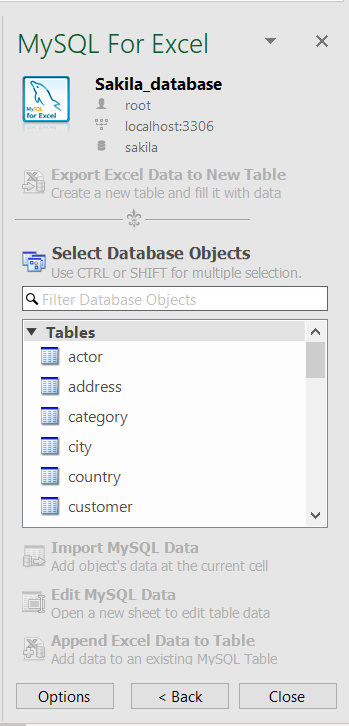
To import data, on the MySQL for Excel panel, select the desired table, and click the Import MySQL Data button. The Import Data window will appear:
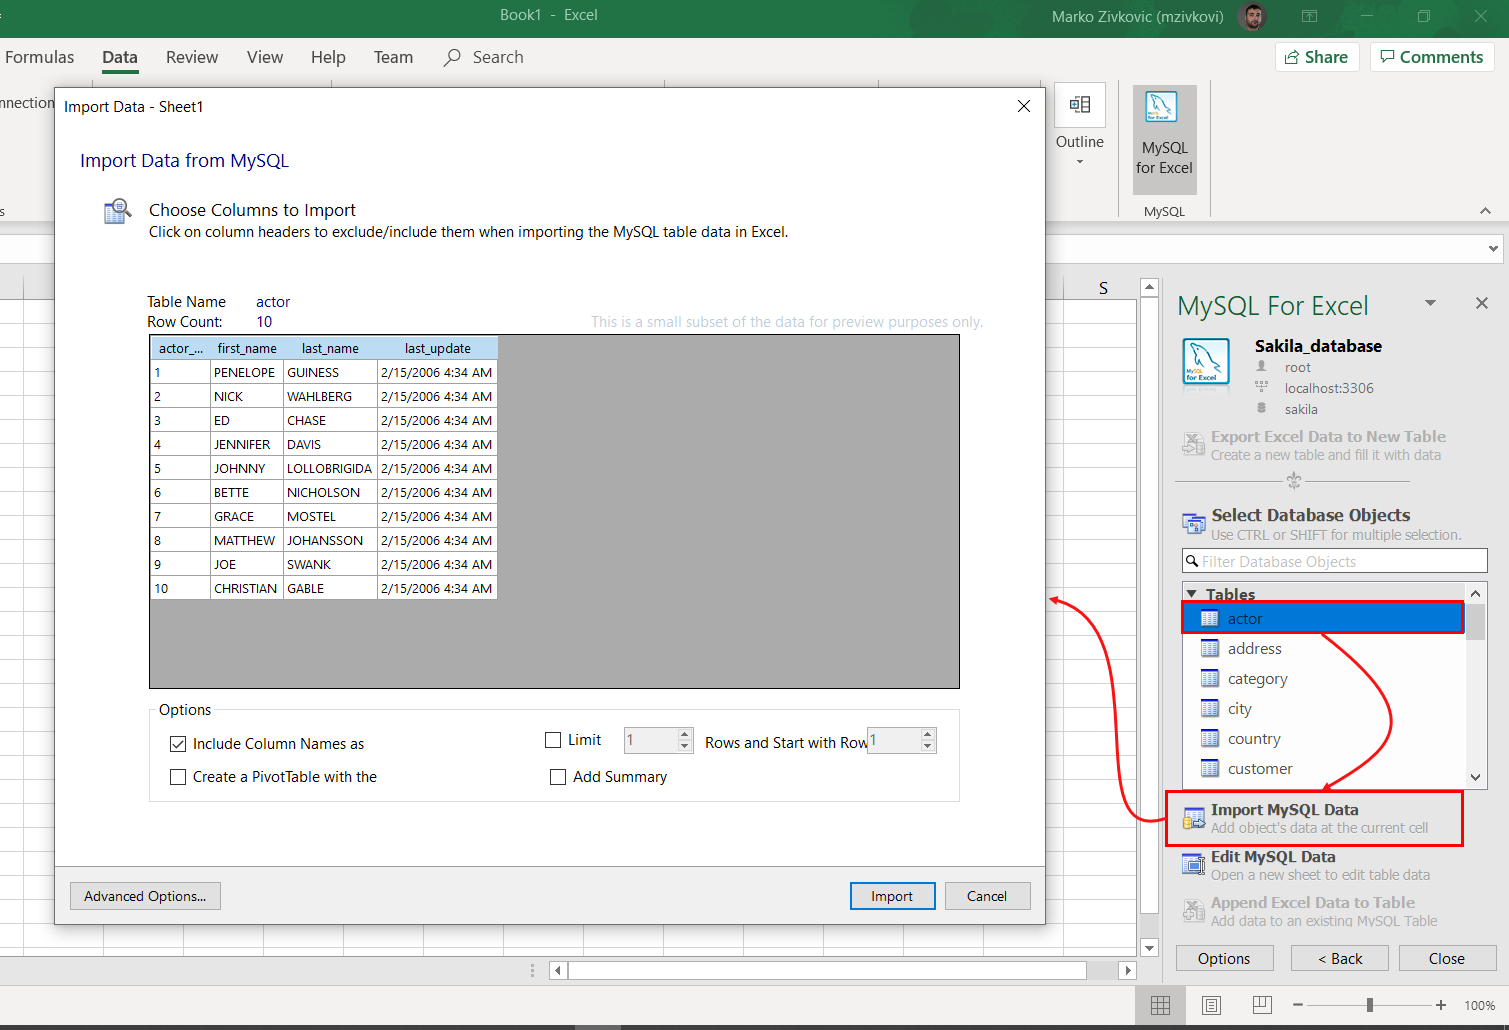
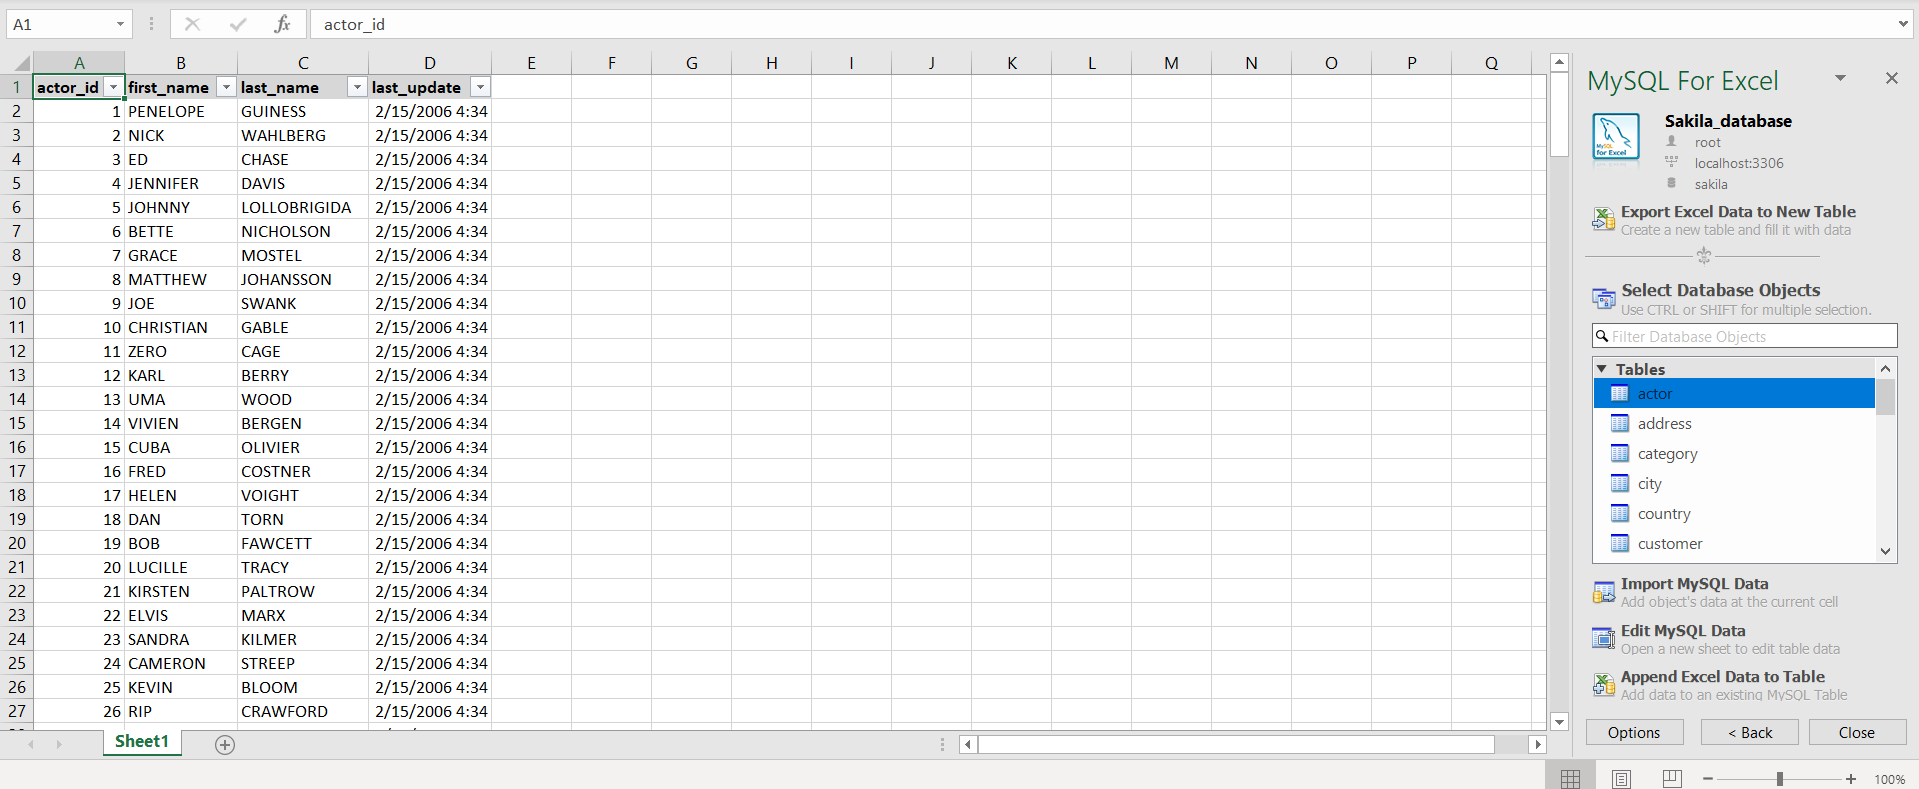
When all settings are set, click the Import button. The imported data will look something like this:
This add-in can return all rows, or a specified range of rows, from a specified table. It cannot import data stored in two different tables, perform table joins, or filter data.
More details about MySQL for Excel tool can be found on the MySQL for Excel page.
Export to Excel using a third-party software
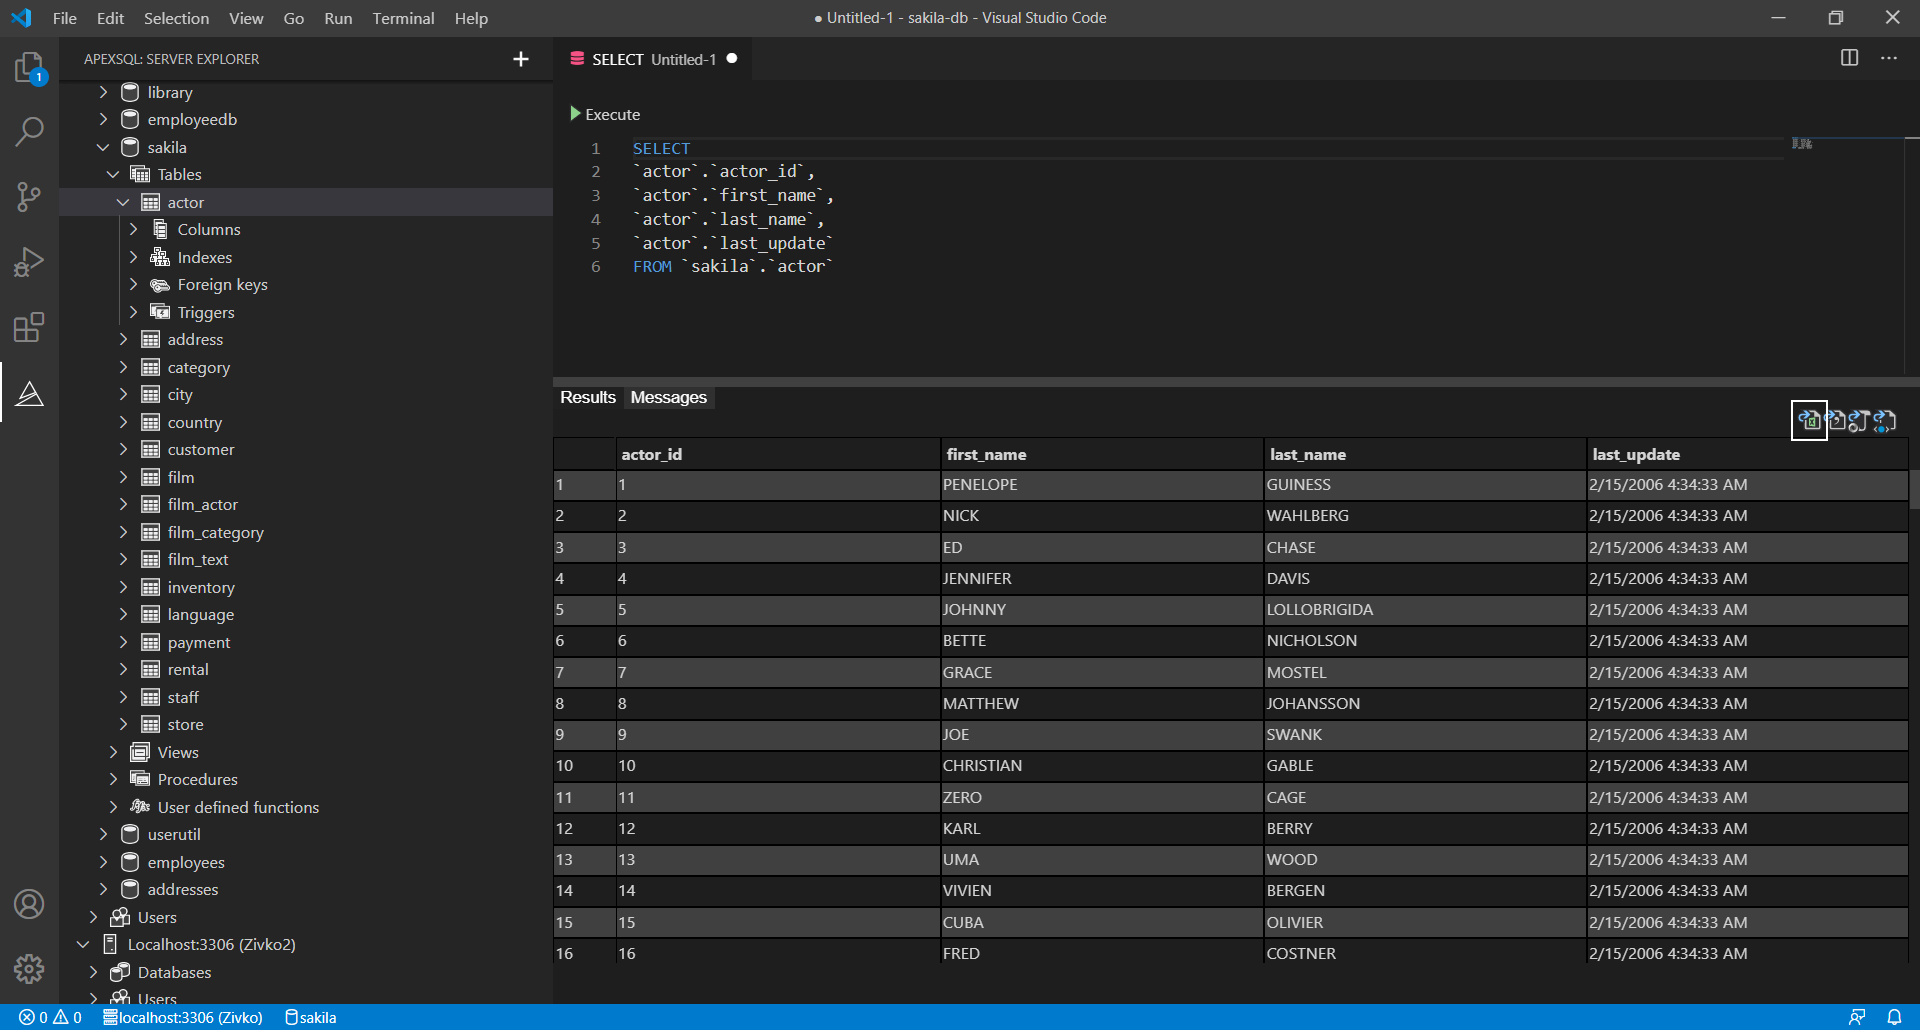
Using the Export to Excel feature from ApexSQL Database Power Tools for VS Code, query results can be exported to MySQL data from the results grid in just a few steps. Besides exporting data to Excel, this VS Code extension provides a couple of more exporting options, such as export data to JSON, CSV, and HTML file format.
In a query editor of the VS Code extension, execute a query from which you want to be data exported. In the top right corner of the Results grid, click the Export to Excel button:
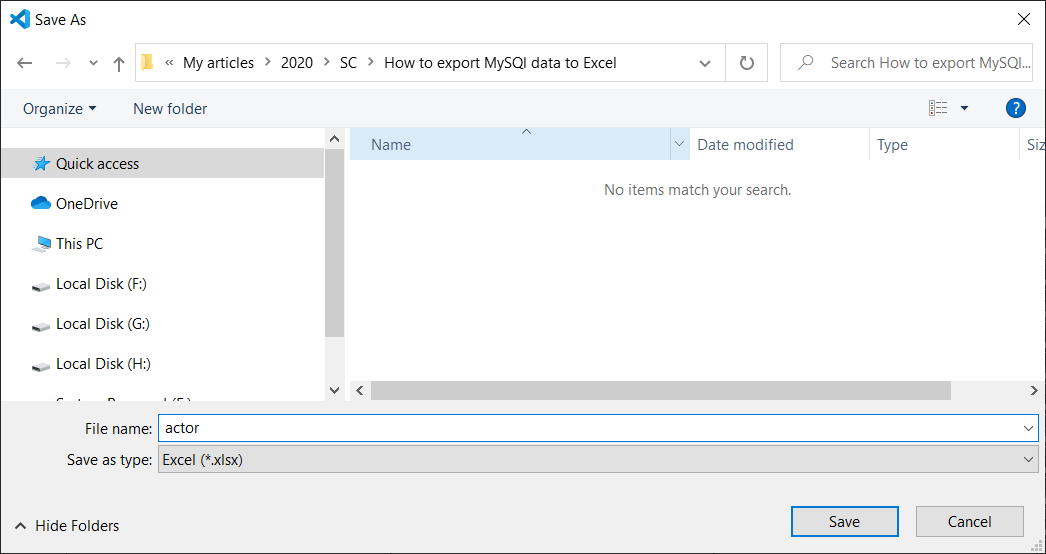
In the Save as window, enter a name and location for a new Excel file and click the Save button:
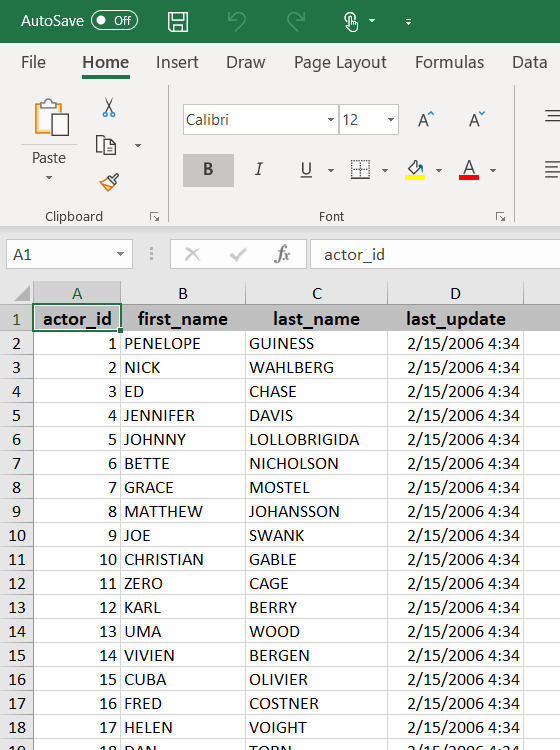
The exported data will look like this:
August 12, 2020


