


Text file represents a document that contains information in plain text. Any text editor and most popular web browsers are suitable for viewing or editing text file formats. Also, all smartphones are equipped with suitable applications that can open and edit text file formats. As such, text file formats are the most relevant file formats for sharing information between users. SQL Server users, among other things, can export data in text file format, which will be explained further in the article.
Exporting SQL Server data to a text file format will be explained through using the next two application:
- SQL Server Import and Export Wizard – the Wizard that allows users to copy data from a source to a destination
- ApexSQL Pump – the standalone application that allows the users to import and export SQL Server data in various file formats
Export SQL Server data by using the SQL Server Import and Export Wizard
The SQL Server Import and Export Wizard allowing users to copied data from and to data sources. This Wizard can be opened in two ways, through SQL Server Management Studio, or a stand-alone application through the Start menu. This article will explain how to with SQL Server Import and Export Wizard opened through SQL Server Management Studio.
When the SQL Server Management Studio is opened establish connection to a desired SQL Server. In the Object Explorer panel right-click on the database from where the data should be exported. Select the Tasks option to open the submenu in which the Export data action should be chosen:

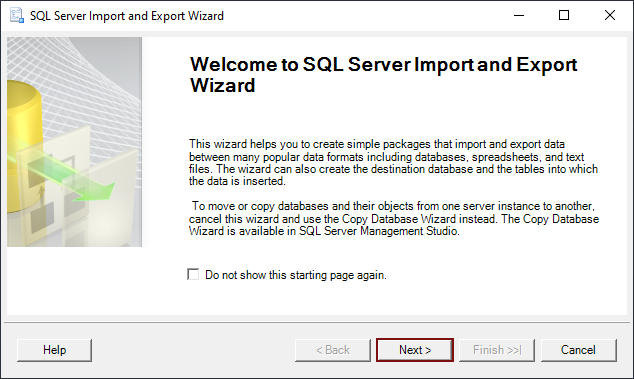
The SQL Server Import and Export Wizard will appear, with the Welcome to SQL Server Import and Export Wizard step as the first step of export SQL Server data. The information about what this wizard can do is contained in this step. By clicking on the Next button, the wizard will move to the next step:
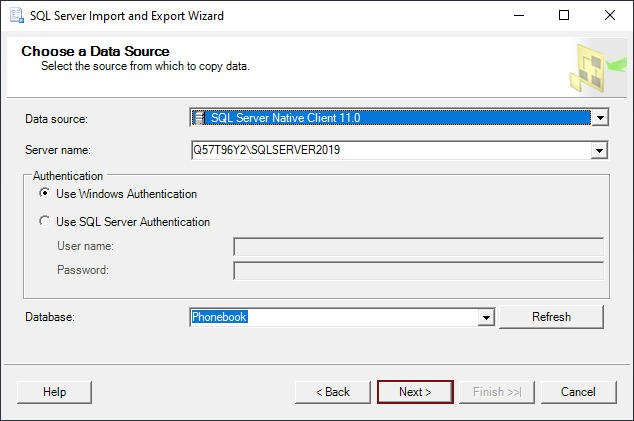
The Choose a Data source is the next step, as the name suggests, the source, from which the data will be copied, is selected. When the data from SQL Server are ready to be exported, from the Data source drop-down list SQL Server Native Clientis needed to be selected. Based on selected data source the section below that drop-down list will automatically change. For the SQL Server Native Client data source type it is necessary to set SQL Server, type of Authentication, and a Database from which the data will be exported. For demonstration purpose in this article the Phonebook database which is located on SQL Server 2019 instance is chosen. When all is select click on the Next button to proceed further:
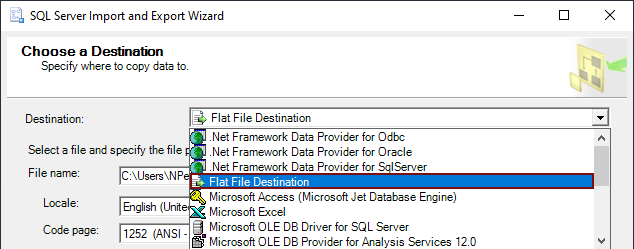
The Choose a Destination is the next step that in the SQL Server Import and Export Wizard is presented. From the Destination drop-down list, the Flat File Destination option should be selected. The Flat File Destination writes data to a text file:
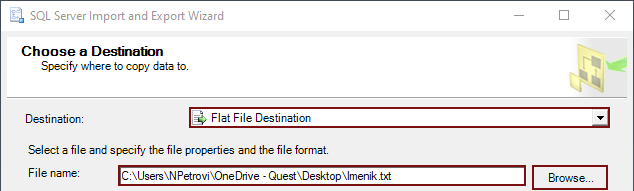
In the section below the Destination drop-down list, the options related to selecting and specifying the file properties as well as the file format need to be configured. In the File name text box, the path and file name of the flat file should be entered or it can be browsed with the click on the Browse button:
When the file location is defined in the File name text box, the locale to provided language-specific information for sorting and for date and time format is need to be specified from the Locale drop-down list. When the Locale is selected, checking or unchecking the Unicode checkbox will specify if the file uses Unicode character set. If the file uses Unicode the code page can not be specified, otherwise, from the Code page drop-down list, the code for non-Unicode text can be specified:

In the Format section of Choose a Destination step whether the file uses delimited, fixed-width or ragged right formatting can be set:

When all of the previously explained options are set click on the Next button to proceed to the next step:

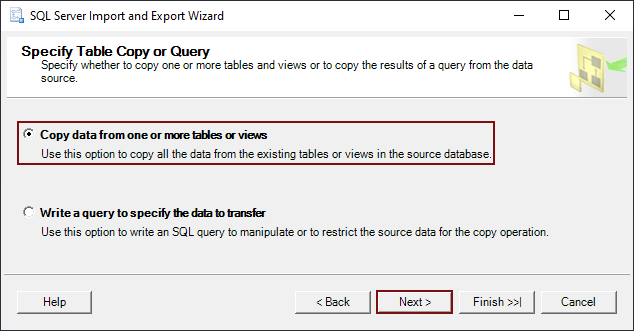
In the Specify Table Copy or Query step, the Copy data from one or more tables or views or to Write a query to specify the data to transfer options can be chosen. The Copy from one or more tables or views option will execute the process within the wizard, so it will be selected for this article. By clicking on the Next button the wizard will be taken to the next step in the export SQL Server data process:
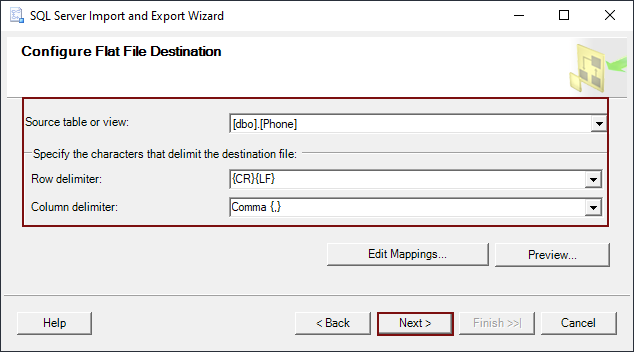
The Configure Flat File Destination is the step in which the source table or view will be chosen to export SQL Server data from. In this example the dbo.Phone table is selected for exporting SQL Server data. When a table or view is selected in the Specify the characters that delimit the destination file section, characters to use as row and column delimiter are set. After configuring this step click on the Next button to proceed:
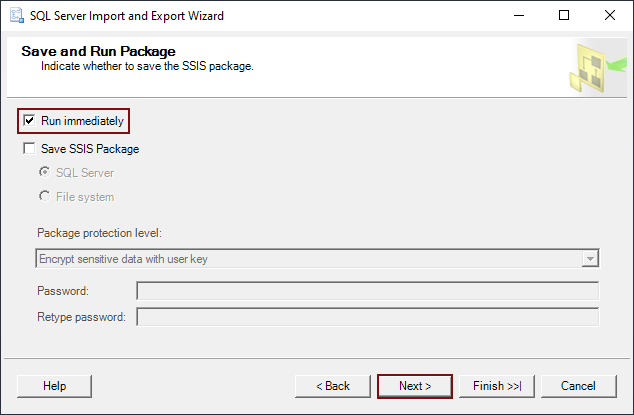
The Save and Run Package is the next step in the export SQL Server data process. In this step are two options available:
- Run immediately – if this option is selected the import or export SQL Server data will run immediately upon wizard ending, and this option is checked by default
- Save SSIS Package – this option offers to save the setting as an SSIS package, which optionally can be customized and run again later
The goal of the example in this article is to export SQL Server data, and for this the Run Immediately option should stay checked in this step. Click on the Next button will take the process further:
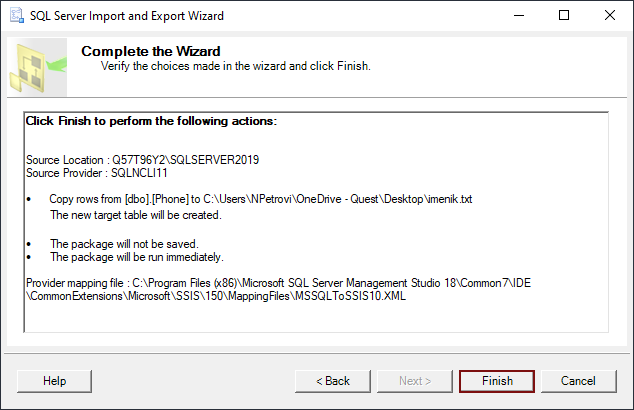
The last step in the export SQL Server data process through this wizard is the Complete the Wizard step in which the choices that are made in the wizard can be verified. If users agree with all choices in this step, clicking on the Finish button will finalize the configuration to export SQL Server data:
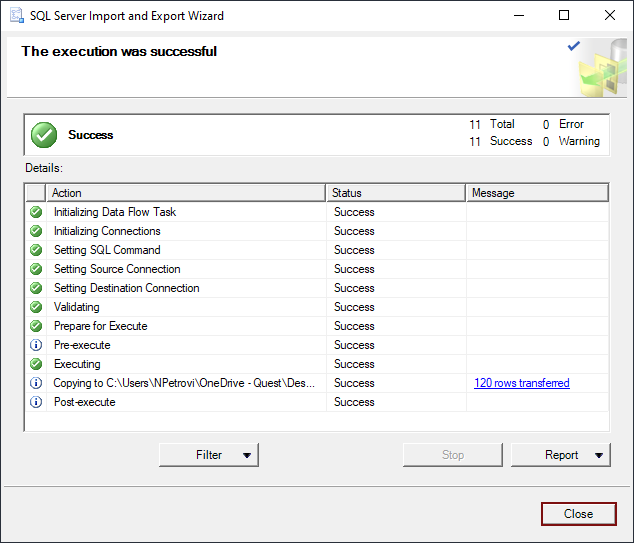
When is the configuration part is finished, the last step in the process of exporting data is the Summary step with information does the process is finished successfully or not. Click on the Close button the SQL Server Import and Export Wizard will be closed:
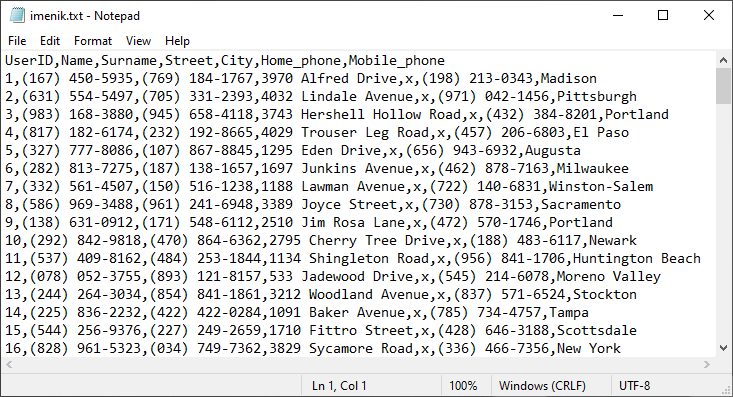
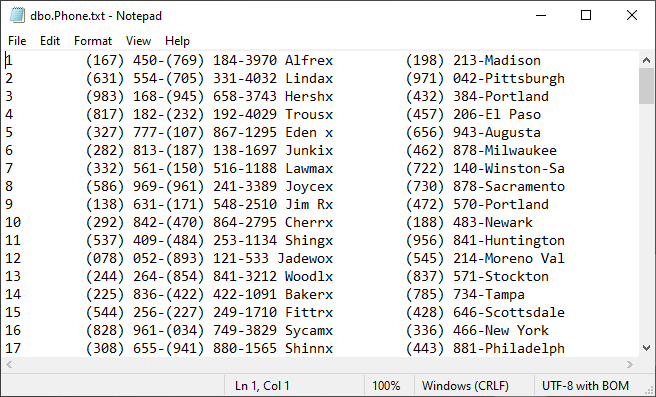
After the process is finished, the exported SQL Server data will look like this:
Export SQL Server data in text file format by using ApexSQL Pump
ApexSQL Pump is a standalone application with the possibility to import and export SQL Server data in different file formats, and the text file format is one of them.
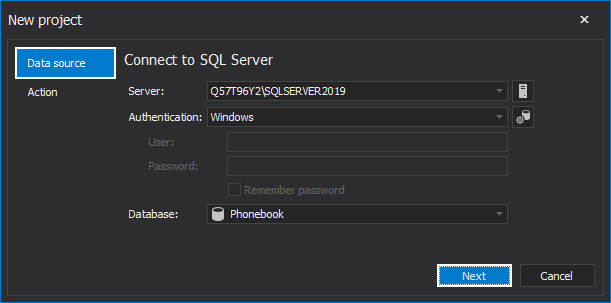
On the application startup, the New project windowwill be shown, wherein the Data Source tab the SQL Server instance, the type of Authentication and Database needs to be set. As with previous example, the SQL Server 2019 instance and the Phonebook database will be used. When this is set in the Data Source tab, click on the Next button:
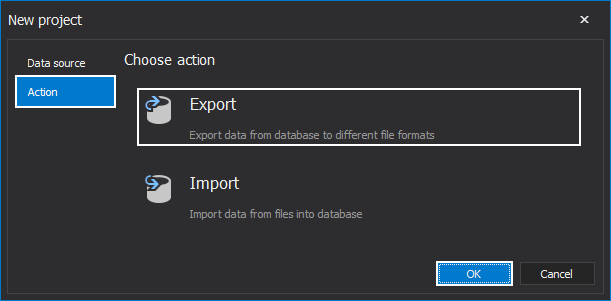
The view will go to the Action tab, whereby the Export action should be selected. Click on the OK button to switch the view to the main window of ApexSQL Pump:
The main window will show the list of all tables and views from the selected database. The application offers the capability to select multiple tables or views to export SQL Server data from, and for this article, the dbo.Phone table will be picked. If a desired table is checked in the main grid, the next step is to choose in which file format that table will be exported. That should be done by clicking on the Manage button in the Home tab of the main window:
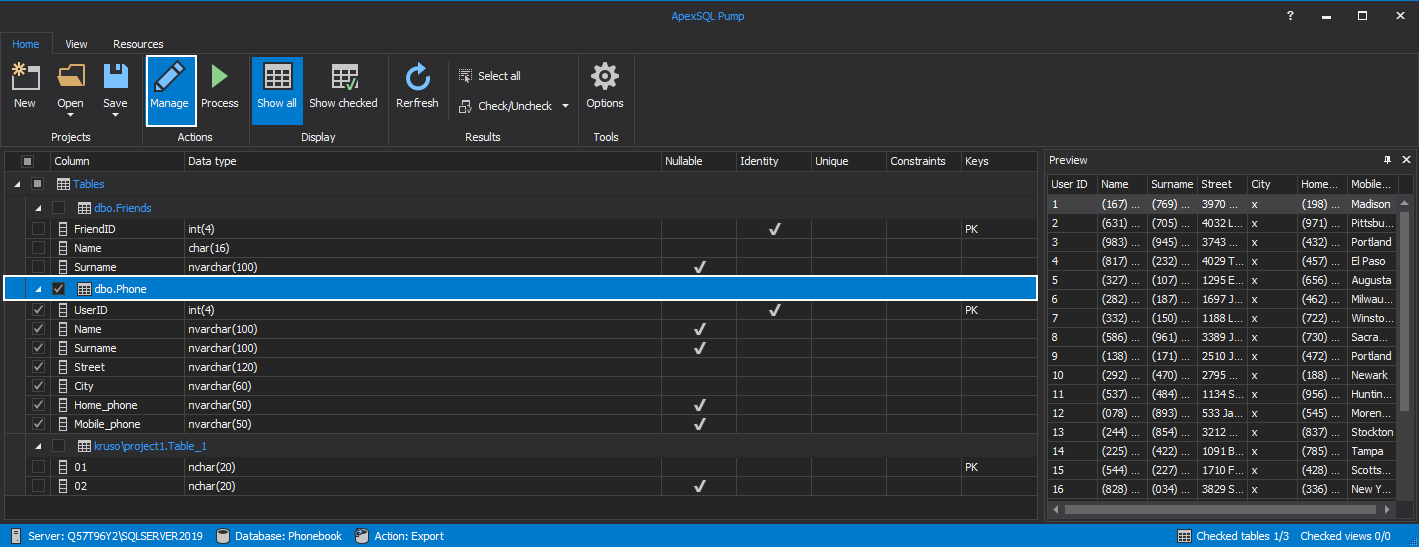
The Manage export window will be opened. Click on the Text button to select the text file format for export:
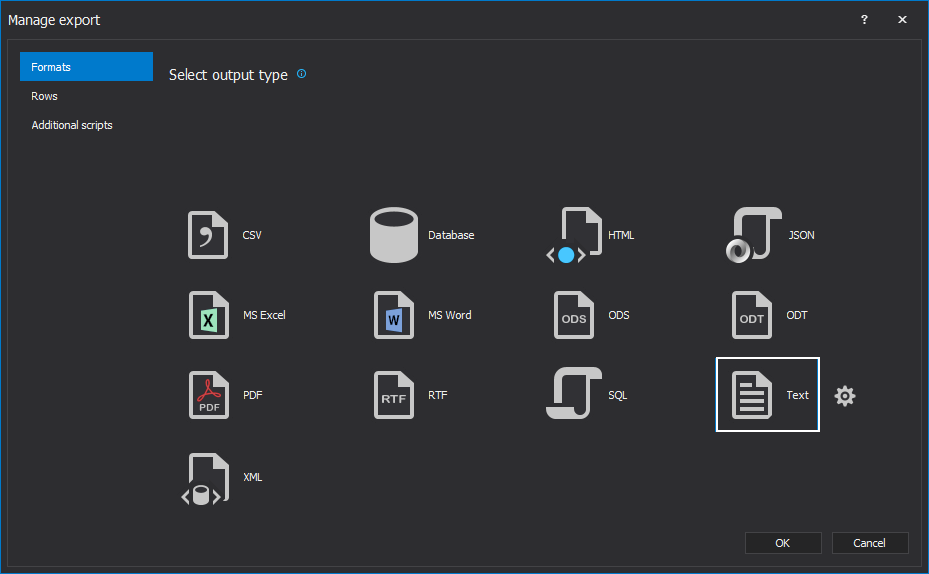
The Settings button will appear to the right of the selected file format. Click on it to opent the Text options window:
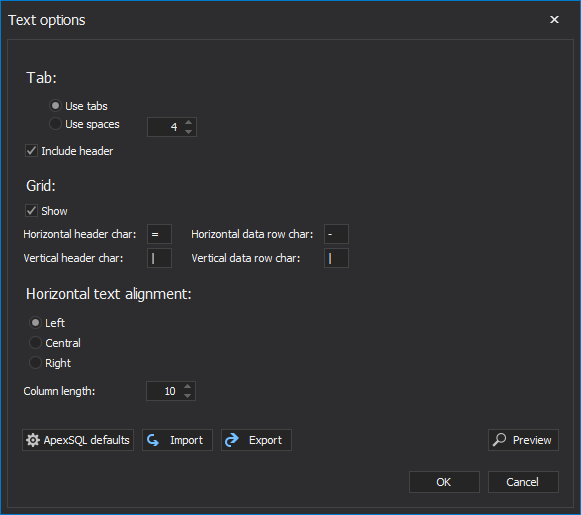
In the Text options window, the options related to the exported text file can be set, and there are divided into three sections:
- Tab – this section contains options related to the header of the exported table. In this section it is possible to set if the exported table will have the column header or not, and how will columns in the header be separated (with tabs or with spaces)
- Grid – in this section the options to show data as grid can be set, and if grid is enabled a column and row separator can be customized
- Horizontal text alignment – this section is related to text alignment and maximum column length, if some data value exceeds this length it will be truncated
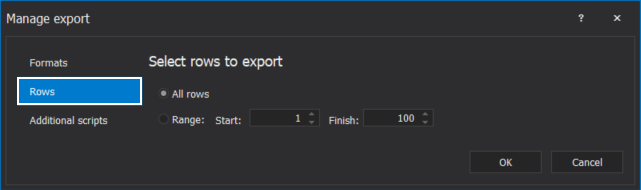
When formatting options are set, click the OK button to bring the view back to the Manage export window. The Rows tab can be configured next . This is where the number and scope of rows to export can be specified:
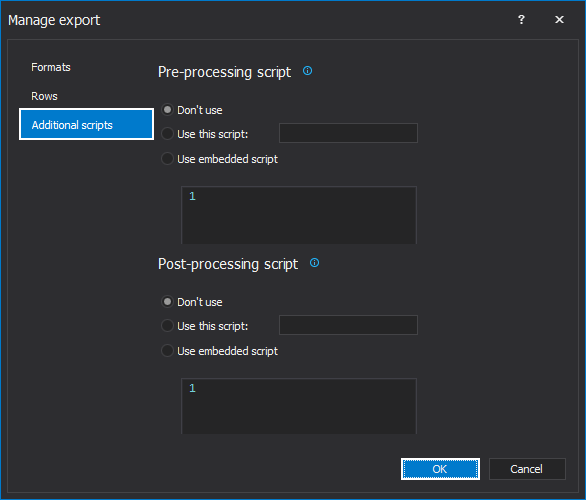
For additional operations and advanced usage the Additional scripts tab, where SQL scripts for manipulating the SQL Server data, can be used. The script that is used before the export SQL Server data process is the Pre-processing script, and the script used after the export process is the Post-processing scripts. When the export configuration is all set, click the OK button to confirm it and return to the main window:
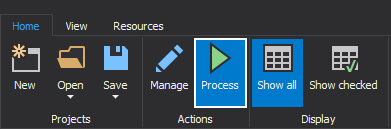
To procede with the export SQL Server data process, click on the Process button in the Home tab:
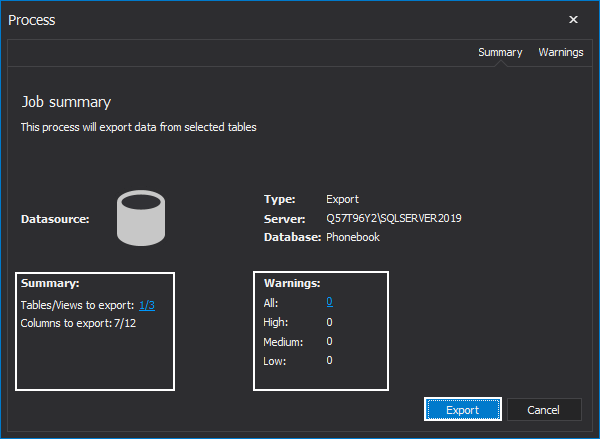
The Job summary window will be shown containing the information about how many tables or views, columns are ready to be exported in the Summary section, and the information about mistakes or deviation which need to be fixed before the export SQL Server data process is started in the Warnings section. If there are no warnings to fix, and after reviewing the summary information, the process can start by clicking on the Export button:
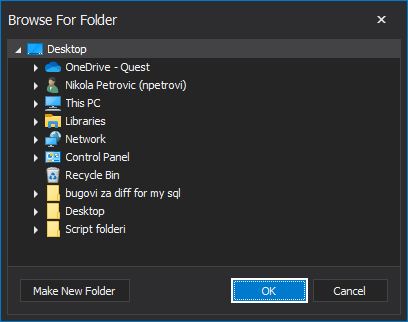
The Browse For Folder window will appear, in which the location to save the exported file to is chosen. Click on the OK button will close that window, and the SQL Server data will be exported:
The exported file will have the name as the table in this case dbo.Phone, and it will look like this:
ApexSQL Pump is allowing easy export data from multiple tables and views to text file formats at the same time. Besides text file formats, ApexSQL Pump can export SQL Server data to 12 more file formats and import data to SQL Server from 11 file formats.
April 14, 2021


