


One of many Tableau administrator responsibilities is to be familiar with the server configuration, managing users, automated server job process management, knowing Tableau metadata and being familiar with migration and scheduling. To stay updated and keep everything under control, good Tableau documentation can come in handy. Such documentation can be created using ApexSQL Doc, a tool for creating SQL Server, BI, SharePoint as well as Tableau site documentation, which will be covered in this article.
This article will show how easy it is to create Tableau site documentation and explain how to setup automated Tableau documentation using ApexSQL Doc.
Documenting Tableau Sites using ApexSQL Doc
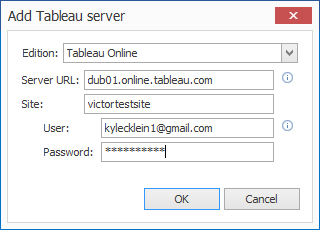
Let’s start with a new project in ApexSQL Doc. Select the Tableau server tab in the left window pane and then select the Add button. The same result can be achieved by clicking the Add Tableau site in the Home ribbon menu.
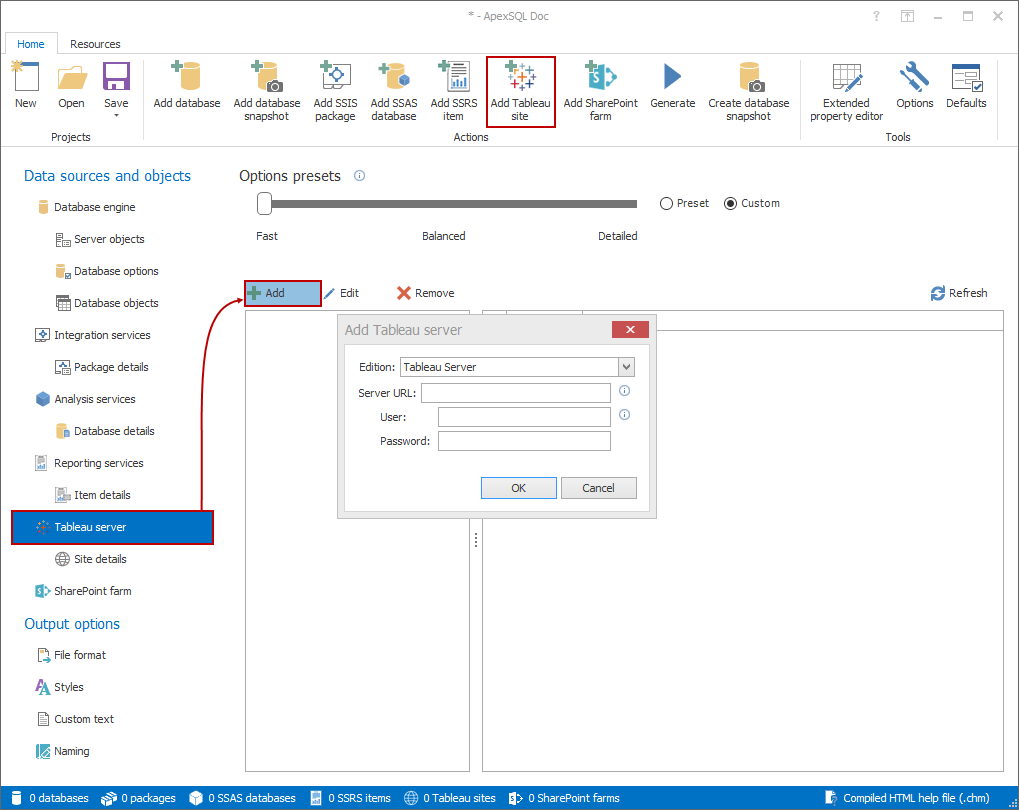
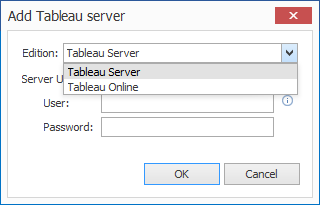
As seen on the picture above, a new dialog box appears, prompting for Tableau edition, server URL and login credentials. ApexSQL Doc supports both Tableau Server and Tableau Online editions, and they can be selected in the drop-down list in the dialog box.
Connecting to Tableau Server
To connect to Tableau Server, the first information needed is the Tableau server URL. This is the same URL that is used to connect to Tableau Server from a web browser or Tableau Desktop. Server IP address can also be used in the URL field as a valid connection parameter.
If ApexSQL Doc is installed locally on the Tableau Server machine, “localhost” can be used instead of an IP address or a web URL.
|
Quick tip: If no HTTP port is specified in the Server URL, ApexSQL Doc will try to connect using the default Tableau Server HTTP port: 80. This information is provided via tooltip in the Add Tableau server dialog. |
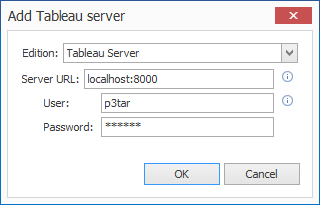
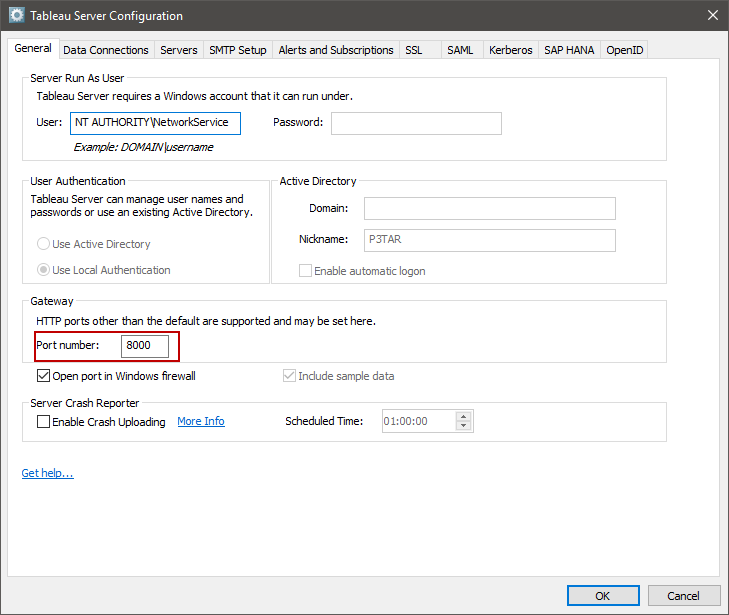
If Tableau server uses any other port than the default, the correct format for the URL is e.g.: “localhost:8000”, specifying the port number besides “localhost”. HTTP port configuration can be found in the General tab in Tableau Server Configuration window under Gateway.
To connect to Tableau server remotely, enter the server machine IP address and the port that the Tableau server is using. The correct URL format is e.g.: “192.168.1.3:8000”.
In this example, the server is in the local network, but depending on the network configuration, it is possible to connect to Tableau server externally. In that case, use the external IP address of the server machine as Server URL if no real server URL is already provided.
Connecting to Tableau Online
To connect to Tableau online, select Tableau Online from the Edition drop down list. The server URL and the site name required to connect ApexSQL Doc to Tableau Online can be found in the web browser.
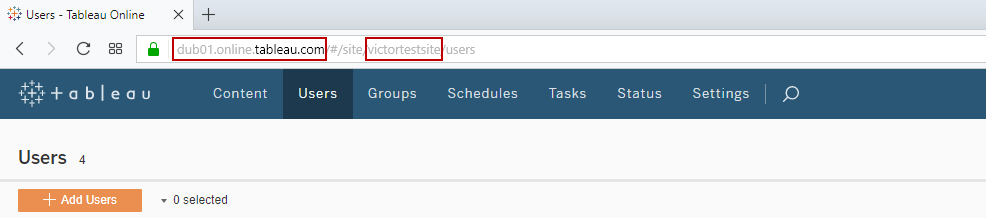
In this example, the server URL is “dub01.tableau.com” and the site name is “victortestsite”. The username and password must be a site administrator account, same that is used for regular login to Tableau Online from a browser.
Selecting Tableau sites
When connected successfully, the server name will appear in the left grid in the main window, and the available sites will appear in the grid on the right. Selecting Tableau sites to document can be done by marking the checkboxes in front of the site name.
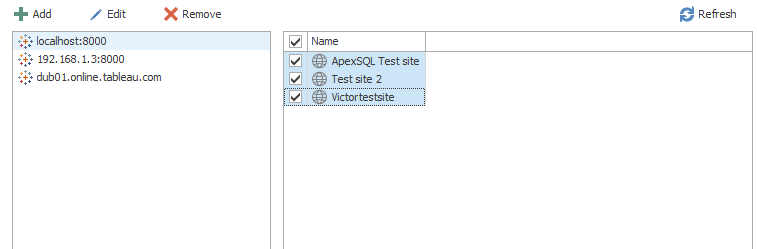
As seen on the picture above, it is possible to select multiple Tableau sites from the same or different connections. In this example, Tableau sites are selected from a local server, a remote server and from Tableau online. The number of selected sites can be seen in the status bar.
Setting up site details for Tableau documentation
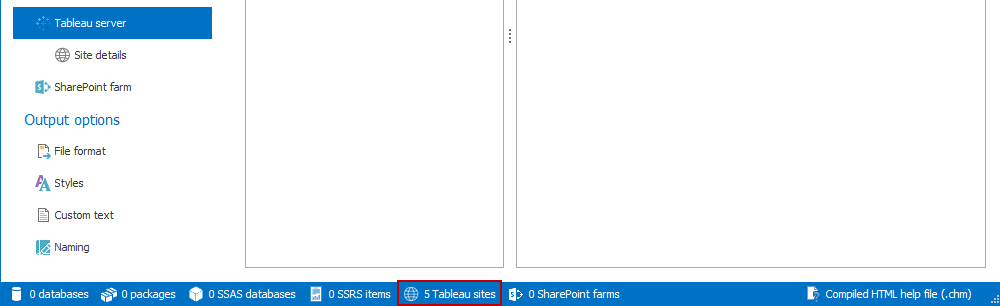
Once the Tableau sites are selected, go to the Site details tab where the Tableau Site documentation options can be found.
|
Quick tip: To access the Site details tab in ApexSQL Doc, at least one Tableau site must be selected. |
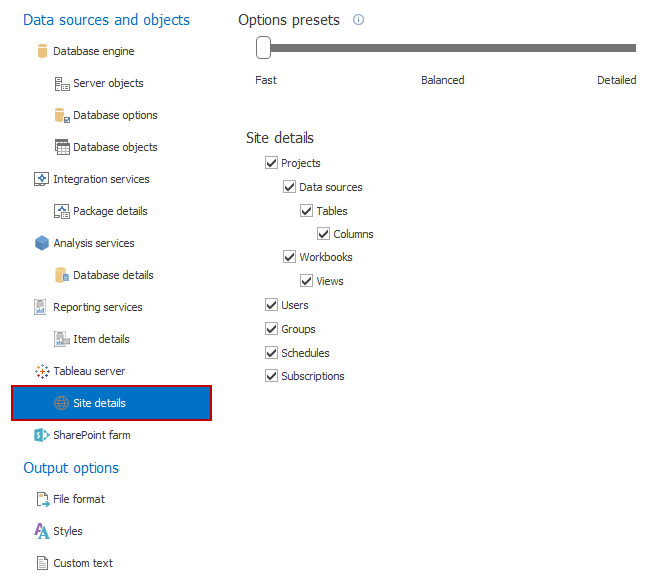
As seen on the picture above, there are five main Site sections that can be included in the documentation:
Projects – contains a list of all available projects on the Site with description, data source and workbook count. Additionally, Data sources and Workbooks sub options can be included from this section.
Selecting the Data source option will include Table and Column reports.
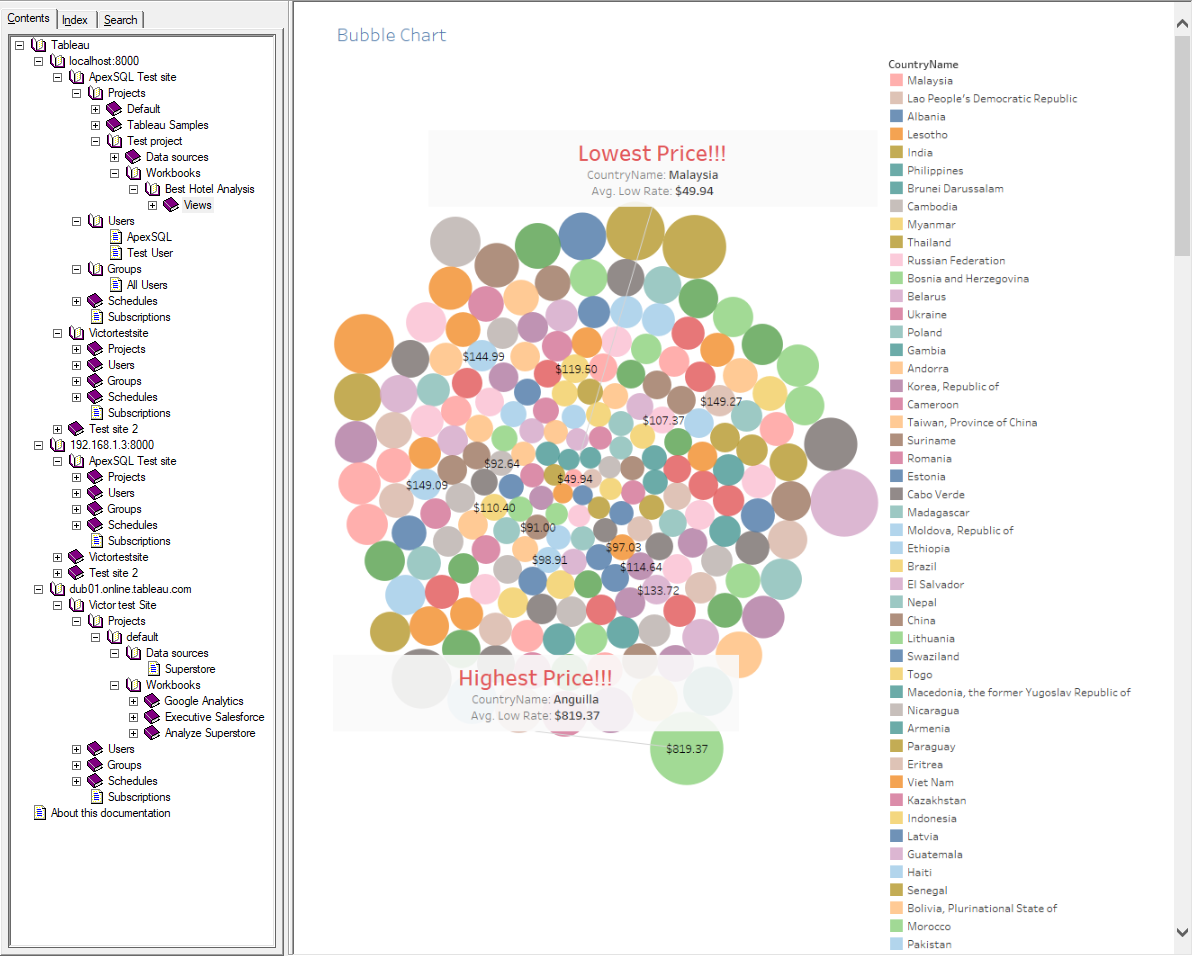
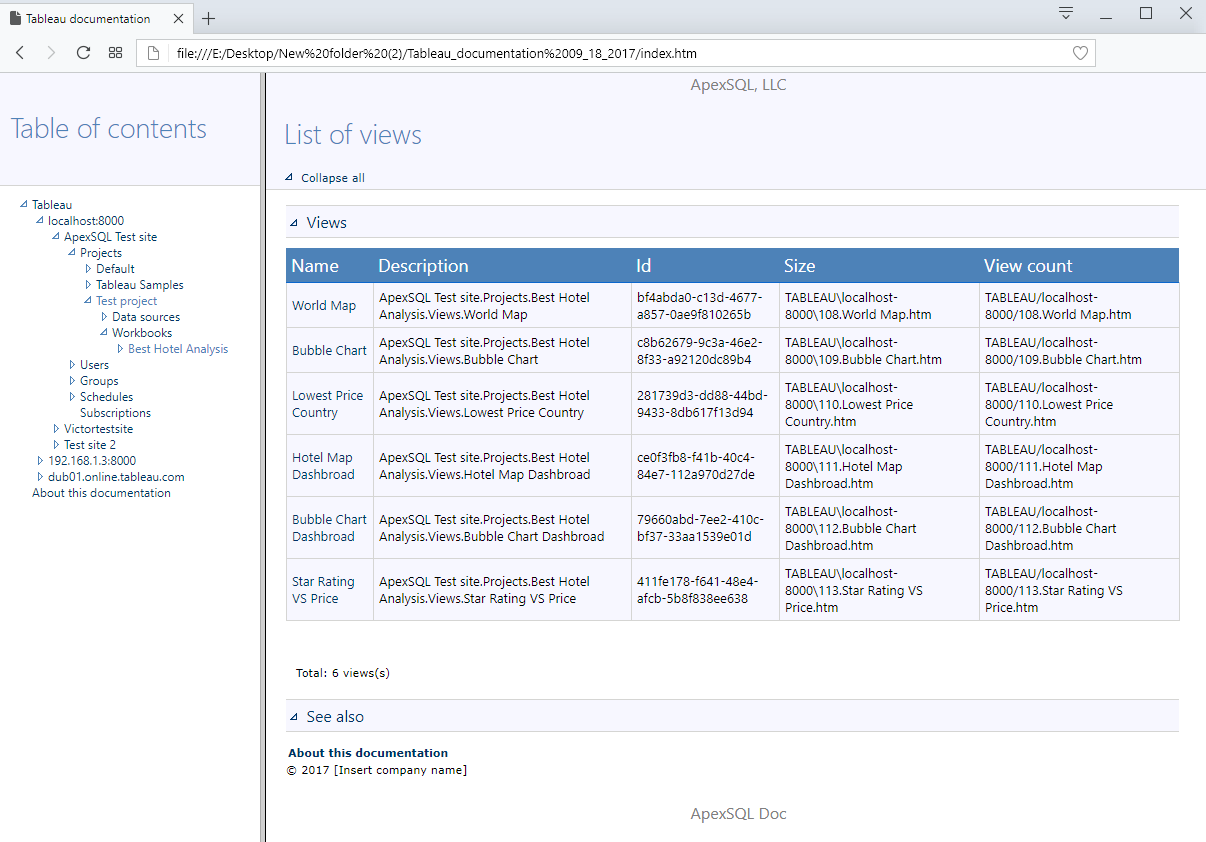
The Workbooks option includes basic information about a project workbook such as: View count, size (in MB), owner name, project name, creation and update dates. As part of the workbook information, Views can be added optionally. Each View is documented with basic information and a rendered picture of the View diagram and chart.
Users – Includes a list of Site users, roles, groups and login information.
Groups – list of user groups, members, permissions, project permissions, and data source permissions for each user group
Schedules – list of scheduled tasks on the Tableau Site and information about each task such as: state, task type, priority, frequency, creation, update and next run date and time.
Subscriptions – listing users email subscriptions for projects, views and workbooks and update information.
If not specified, ApexSQL Doc generates Tableau Site documentation including all Site details by default.
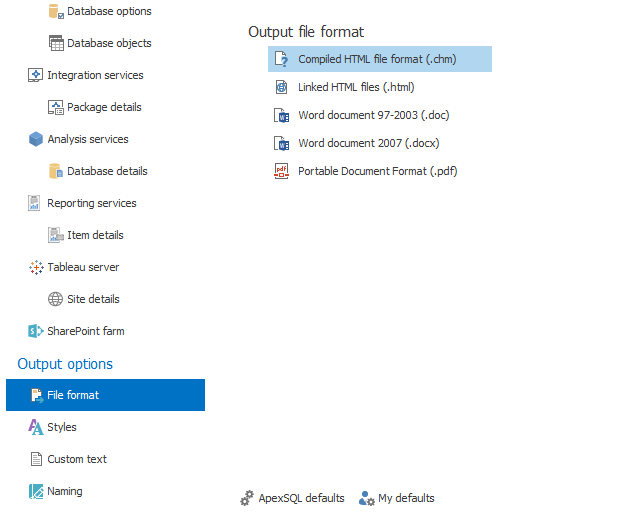
When the documentation details are set, go to the File format tab and chose one of the four available file formats: CHM, HTML, Word or PDF output formats.
To start the documentation process, select the Generate button in the Home ribbon menu, and set the documentation output folder location.

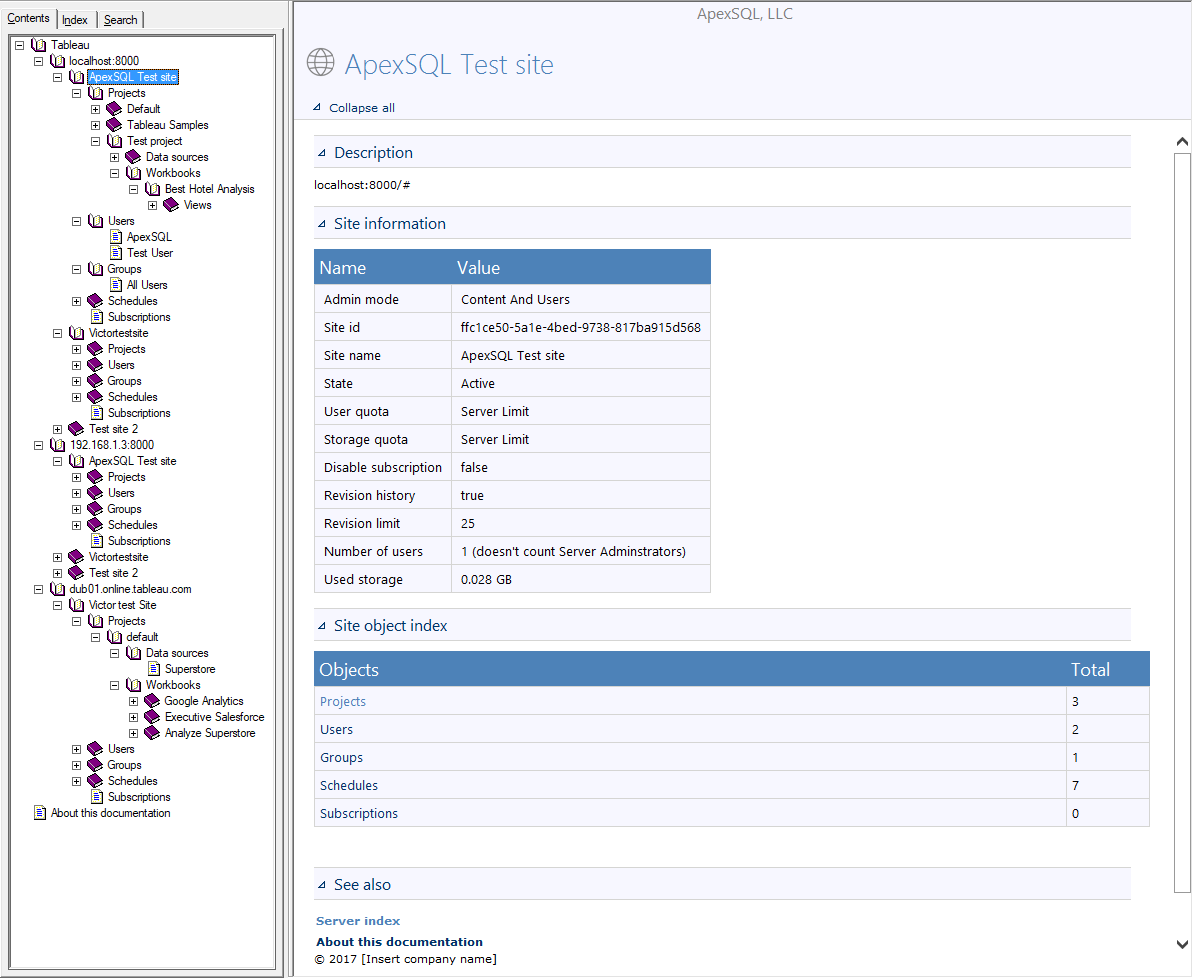
Depending on the output format and documentation style, the generated documentation will look similar to the ones shown on the following screenshots:


Setting up automated documentation
ApexSQL Doc provides a way to automate the documentation process through a command line interface e.g. CLI.
Automated documentation using a project file
The easiest way to setup an automated documentation script is to set the documentation in GUI, save it as a project file and run the project file using PowerShell.
Using the setup from the previous examples, let’s set a new default documentation output location by clicking the Options button in the Home ribbon menu, and then select the Output tab and in the “Default output folder” enter the location for the documentation output.

This way, the output location will be saved in the project file. If the output location isn’t specified, ApexSQL Doc will use its default output folder: “C:\Users\user_name\Documents\ApexSQL\ApexSQLDoc”.
Save the project file by clicking the Save button in the Home ribbon menu.
To execute the documentation process in PowerShell, use the following switch combination:
&’C:\Program Files\ApexSQL\ApexSQL Doc\ApexSQLDoc.com’ /pr: ‘E:\Desktop\Example project.axdp’ /v /f
$LASTEXITCODE
&’C:\Program Files\ApexSQL\ApexSQL Doc\ApexSQLDoc.com’– defines the path to ApexSQLDoc.com (this is the console application executable for ApexSQL Doc) which is necessary to recognize the CLI switches.
Using the /pr: switch, specify the project file for the documentation.
/v and /f are optional switches: /verbose (or shortly /v) enables documentation output details, and /force (or shortly /f) is a switch that overwrites previous documentation files with the same file name.
The $LASTEXITCODE command is used to see the return code e.g. 0 for success in ApexSQL Doc.
When the documentation process is done, the results will look similar to the following:
Creating the table of contents…
Creating the index file
Creating a documentation file…
Compiling in progress
Compiling an HTML help project
The documentation has been written in D:\documentations\Tableau documentation.chm
The operation has finished successfully
0
The return code: 0 in the end of the documentation means that the operation is successfully finished . The complete list of return codes can be found in this article
The other way to set up a documentation process involves being familiar with Tableau switches.
Select Save as batch from the Main ribbon menu to open the Save project as batch file window.

In the example batch script in the picture above, there are two Tableau Server connection switches /tts, one Tableau Online connection switch /tos and Tableau site details switch /tsd
For Tableau server connection switches, connection parameters must be provided as arguments. In the example on the above picture:
/tss:”[localhost:8000].[ApexSQL Test site].[Test site 2].[Victortestsite][:p3tar[.012345]]”
The switch format for Tableau server connection is:
/tss:”[Server URL:port].[Site 1].[Site 2].[Site 3][:user name[.password]]”
Notice that Sites are attached to the server URL with a dot “.”
After listing all the Sites to be included in the documentation, add the administrator user name and password. By specifying multiple Tableau Server switches, it is possible to document Tableau Sites from multiple servers in a single documentation.
The format for Tableau Online switch is very similar to Tableau server switch. From the example:
/tos:”[dub.onlie.tableau.com].[victortestsite][:kylecklein1@gmail.com[.012345678a]]”
The switch format is:
/tos:”[Tableau Online server URL].[Site name][:login email[.password]]”
It is also possible to add multiple Tableau Online Sites to the documentation by adding additional /tos switches.
As mentioned before, when a Tableau Site is selected, all site details are selected for documentation by default. The same logic is applied with switches. The role of /tsd switch is to specify the Site details to include in the documentation if not all Site details are selected.
/tsd:tp tds tdst tw twv tu tg tsb
In the example, the selected Site details are: projects, data sources, tables, workbooks, views, users, groups and subscriptions. Note that the argument switches are separated with an empty character.
The rest of the switches in the script are standard documentation output switches:
/ot – specifies the file format
/od – specifies the output directory
/on – specifies the output file name
To see the full description and usage examples of Tableau and other available switches in ApexSQL Doc, follow this link.
To use the script in PowerShell the script needs to be run using the following example:
&’C:\Program Files\ApexSQL\ApexSQL Doc\ApexSQLDoc.com’ /tss:’[localhost:8000].[ApexSQL Test site].[Test site 2].[Victortestsite][:p3tar[.012345]]’ /tss:’[192.168.1.3:8000].[Victortestsite][:p3tar[.012345]]’ /tos:’[dub01.online.tableau.com].[victortestsite][:kylecklein1@gmail.com[.012345678a]]’ /ot:chm /od:”D:\documentations” /on:Example documentation’.chm /v /f
$LASTEXITCODE
The results of the successful documentation will look similar to the following:
Chm project file creation
Creating the table of contents…
Creating the index file
Creating a documentation file…
Compiling in progress
Compiling an HTML help project
The documentation has been written in D:\documentations\Example documentation.chm
The operation has finished successfully
0
The created batch script in the Save project as batch file window can be saved as batch or PowerShell script and scheduled for an unattended documentation process.
FAQ’s
Q: Can I connect to a Tableau site in ApexSQL Doc as a publisher or any other user role other than server administrator?
A: No, to connect to Tableau Server or Tableau Online a server administrator account must be used.
Q: Can I change the default documentation name?
A: Yes, to learn more about customizing documentation names in ApexSQL Doc, refer to this article.
Q: Can I combine Tableau Sites and other data sources in a single documentation?
A: Yes, it is possible to combine multiple different data sources in the same documentation.
September 22, 2017


