


Challenge
One of the challenges when working with SQL source control systems is to have a sort of a “safe mechanism” that will allow developers to revert any changes made on the destination database. That kind of “mechanism” are source control labels, which are basically snapshots of the SQL source control repository captured at specific time where each object is saved as individual SQL script.
Best practice is to create a label after initial commit of the complete database, in order to have a starting point. After each build when new changes get “approved”, a new label can be created with corresponding comment for those changes. The main purpose of source control labels is to allow developers to get back to the last known working state of objects in the SQL source control repository, in order to continue working on new changes from scratch.
Solution
For the purpose of this article, a third-party tool, ApexSQL Diff will be used, as it can compare and synchronize SQL Server objects between databases, backups, script folders, SQL source control projects and labels and ApexSQL snapshots. ApexSQL Diff will be used to show the complete process of pulling object changes from a SQL source control label and deploying on a SQL Server database.
In the first part, everything will be done in the application’s GUI and project file will be created. Afterwards, the automation process will be created, so that a database state can be reverted via a source control label, with a single click at any time.
System requirements
Before moving forward, the following requirements should be met:
-
Make sure that the latest changes are deployed to a SQL database from a source control repository, so that SQL database contains all latest changes
- A label that will be used as a source for the comparison and synchronization is created. Check out the article on how to work with SQL database source control labels
System setup
After all requirements are met, let’s start with setting the complete process:
-
Run ApexSQL Diff
-
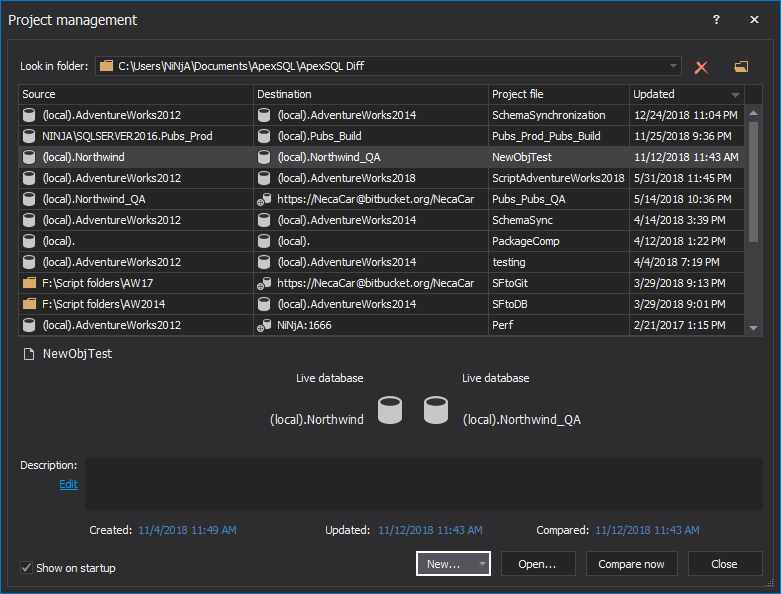
Once started, the Project management window will be shown in which the New button should be clicked:
-
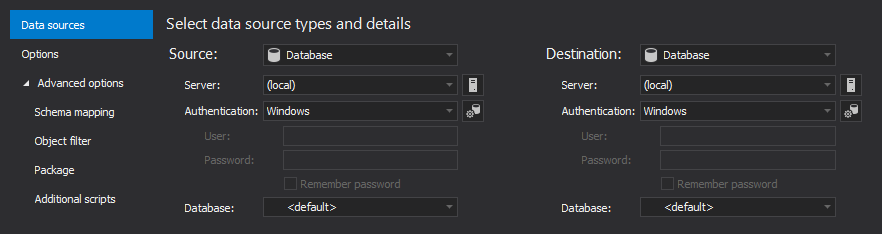
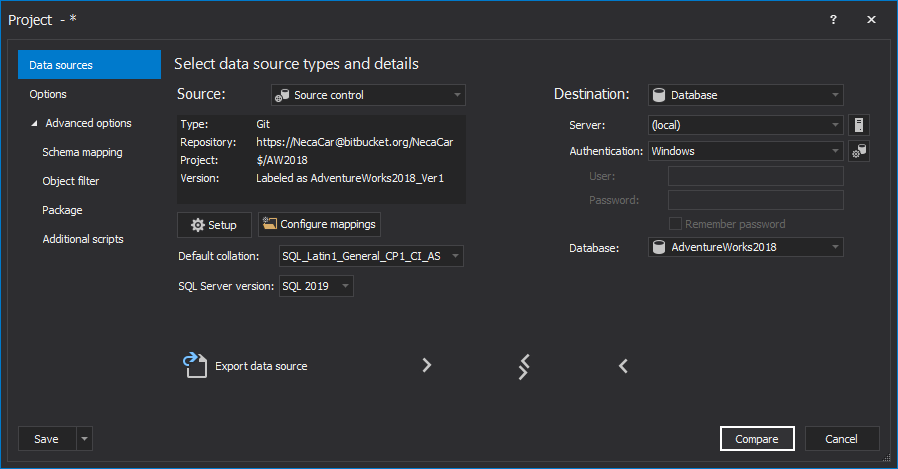
The Data sources tab will be shown where the source and destination should be set:
-
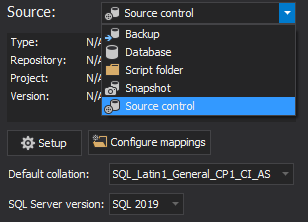
Under the Source drop-down list, choose a SQL Source control data source:
-
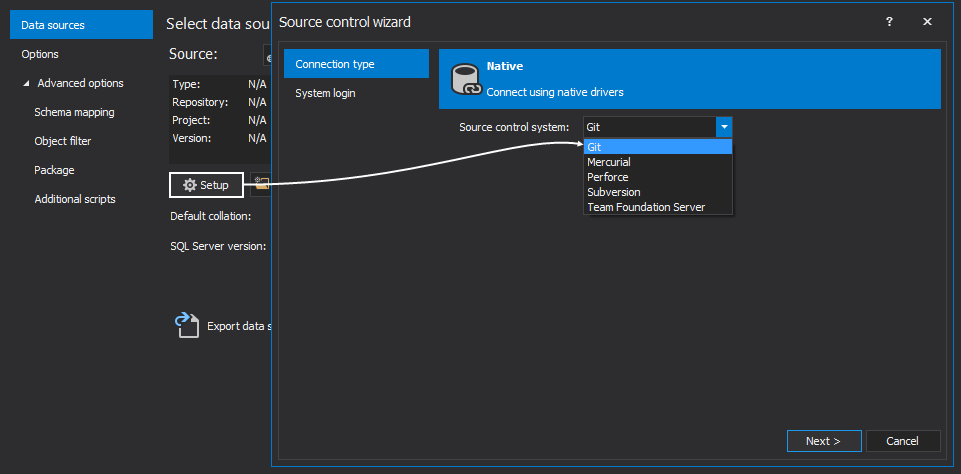
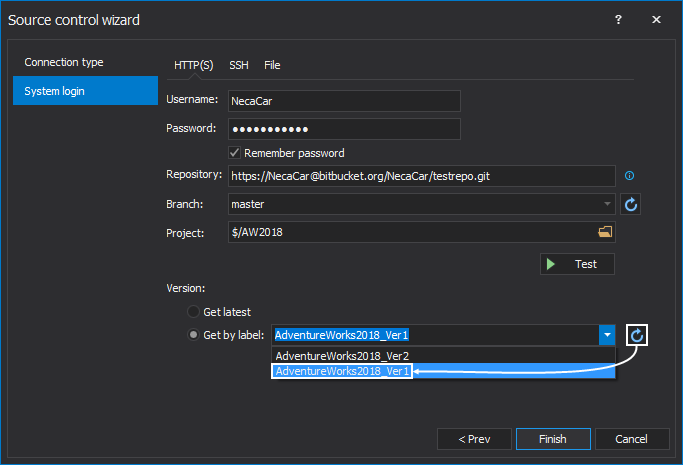
Click the Setup button to initiate the Source control wizard and for the purpose of this article let’s choose the Git source control system:
-
Under the System login tab, provide the SQL source control login information and under the Version section, switch to the Get by label option, click the Refresh button and choose a desired label that will be used as source:
-
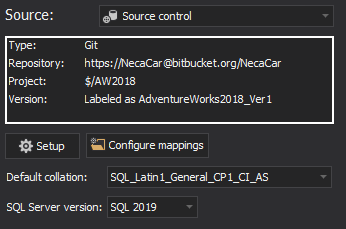
Once set, click the Finish button and SQL source control information will be loaded, along with the Default collation and SQL Server version:
-
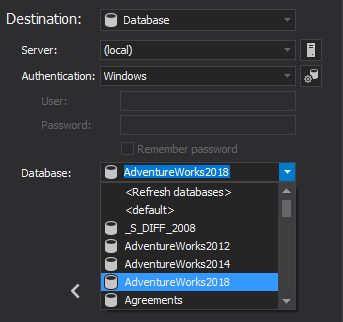
Under the Destination drop-down list, choose Database data source, specify server, authentication type and database:
-
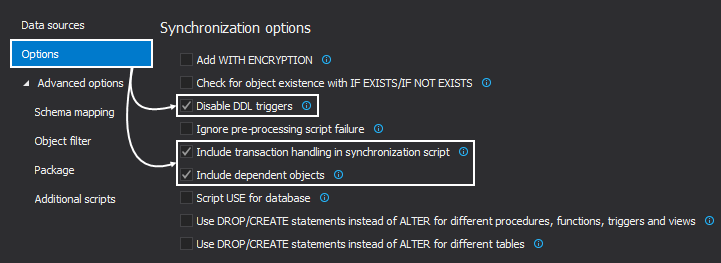
To ensure that synchronization process is error-free, switch to the Options tab, and make sure that these Synchronization options are checked:
-
Additionally, if there is no need to compare all objects, switch to the Object filter tab and check out the article on how to narrow schema comparison and synchronization to affected objects only:
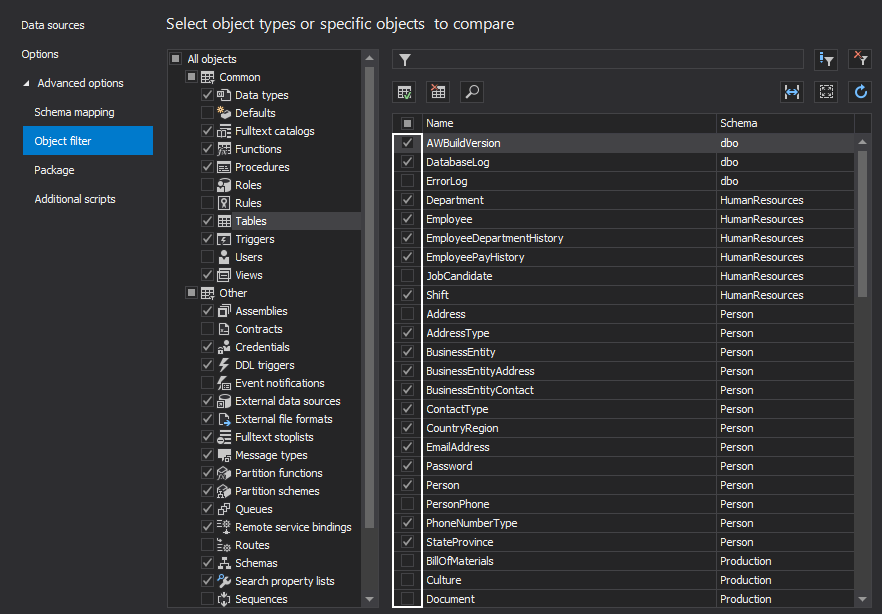
-
Once all pre-comparison options are set, click the Compare button from the bottom-right corner of the New project window to initiate the comparison process:
-
The comparison results are shown in the Results grid, from which all or specific objects can be checked for the synchronization process:
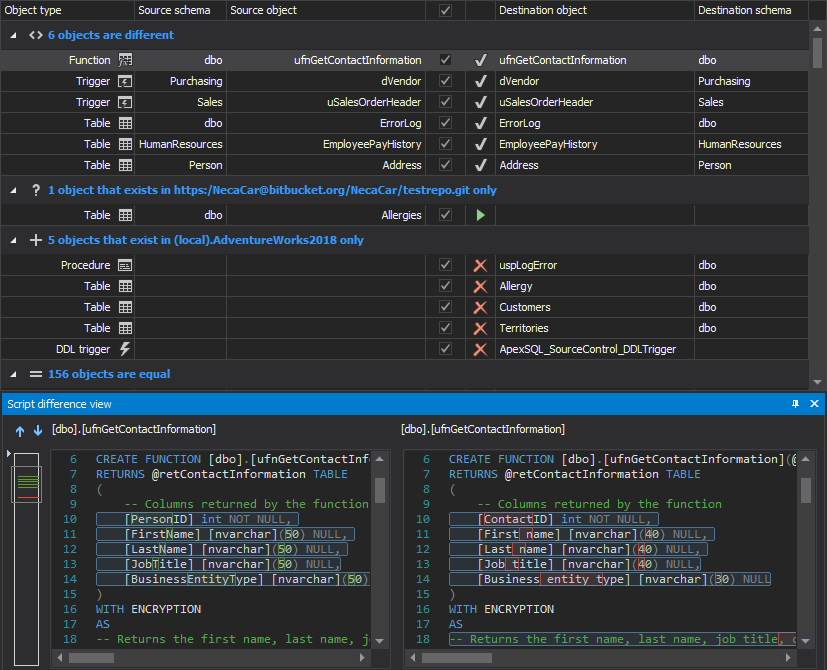
-
After all desired objects for the synchronization process are checked, click the Save button from the Home tab to save current set up to a project file:
-
Click the Synchronize button from the Home tab to initiate the Synchronization wizard:

-
The first step in the Synchronization wizard is to set the synchronization direction and it will be left as it’s shown, from source to destination:
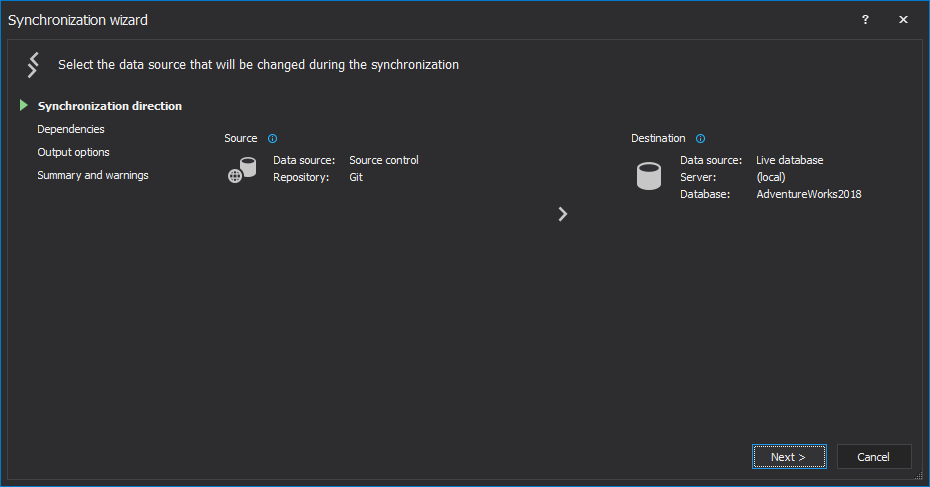
-
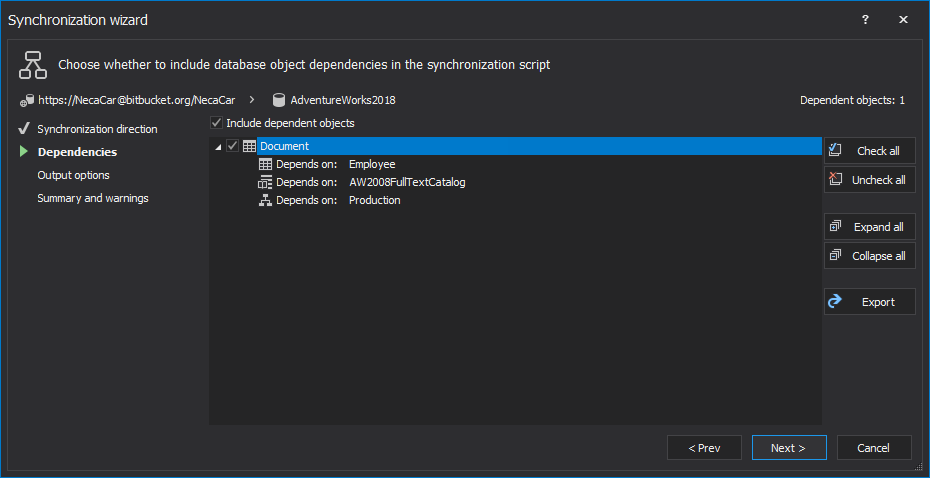
In the next step, any dependent objects will be automatically checked and included in the synchronization script, but these can be reviewed and any undesired can be excluded:
-
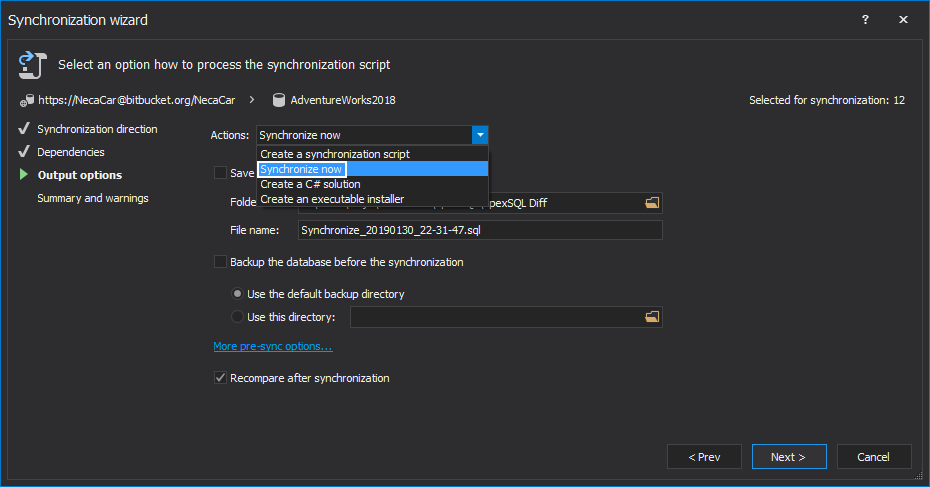
Under the Output options step, choose the Synchronize now action from the drop-down list, in order to execute the synchronization script directly on a database, or if preferred, choose the Create a synchronization script action in order to review it before execution:
-
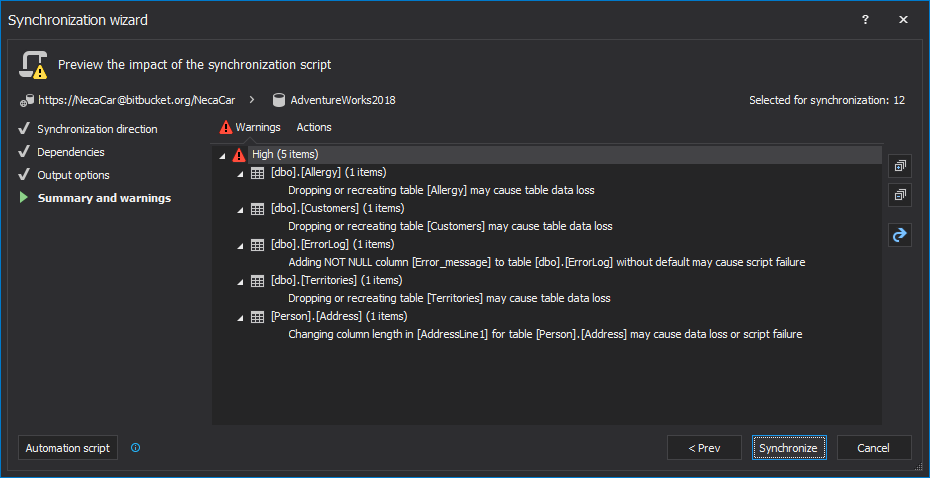
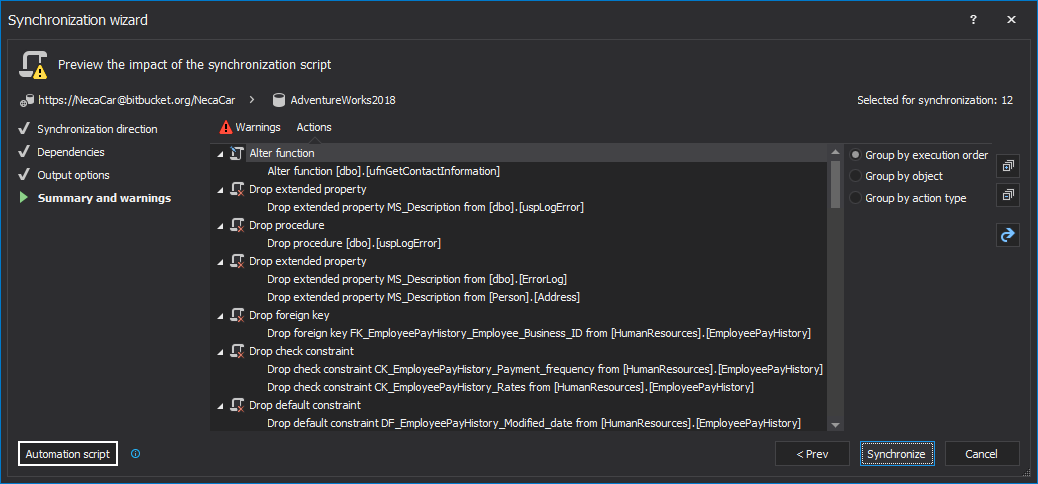
Under the last step, review any Warnings and summary of the execution actions:
-
If everything seems in order, click the Synchronize button to start the synchronization process:

-
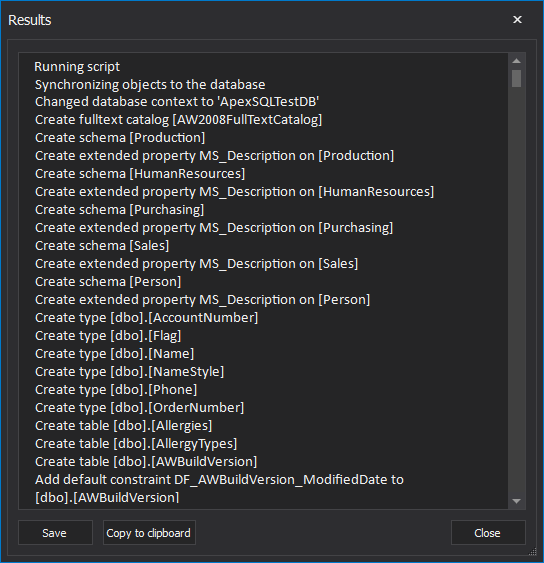
Once the synchronization is finished, the Results window will be shown, along with the execution results:

The saved project file can be used later for the automation process.
Automation process
Two types of automation scripts can be created and both from ApexSQL Diff’s GUI – Batch and PowerShell script. In the last step of the Synchronization wizard, click on the Automation script button from the bottom-left corner:
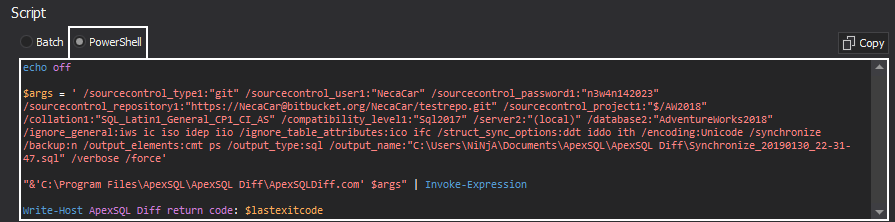
Once clicked, the Automation script window will be shown in which all previously set options are shown as CLI switches. By default, the Batch script is shown:

But it can be easily changed to the PowerShell script with a click on its radio button:
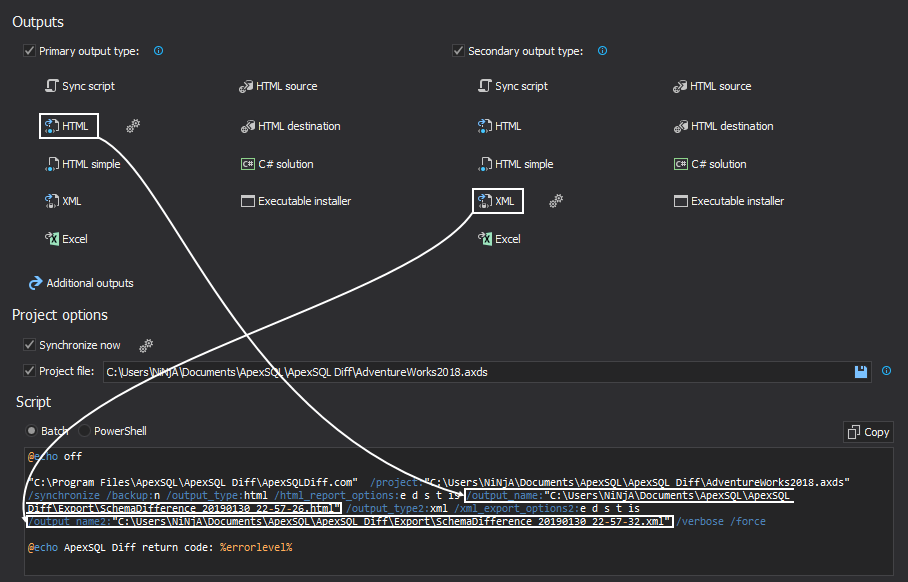
It is advised to check the Project file option, so that all passwords (for SQL Server authentication and SQL source control login) are encrypted in the saved project file:

The Automation script window allows users to set any report or export options of the comparison process:
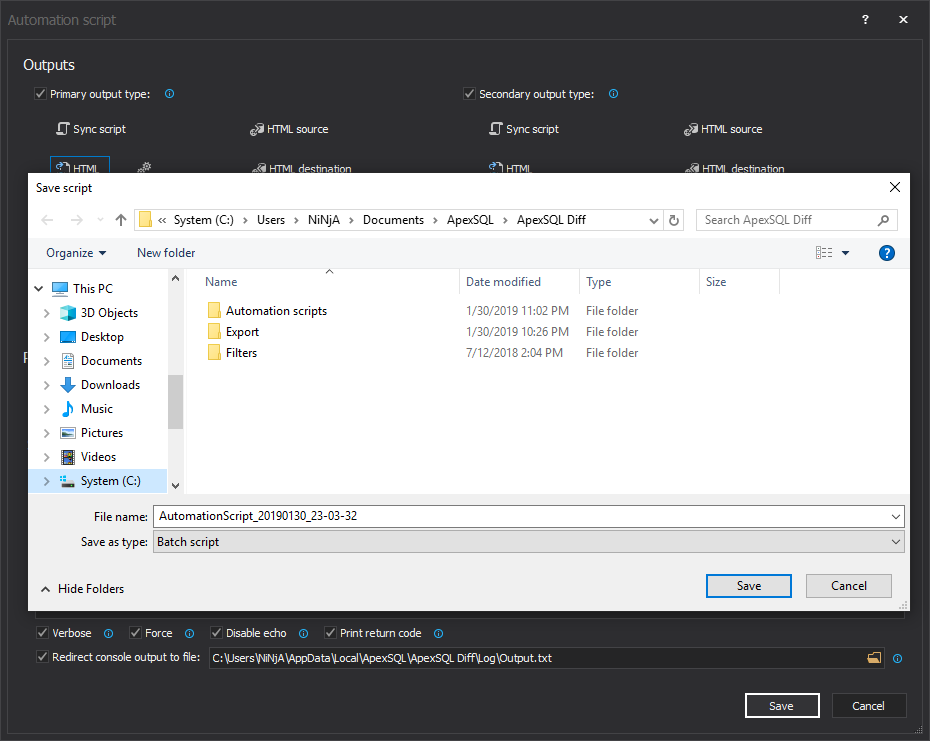
Also, there are a couple of additional options, such as the Redirect console output to file option which outputs all execution messages to a file:
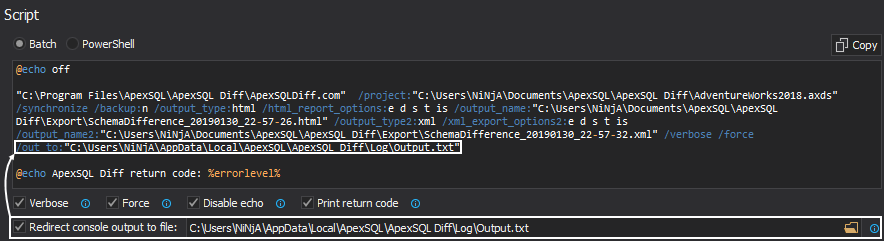
Once desired options are set, along with choosing the automation script, click the Save button from the bottom-right corner of the Automation script window and provide the location where it will be saved:
Now, each time when any issue occurs during the development of new objects or updating existing ones, developer can just click on the created automation script to run it and it will use the selected label state to deploy it on a database and revert any undesired changes.
February 4, 2019


