Many database developers want to export MySQL data that they got as the results of an executed query to a CSV, XML, JSON, or HTML file.
In this article, two different ways of exporting MySQL data to a CSV file will be shown.
The first way is by using the SELECT INTO … OUTFILE and the second way is by using the Export to CSV option from the ApexSQL Database Power Tools for VS Code extension.
The comma-separated values (CSV) files are very useful to exchange data between applications such as Microsoft Excel, Google Docs, etc. Also, when data is exported to the CSV file format, it can be used for analysis and can be formatted in the way you want.
Before we start to export MySQL data, let’s first create a database with one table, which will be used as an example.
Copy and execute the code below in some of the code editors:
CREATE DATABASE 'addresses';

USE addresses;


CREATE TABLE 'location' (
  'address_id' int NOT NULL AUTO_INCREMENT,
  'address' varchar(50) NOT NULL,
  'address2' varchar(50) DEFAULT NULL,
  PRIMARY KEY ('address_id')
);


INSERT INTO location VALUES
(NULL, '1586 Guaruj Place', '47 MySakila Drive'),
(NULL, '934 San Felipe de Puerto Plata Street', NULL),
(NULL, '360 Toulouse Parkway', '270, Toulon Boulevard');
As for a code editor, I use Visual Studio Code and, for connecting to MySQL server, I use the ApexSQL Database Power Tools for VS Code extension.
Export MySQL data to CSV file using the SELECT INTO … OUTFILE statement
The SELECT … INTO OUTFILE statement is used to write the data from the SELECT statement to a file.
So, let’s create an export command using the SELECT … INTO OUTFILE statement and export data to the desired location and file format.
Execute the following code:
SELECT
address,
address2,
address_id
FROM location INTO OUTFILE 'C:\ProgramData\MySQL\location.csv';
After executing the above code, the following message (error) may appear:
-
Access denied; you need (at least one of) the FILE privilege(s) for this operation
To export data from MySQL server, a user that is connected to a MySQL server needs to have the FILE privileges.
To see which privileges a current user have, execute the following command:
SHOW GRANTS FOR CURRENT_USER();
To add the FILE privileges, execute the code below:
GRANT FILE ON *.* TO 'jack'@'localhost';
Now, when the user has all the necessary privileges, execute again the SELECT … INTO OUTFILE statement:
SELECT
address,
address2,
address_id
FROM location INTO OUTFILE 'C:\ProgramData\MySQL\location.csv';
But now, a new message (error) may appear:
-
The MySQL server is running with the –secure-file-priv option so it cannot execute this statement
The message above tells us that every data export must be stored under a location that is set in the secure_file_priv variable.
To see what location is set, execute the following command:
SHOW VARIABLES LIKE "secure_file_priv";
Now, let’s change the OUTFILE location and execute the code:
SELECT
address,
address2,
address_id
FROM location INTO OUTFILE 'C:\ProgramData\MySQL\MySQL Server 8.0\Uploads\location.csv';
But, again, the same message appears in the Query results grid:
-
The MySQL server is running with the –secure-file-priv option so it cannot execute this statement
This problem appears because of backslashes in the file path. To resolve this, either add additional backslashes in front of existing ones:
SELECT
address,
address2,
address_id
FROM location INTO OUTFILE 'C:\\ProgramData\\MySQL\\MySQL Server 8.0\\Uploads\\location.csv';
Or, in the file path, change the direction of the backslashes:
SELECT
address,
address2,
address_id
FROM location INTO OUTFILE 'C:/ProgramData/MySQL/MySQL Server 8.0/Uploads/location.csv';
Again, execute the export statement, but now a different message appears:
-
File ‘C:/ProgramData/MySQL/MySQL Server 8.0/Uploads/location.csv’ already exists
This message informs us that the file with the location.csv name already exists on the specified location and a new one with the same name cannot be created. To resolve this either delete the existing file on the specified location or change the name of the file specified in the file path:
SELECT
address,
address2,
address_id
FROM location INTO OUTFILE 'C:/ProgramData/MySQL/MySQL Server 8.0/Uploads/locationNEW.csv';
Finally, we managed to export MySQL data:
The file will be created in the location that is specified in the secure_file_priv variable:
Change location for export MySQL data
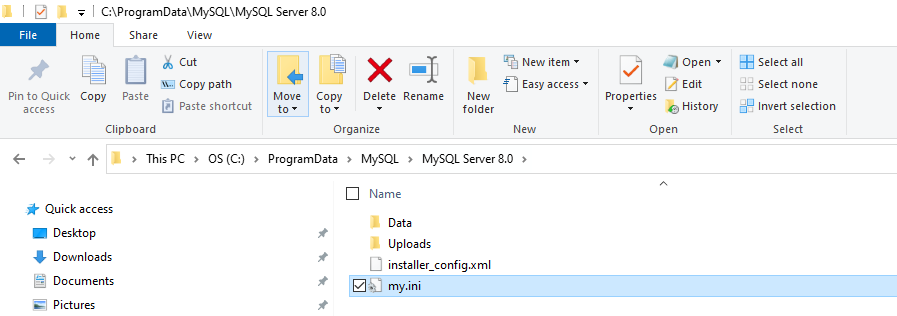
If you are not satisfied with the export location specified in the secure_file_priv variable, it can be changed by editing the my.ini configuration file. The my.ini file on Windows platform is usually located on this path: C:\ProgramData\MySQL\MySQL Server X.Y\
Open the my.ini file in one of the text editors (e.g., Notepad++), find the secure-file-priv variable, and set a new location to export MySQL data:

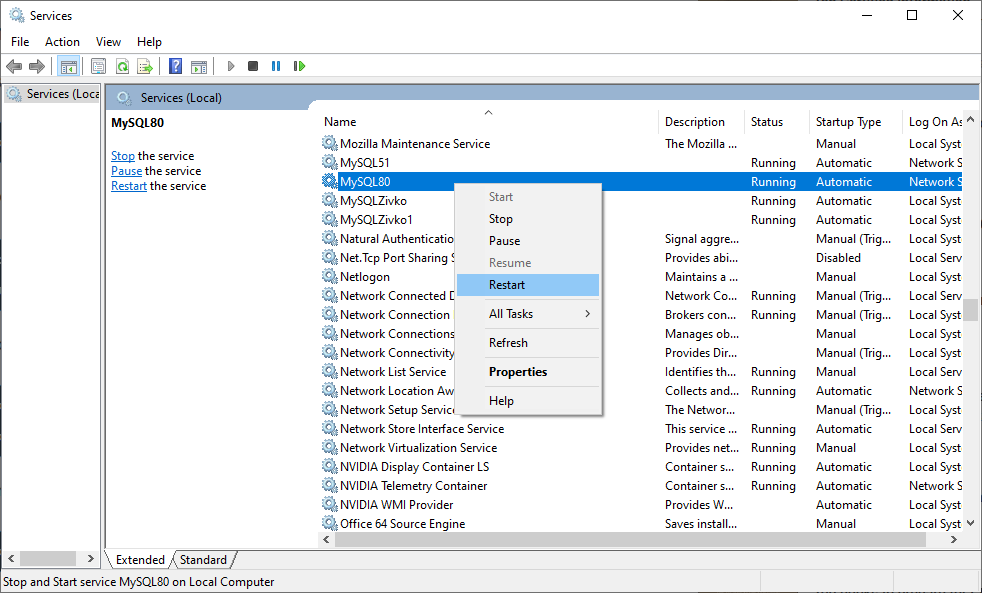
Restart MySQL service for the changes to take effect:
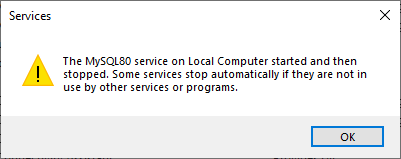
Please, make sure that a new path, that is provided in the secure-file-priv variable exists on the machine; otherwise, when restarting MySQL service, a similar warning message may appear:
Now, let’s export MySQL data to the new location, execute the following code:
SELECT
address,
address2,
address_id
FROM location INTO OUTFILE 'C:\ProgramData\MySQL\location.csv';
To disable the secure-file-priv variable and enable option to export MySQL data to any location, set the secure-file-priv value to empty string and restart MySQL service:
-
secure-file-priv = “”
Now, you should be able to export MySQL data in any location that is specified in OUTFILE. Of course, a specified location must exist; otherwise, when executing the code, the following message may appear in the Query results grid:
-
Can’t create/write to file ‘C:\Bokito\location.csv’ (OS errno 2 – No such file or directory)
Once the data are exported to the desired location, let’s open it using some of the text editors (e.g., Notepad) and see what is exported:
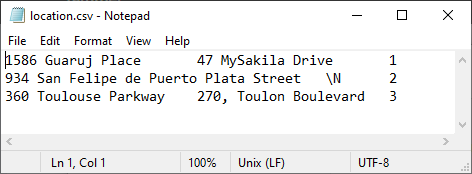
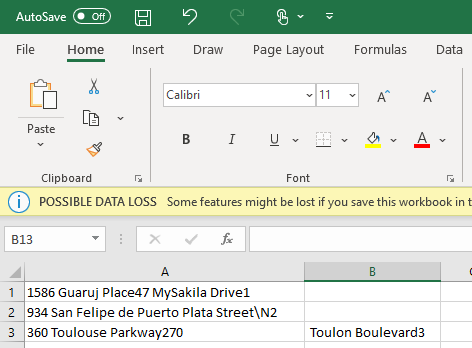
Well, the exported data is there, but it’s very hard to read it. Furthermore, if the exported data is opened in Excel, it will be seen that all data are placed in one column except the last one, which is placed in the second column, and this is very strange:
Let’s fix that by adding some available MySQL options (command) in the exporting query.
SELECT
address,
address2,
address_id
FROM location INTO OUTFILE 'C:/ProgramData/MySQL/location.csv'
FIELDS TERMINATED BY ','
ENCLOSED BY '"'
LINES TERMINATED BY '\r\n';

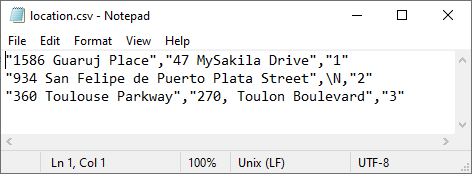
As can be seen below, when opening the exported file in Notepad, numeric fields are surrounded with quotation marks:
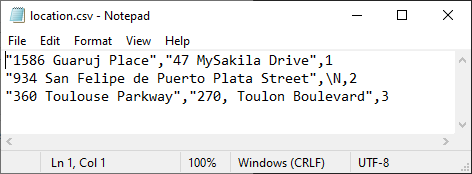
If you don’t need them, then, in the export query, instead of ENCLOSED BY, put the OPTIONALLY ENCLOSED BY:
SELECT
address,
address2,
address_id
FROM location INTO OUTFILE 'C:/ProgramData/MySQL/location.csv'
FIELDS TERMINATED BY ','
OPTIONALLY ENCLOSED BY '"'
LINES TERMINATED BY '\r\n';
The result will be something like this:
Also, it can be noticed that in the explored file instead of NULL value stands as \N:

To fix this and to put some other value instead of \N, execute the code below:
SELECT
address,
IFNULL(address2, 'N/A'),
address_id
FROM location INTO OUTFILE 'C:/ProgramData/MySQL/location.csv'
FIELDS TERMINATED BY ','
OPTIONALLY ENCLOSED BY '"'
LINES TERMINATED BY '\r\n';
The exported file shows N/A instead of \N value:

Now, only one thing is missing in the exported file, and that is column headers. Let’s again modify the query and export MySQL data:
SELECT 'Address', 'Address2', 'Address_ID'
UNION
SELECT
address,
IFNULL(address2, 'N/A'),
address_id
FROM location INTO OUTFILE 'C:/ProgramData/MySQL/location.csv'
FIELDS TERMINATED BY ','
OPTIONALLY ENCLOSED BY '"'
LINES TERMINATED BY '\r\n';

Export MySQL data using third-party software
ApexSQL Database Power Tools for VS Code is a Visual Studio Code extension that allows users to connect to MySQL and MariaDB instances, execute and display queries results, export query results into XLSX, CSV, HTML, JSON file formats, and generate DDL and DML scripts from ApexSQL server explorer. All of this is possible on multiple computing platforms like Windows, Linux, and macOS.
To export MySQL data to CSV file format, in the query editor, execute a query for which results wants to export:
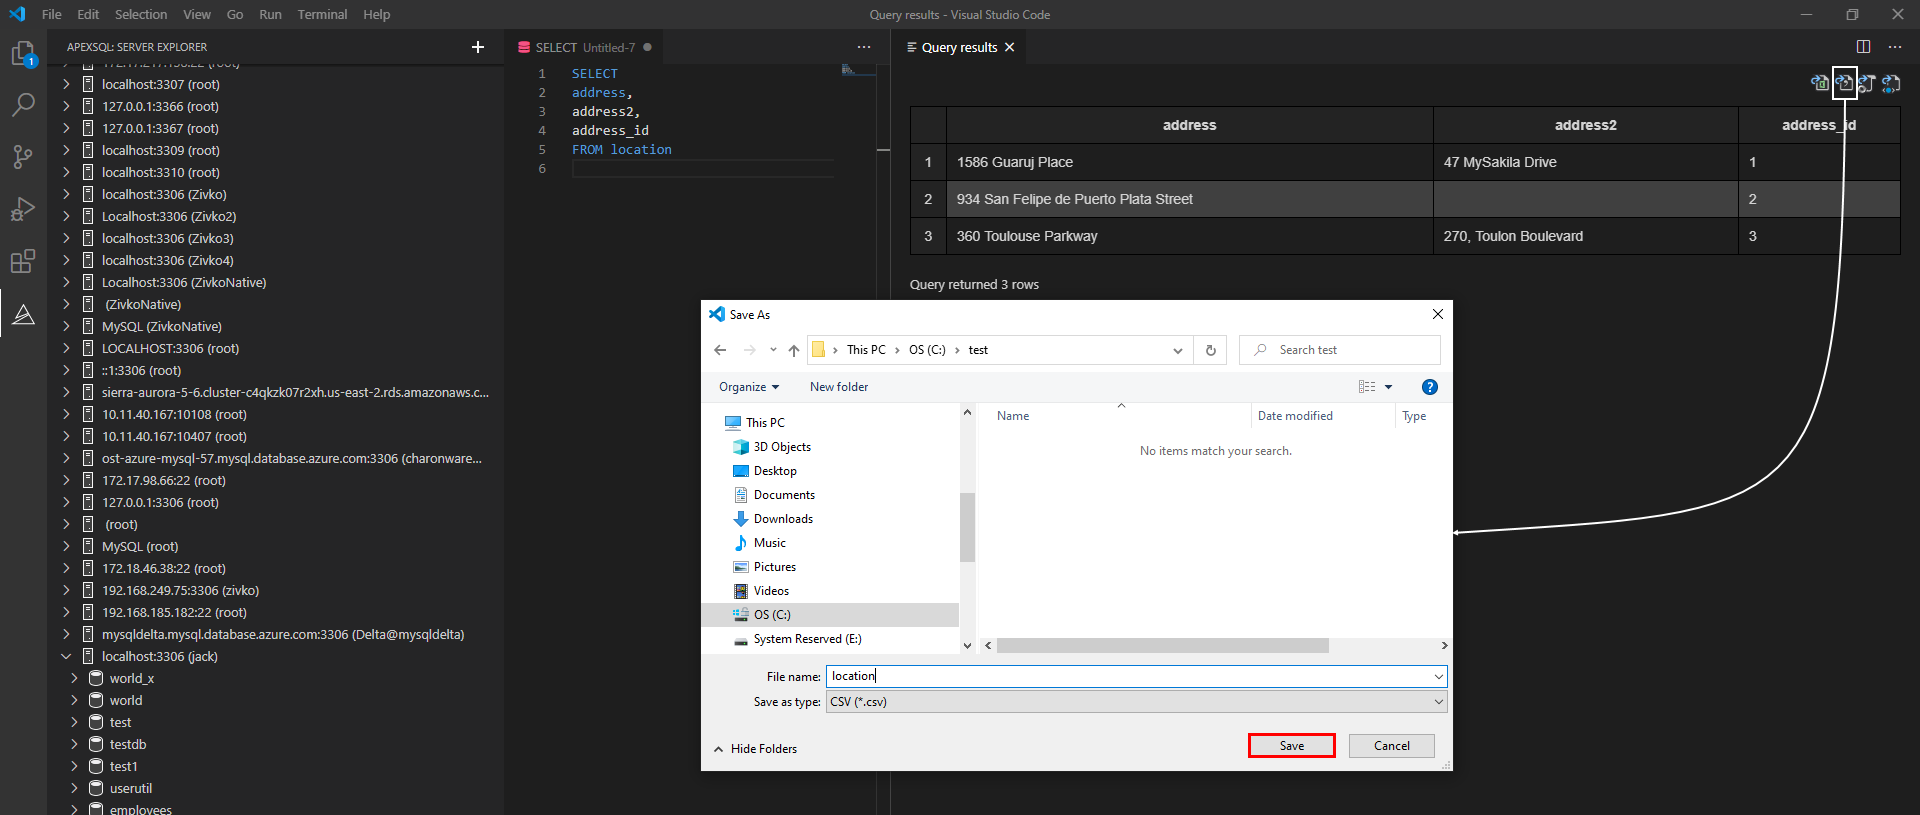
In the top right corner of the Query results grid, click the Export to CSV button. In the Save As dialog, choose a location for exporting data, enter a name for CSV file and click the Save button:
Exported data will be similar to this:

May 21, 2020


