


Configuring a safe and secure environment for your SQL Server instance is a complex task. SQL Server security must be set on the SQL Server instance, operating system, firewall, antivirus program, etc. But failing to set up security properly can bring a lot of headaches and even irreversible damage
In terms of SQL Server security, there are both internal and external threats, deliberate and inadvertent. Let’s look at one example. You have a user (help desk technician) who has more privileges on the HR records than he/she should. He/she can inadvertently delete an invoice item or customer address
Another example would be a high security environment, where even seeing sensitive data by an unprivileged user must be prevented. An employee who has been granted more privileges than needed can see sensitive records, such as bank account number, transactions or personal health data
External threats come from hackers as SQL injections, brute-force cracking of weak credentials, network eavesdropping, and various attacks. These attacks are usually more harmful, as unlike the internal ones, the external target whole databases and tables. The goal of hacker attacks can be theft and disclosure of customers’ credit and debit card details, personal details, names and social security numbers
A sensitive data leak, unauthorized access and changes, records missing, database backups being stolen are more likely to happen on an unsecure SQL Server instance, than in a well-protected environment
Recommended Microsoft SQL Server and Windows Server security settings
In order to effectively set SQL Server security, it’s recommended to apply the following security actions before running a SQL Server setup:
- Apply all Microsoft Windows service packs and updates
- Create a dedicated account under which SQL Server service will run and make sure it only has the necessary privileges. Do not use an account with admin privileges to run SQL Server service
- Grant access to the host only to the privileged users
SQL Server instance security considerations that reduce the surface area of potential attacks:
- Don’t install unnecessary SQL Server features (if they have already been installed, disable them)
- Apply all Microsoft SQL Server service packs and updates
- Use Windows authentication, if possible
- Configure access privileges for logins, users and roles to meet minimal requirements
- Change the default SQL Server ports (1433 and 1434)
- Allow access to the SQL Server installation files, folders and database files only to the account used to run SQL Server service
- Monitor successful and failed logins. This will not prevent an attacker, but is useful for identifying security gaps
- Disable remote logins, unless necessary
- Use Transparent Data Encryption
Login, user and role privileges
When it comes to configuring access privileges for your users, it’s necessary to first determine who needs to do what. It’s recommended to grant the users lowest possible permissions, to avoid any unprivileged access
The terms SQL Server login and user are often mixed up, although they are quite different
A SQL Server login is a security entity defined on a SQL Server instance. You can use it to connect to a SQL Server instance, but if it’s not mapped to a database user, you will not be able to connect to a specific database. One login can be mapped to a different user in each database
A user is a security entity defined to access a database. Permissions on databases and database objects (tables, views, etc.) are granted or denied to the database user. A user must be mapped to a SQL login, certificate or key
Another security entity is a SQL Server role – a set of permissions that can be granted or denied to groups of users. Roles provide quicker permission managing for a group of users that should be granted the same set of privileges. A user can be a member of multiple roles. By default, all logins are associated to the public role. The public role cannot be deleted and logins cannot be removed from it
When working with SQL logins and users, consider the following security actions:
- Enforce a strong password policy
- Disable or rename the “sa” login
- Remove unused logins
- Remove/disable the guest user
- Disable anonymous logins
- Don’t grant any permissions to the public role
As recommended, a user should not be given more privileges than he needs to do his work. To enable John Smith to modify just the HumanRespurces.EmployeeDepartmentHistory table, and restrict from even seeing any of the other table data, you’ll need to do the following:
-
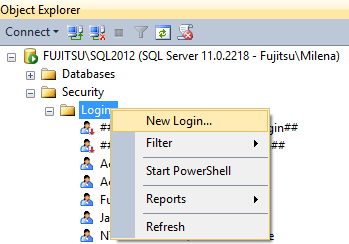
Create a new login. In SQL Server Management Studio, right-click Logins and select New Login
-
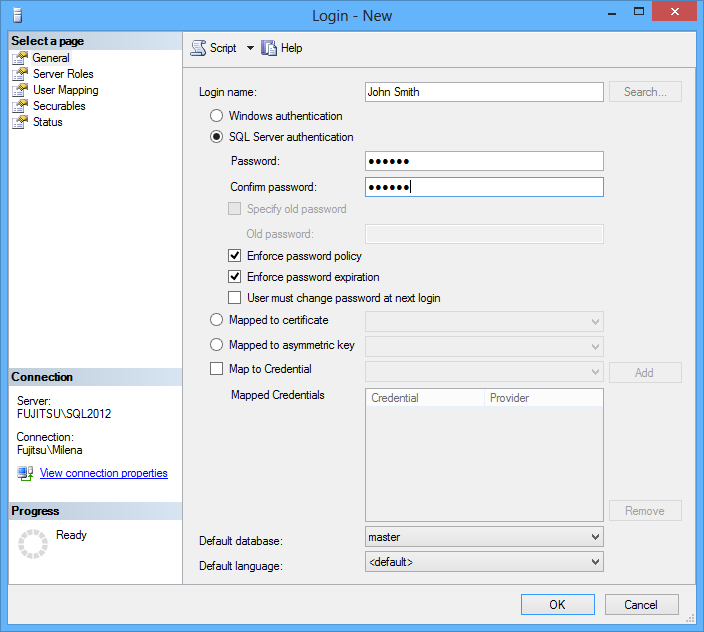
Enter a login name and select the authentication type (Windows or SQL Server). If the SQL Server authentication is used, select to enforce the password policy and that users are not able to change the passwords themselves
-
In the Server Roles tab, leave just the public role checked

-
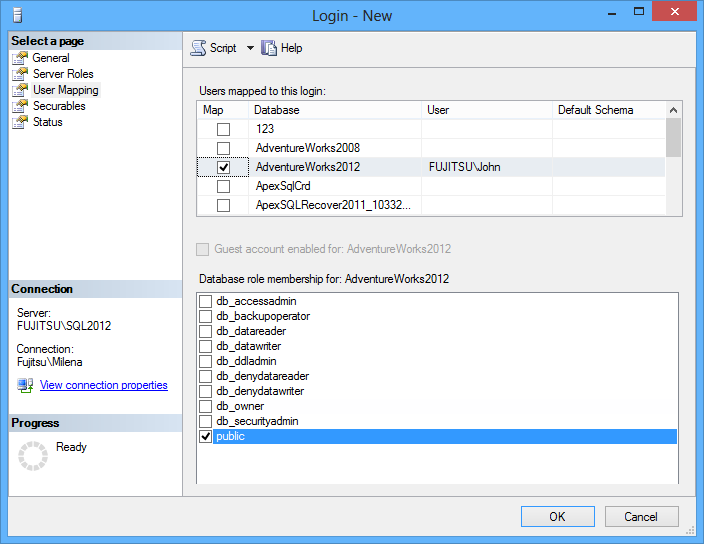
In the User mapping tab, select the database this user will access and uncheck all database roles except public
-
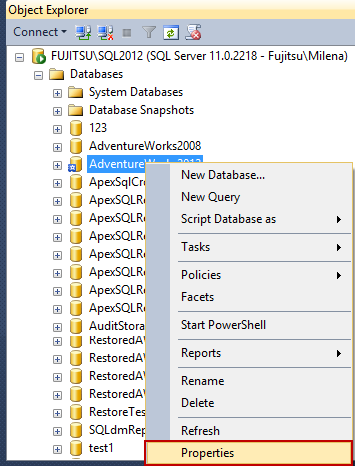
In Object Explorer, right the database John Smith should access and select Properties
-
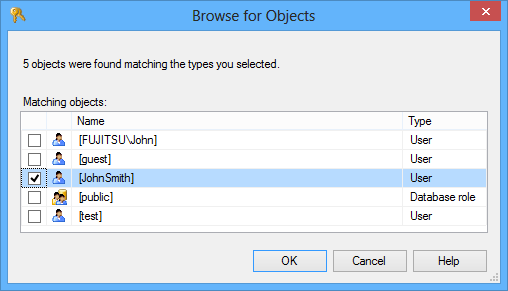
In the Table properties dialog, click Search

-
Select the [JohnSmith] user and click OK
-
Back in the Table properties dialog, check the Grant checkboxes just for the operations you want John Smith to be able to perform – in this example to insert and update the records
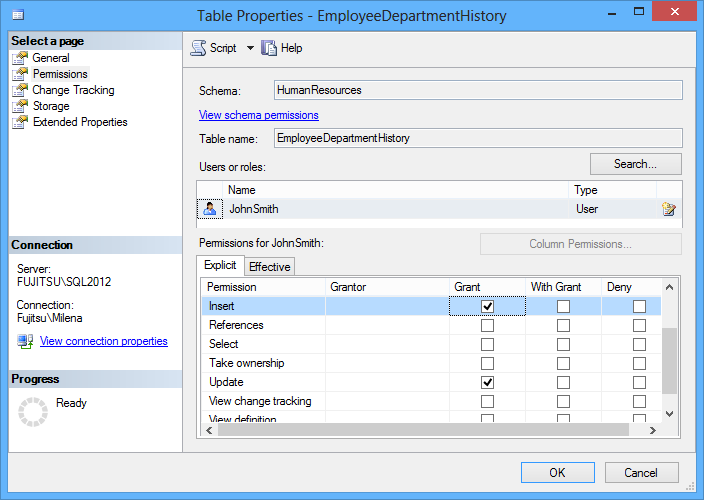
Now, all John Smith can do from a client application or SQL Server Management Studio is to insert and update data in the HumanResources.EmployeeDepartmentHistory table
User privileges on a SQL Server database object can also be granted using T-SQL statements. For the example above, to grant permissions to insert and update data in the HumanResources.EmployeeDepartmentHistory table:
USE AdventureWorks2012;
GRANT INSERT, UPDATE ON HumanResources.EmployeeDepartmentHistory TO JohnSmith;
GO
Similar goes for denying object permissions:
USE AdventureWorks2012;
DENY INSERT, UPDATE ON HumanResources.EmployeeDepartmentHistory TO JohnSmith;
GO
Staying secure
Setting proper permissions for your users is just the first step. To stay safe, you’ll need to monitor the security settings of the SQL Server instance and databases, update them if needed and investigate any unexpected user/login/role change. This is where ApexSQL Audit can help
ApexSQL Audit is a SQL Server auditing and compliance tool, built to comply with auditing regulations. It provides a wide range of possibilities for auditing access, changes, and security on SQL Server instances, databases, objects, and data. It also audits executed queries and warnings encountered on tables, stored procedures, functions, and views. Captured information is saved in a centralized auditing repository, and used to create comprehensive reports. ApexSQL Audit can audit Microsoft SQL Server 2012, 2008, and 2005, but note that the central instance requires Microsoft SQL Server 2008 or greater
To set up SQL Server and database auditing using ApexSQL Audit:
- Start ApexSQL Audit
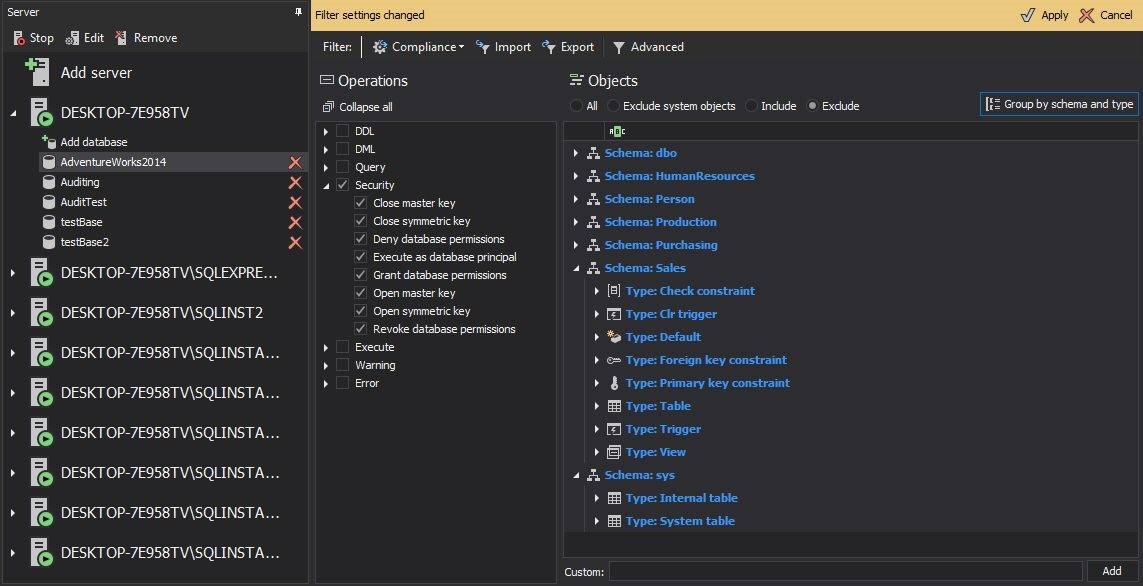
- Select the SQL Server instance and database you want to audit
- Make sure that the Security operations are selected
-
Click Apply in the Filter settings changed menu
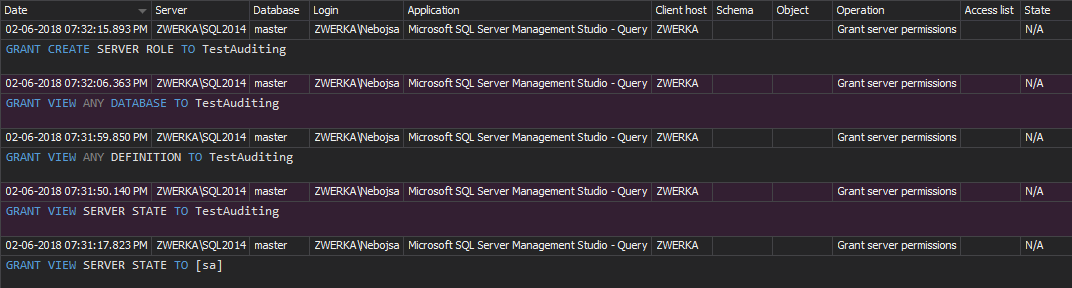
-
All changes made to SQL Server users, logins object permissions will be audited and ApexSQL Audit will show them in the reports
-
Click Reports in the menu to open reports, to see:
-
SQL Server security changes on all security entities -logins, users, roles – use the Security configuration history report
-
Audit logins and logouts, use Logon activity history report

-
Changes in server or database permissions, use the Permission changes report

-
Login fails – use Unauthorized access

-
To make sure your SQL Server instance, database, objects and data stay safe, keeping track of permission changes and actions taken on the SQL Server logins, users and roles is necessary. Any suspicious change or activity should be examined, as it’s a potential threat to your environment. Use ApexSQL Audit to make sure that no SQL Server security change goes unnoticed
September 11, 2013


