


Scenario
When working in a development environment, developers often use Visual Studio for coding, and it also has an option to connect to SQL Server and open a query window in which they can work on creating new objects or updating existing objects directly on their local Dev database, which further requires a way to compare SQL Server database schemas with the QA database.
Once the development part is done, developers will need a tool to compare SQL Server database schemas and push schema changes to the QA database for further testing before reaching production. So, they need a tool that can handle comparison of SQL Server database schemas, push (synchronize) schema changes to the QA database without errors and enable developers to review actions and any potential issues before the synchronization process.
Out of the box solution in Visual Studio
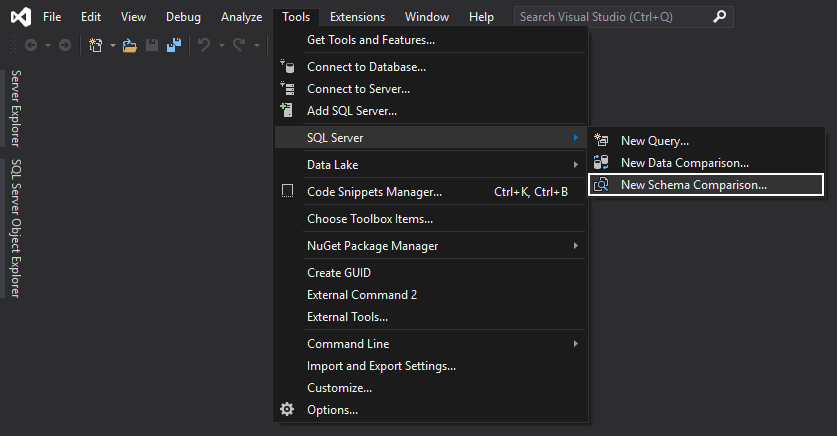
First, let’s start with the built-in feature that Visual Studio has for comparing SQL Server database schemas – the Schema Comparison feature. This feature can be located under the Tools > SQL Server > New Schema Comparison:
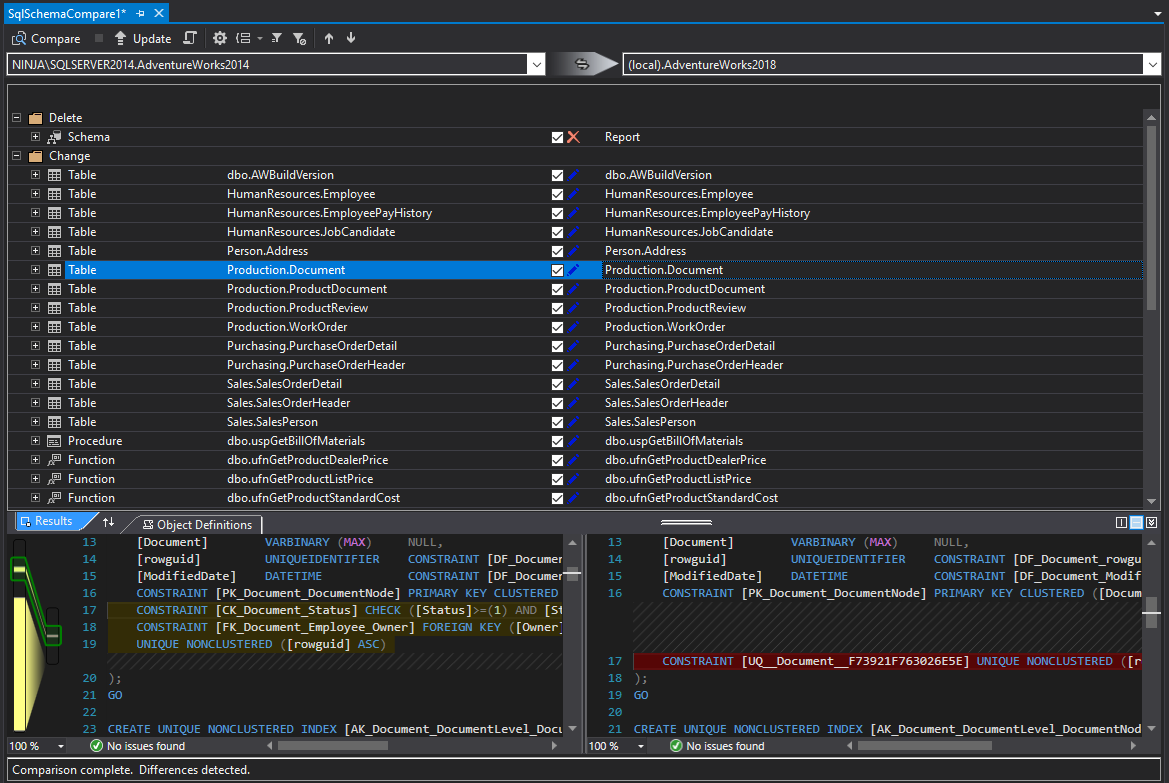
In the newly opened query window, the SqlSchemaCompare query window, source, and target SQL databases should be chosen from the drop-down list:

Once selected, the Compare button should be clicked, and the comparison process will be initiated. This will provide results and for each selected object in the Results grid, the source, and target SQL object script can be seen in the Object Definitions panel below:
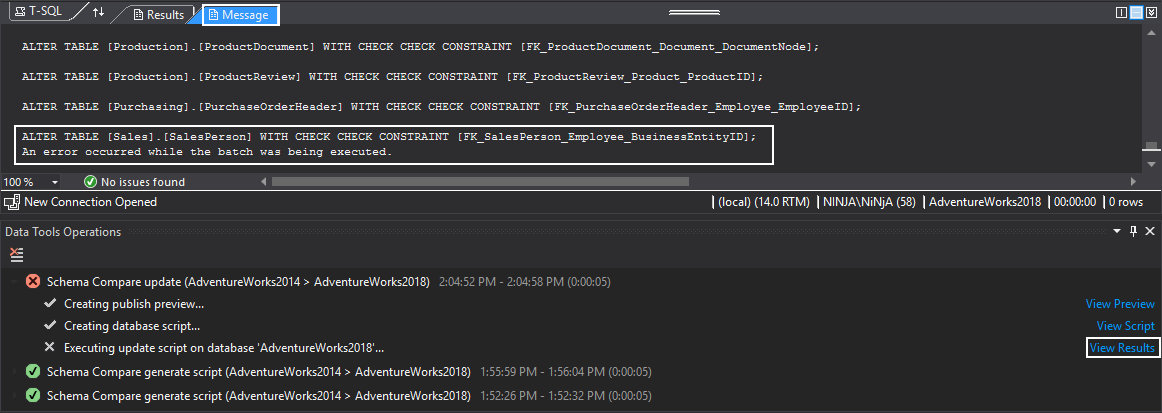
Once desired objects are selected to be updated in the target database, click the Update button and the process will start:

After the update process is finished, the execution messages are shown in the Messages panel. This is where all information can be viewed to check if a target SQL database was successfully updated or if it failed and why:
To learn more, check out this article on how to compare SQL Server database schemas in Visual Studio.
As explained, the Schema Compare feature of Visual Studio has an easy way to compare SQL Server database schemas, and it has almost everything when it comes to scenarios like this one. However, it’s noticeable lack of a couple of things:
- Backup a target database before synchronization, or a rollback script in cases when something goes wrong
- Warnings before the synchronization process starts
- More detailed object filtering
- Dependent database objects
- Support to synchronize other data source types
- Automation of the comparison and synchronization process
Solution with 3rd party tool
The other tool that will be described in this article is ApexSQL Diff – a standalone tool, with an option to integrate into SQL Server Management Studio (SSMS) and Visual Studio. This tool can compare SQL Server database schemas, backups, script folders, snapshots, and source control projects. While it can compare the previously mentioned data sources, it can create a synchronization SQL script direct synchronization on a destination data source, C# solution, and executable installer.
To perform SQL Server database schema comparison from Visual Studio with ApexSQL Diff, during the installation of the application under the integration step, check the Visual Studio version that will be used:
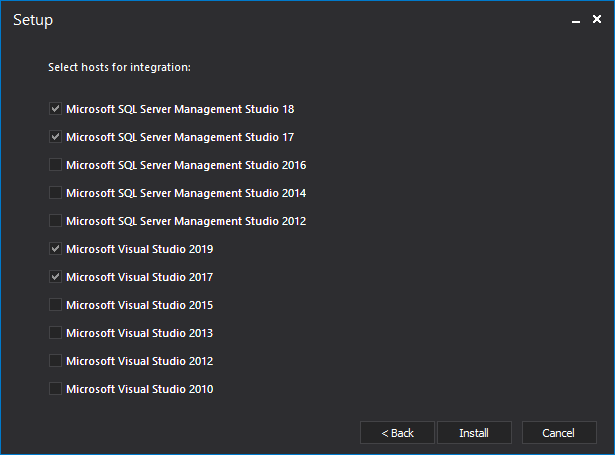
By default, Visual Studio and SSMS versions that are installed on a machine are shown in this step, but when all versions are installed, make sure to check only the desired one(s). In this example, Visual Studio 2017 and 2019 are checked for the integration, but the process will be shown in Visual Studio 2019.
Once the application is installed, along with the host integration part, it can be accessed from Visual Studio main menu by going to Extensions > ApexSQL > ApexSQL Diff:

To initiate the SQL Server database schemas comparison with ApexSQL Diff, follow these steps:
-
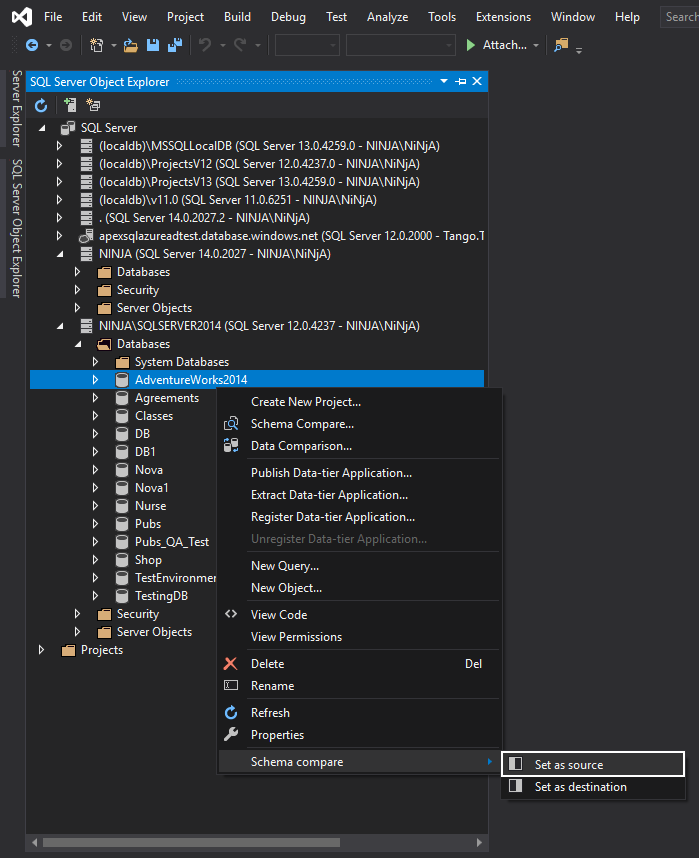
Connect to a SQL Server database via the Server Explorer or SQL Server Object Explorer panel, or if a connection already exists, right-click it, locate the Schema compare in the list and click the Set as source command:
-
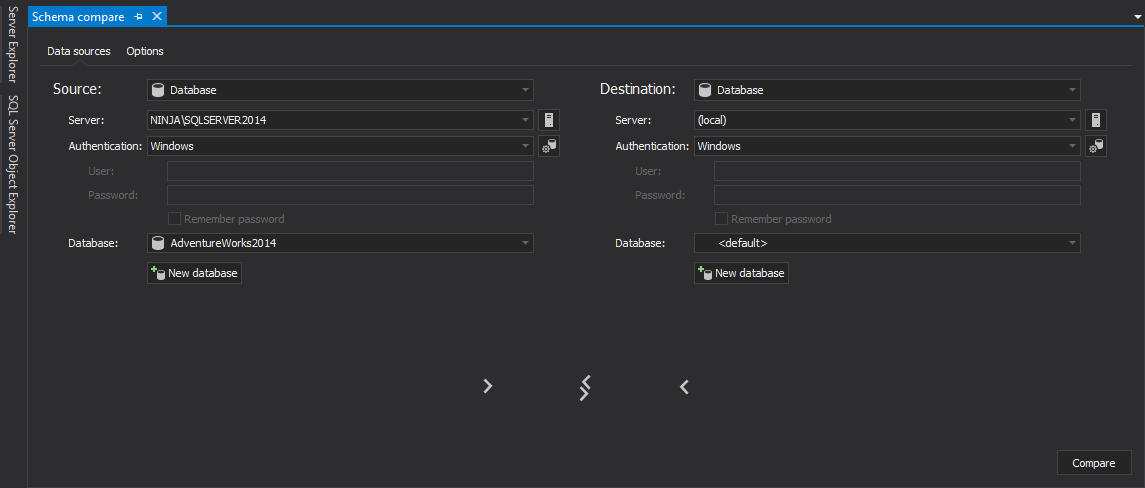
The Schema comparison query window is now shown and a source database is loaded:
-
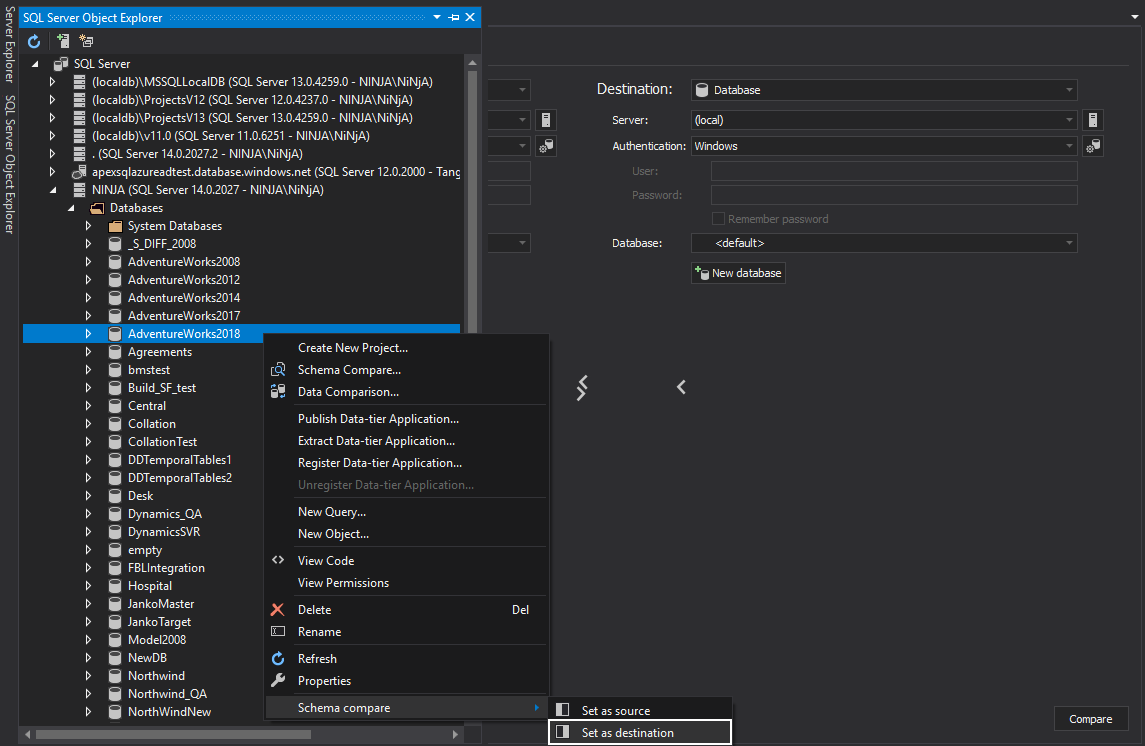
Now, right-click a destination database that needs to be synchronized and click the Set as destination command:
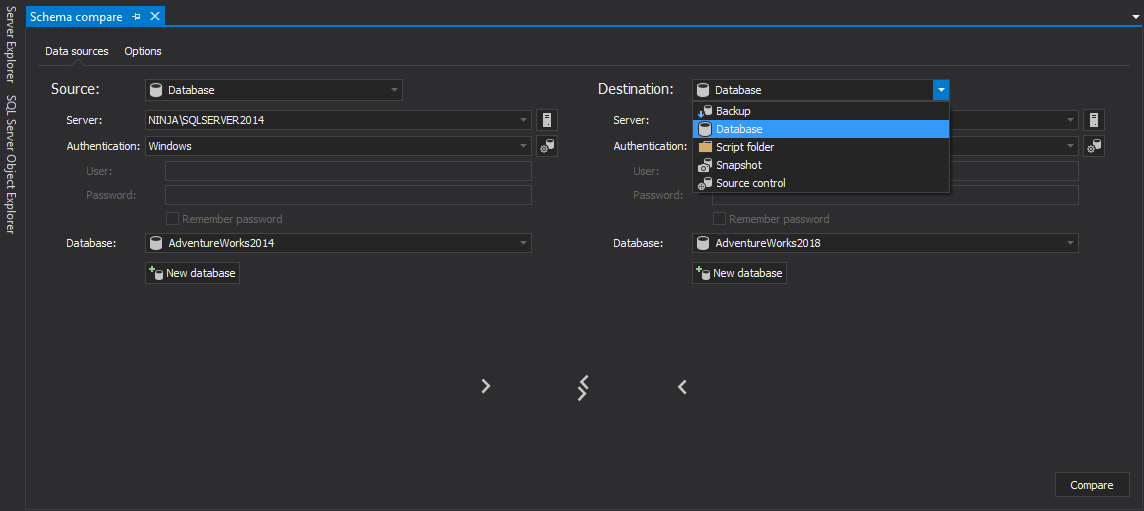
Note that instead of the right-click command, a destination database information can be entered directly in the Schema compare query window and the Destination data type can be changed, so it doesn’t necessary limits comparison to a SQL Server database, rather than choosing one of the five data source types mentioned above:
-
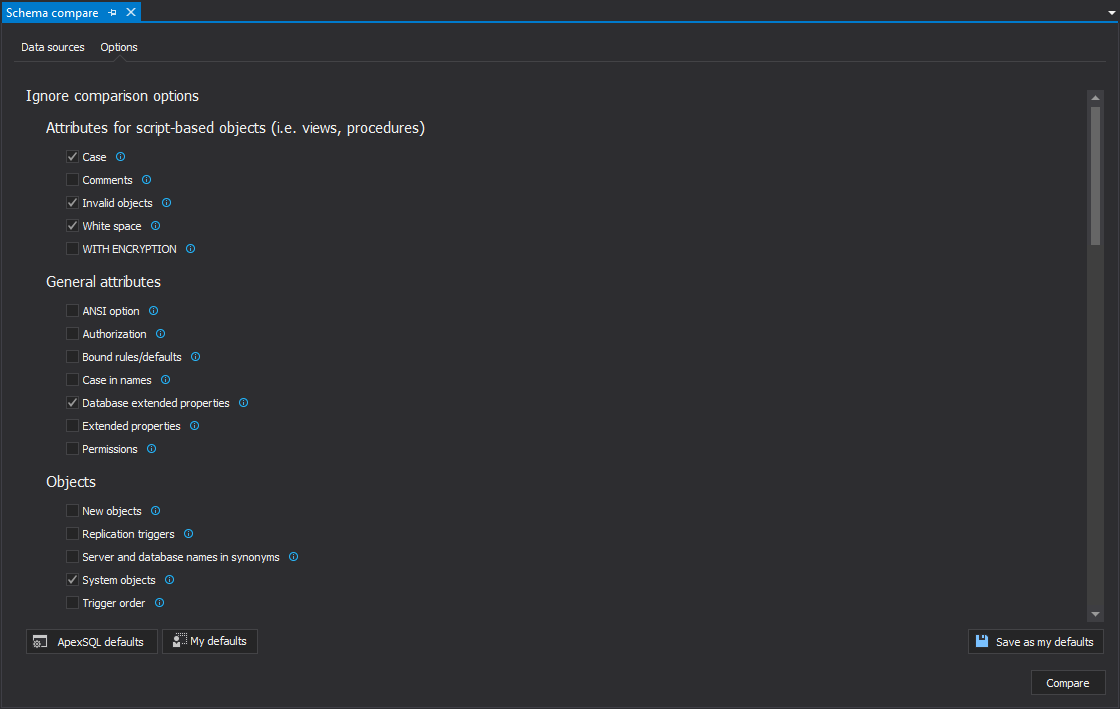
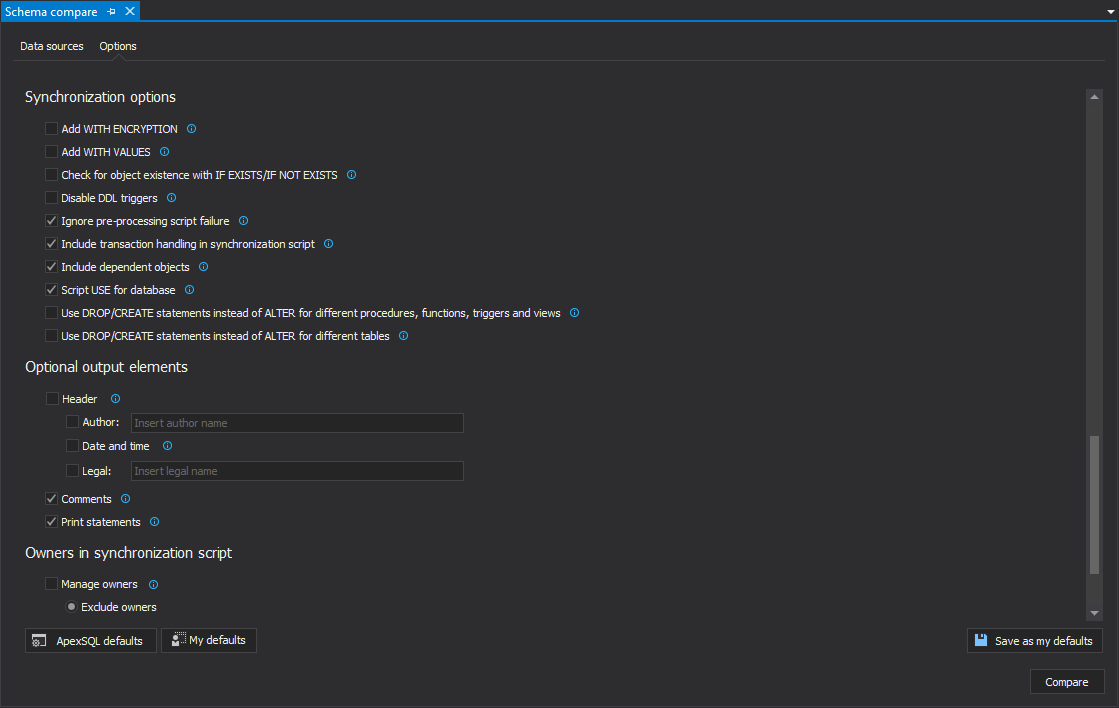
Before starting the comparison process, switch to the Options tab in the Schema compare query window where various comparison and synchronization options can be set:
- Now, when everything is set, in the bottom-right corner click the Compare button and the compare of SQL Server database schema will start by running the standalone application
-
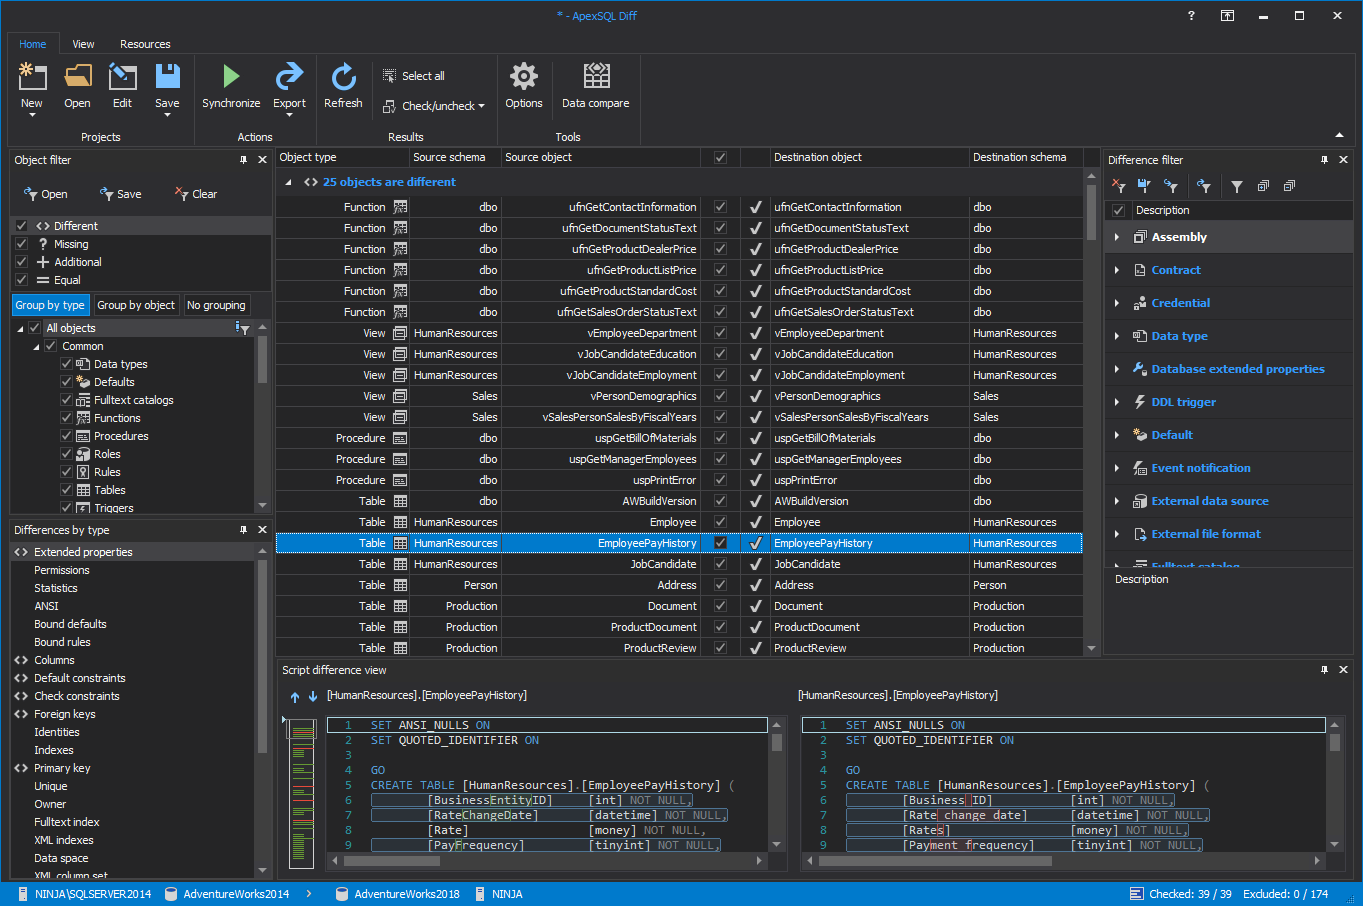
As can be seen, the standalone application is shown now with the comparison results:
-
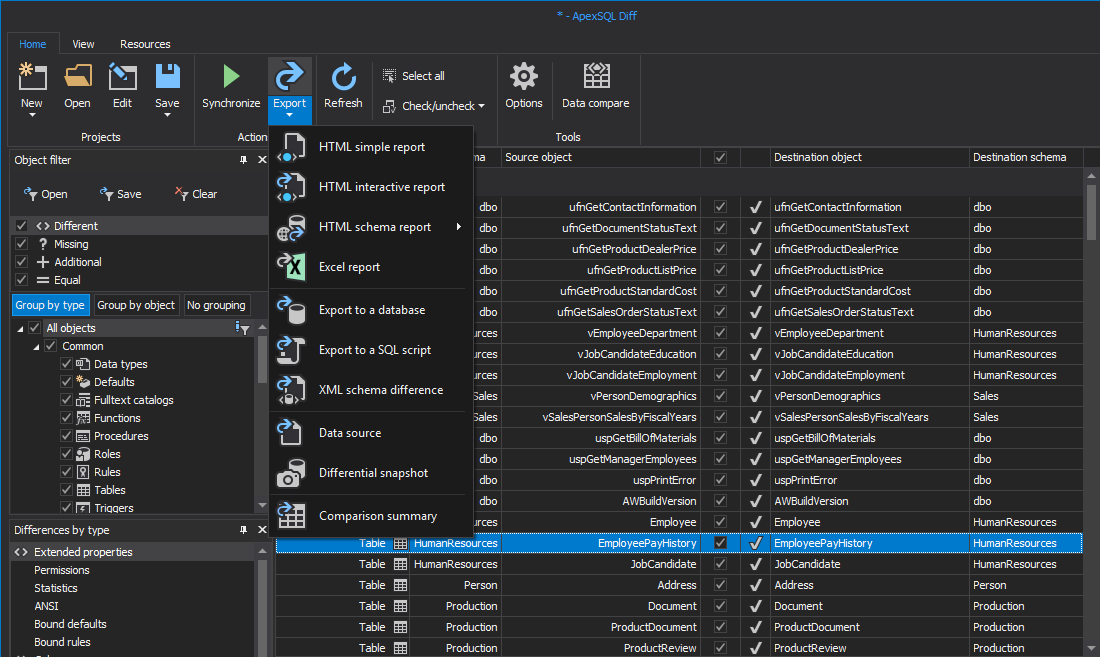
These results can be exported in the below show export output types:
- Review and check the objects that should be synchronized. If needed, check out the article on how to narrow schema comparison and synchronization to affected objects only
-
Under the Home tab, click the Synchronize button to run the Synchronization wizard for compared SQL Server database schemas:

-
In the Synchronization wizard, the Synchronization direction step will be shown with information about the source and destination data sources:

-
Under the Dependencies step, by default, all dependent objects will be included to avoid any SQL Server database schemas synchronization fail:
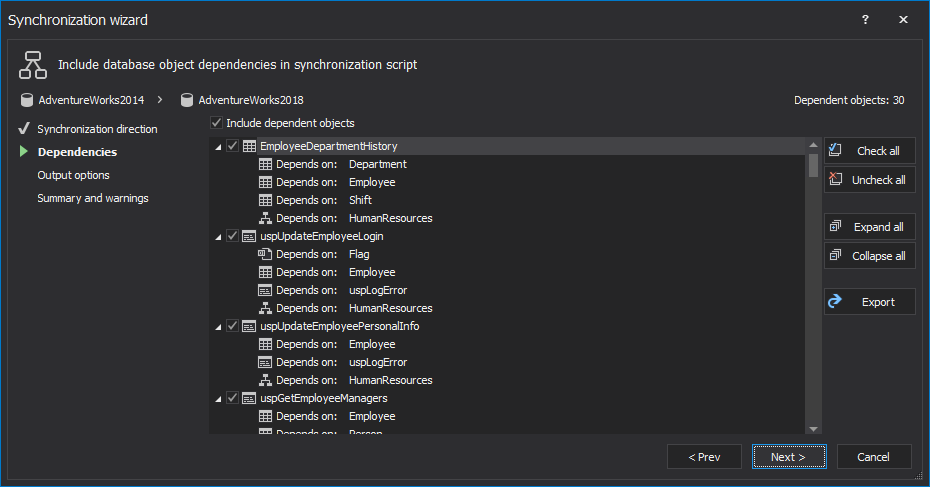
All dependencies can be exported in six different output types with a click on the Export button on the right side.
-
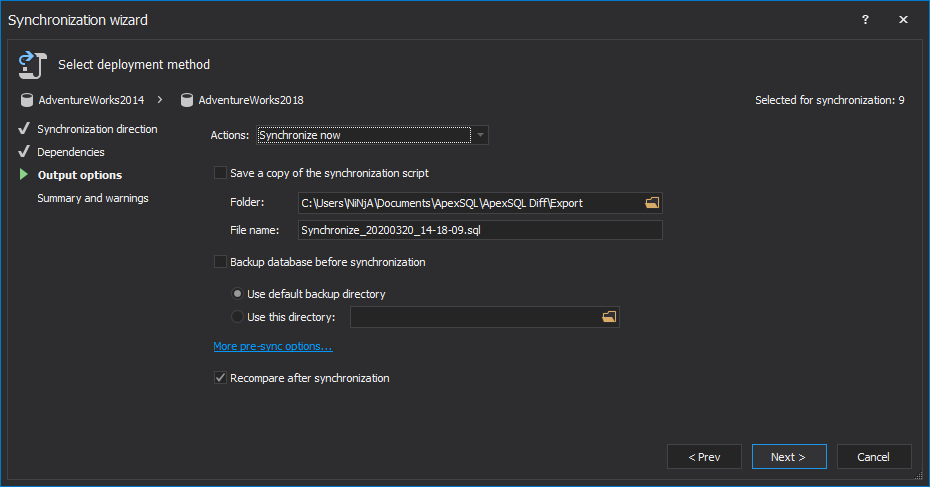
The next step is the Output actions step, in which four actions can be chosen:

If the Synchronize now action is chosen, it will load a few options, such as:
- Save a copy of the synchronization script
- Backup database before synchronization
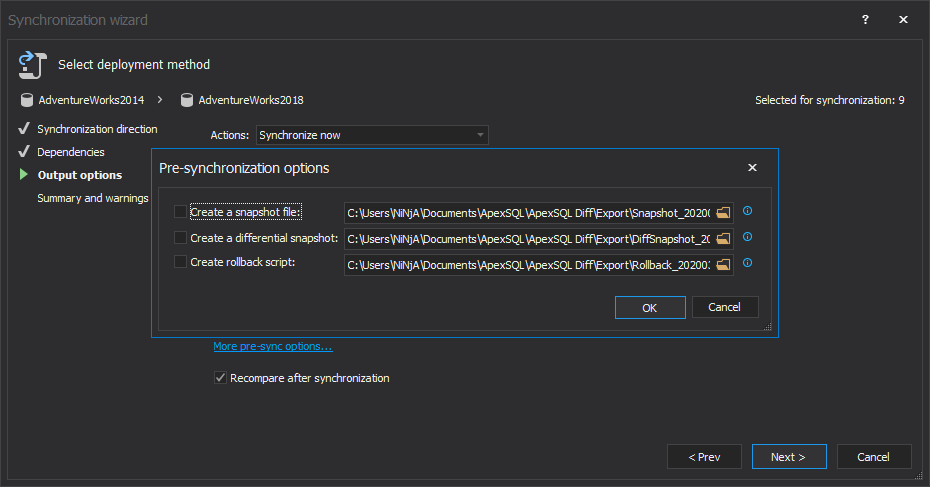
Additionally, if the More pre-sync actions link is clicked, the following options can be selected:
- Create a snapshot file of a destination database before synchronization
- Create a differential snapshot file with differences only
- Create a rollback script to revert changes on a destination database
- Two output actions will be shown – Create synchronization script and Synchronize now, and for both the last step, the Summary and warnings step is the same, with only difference in the name of the button to finalize the process
-
Under the Summary and warnings step, two tabs are shown:
-
Warnings – list of all warnings categorized by importance level:

-
Actions – list of all actions which the synchronization script contains and that will be executed:
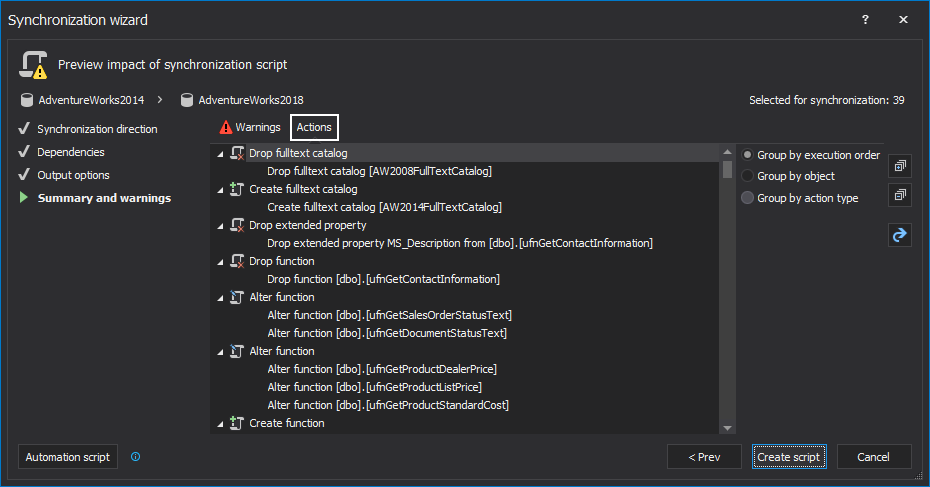
Both warnings and actions can be exported to six different output types with a click on the Export button on the right side.
-
Before starting the SQL Server database schemas synchronization process, the complete project setup can be saved as a batch file or as a PowerShell script with a click on the Automation script button:
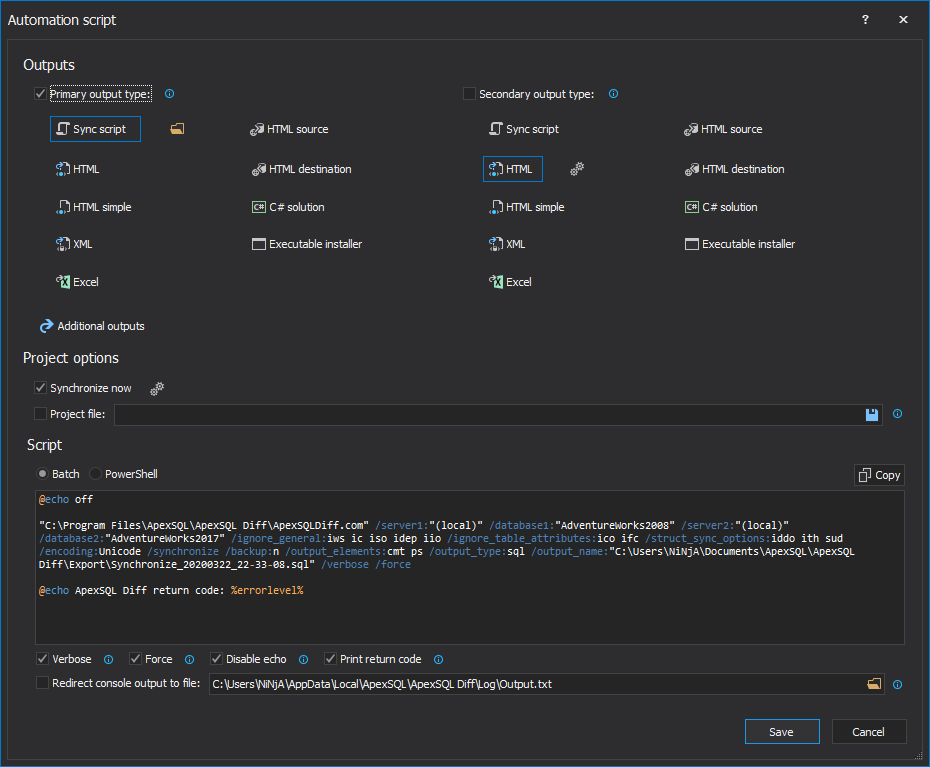
In this way, the complete process can be automated and run on a click, without the need to go through all these steps each time when changes need to be synchronized.
-
If the Create synchronization script action was chosen with the Open the script in an editor option selected, the Create script button will be shown in the bottom-right corner of the Synchronization wizard and once clicked; the schema synchronization script will be opened in the selected editor – Integrated editor in this case:
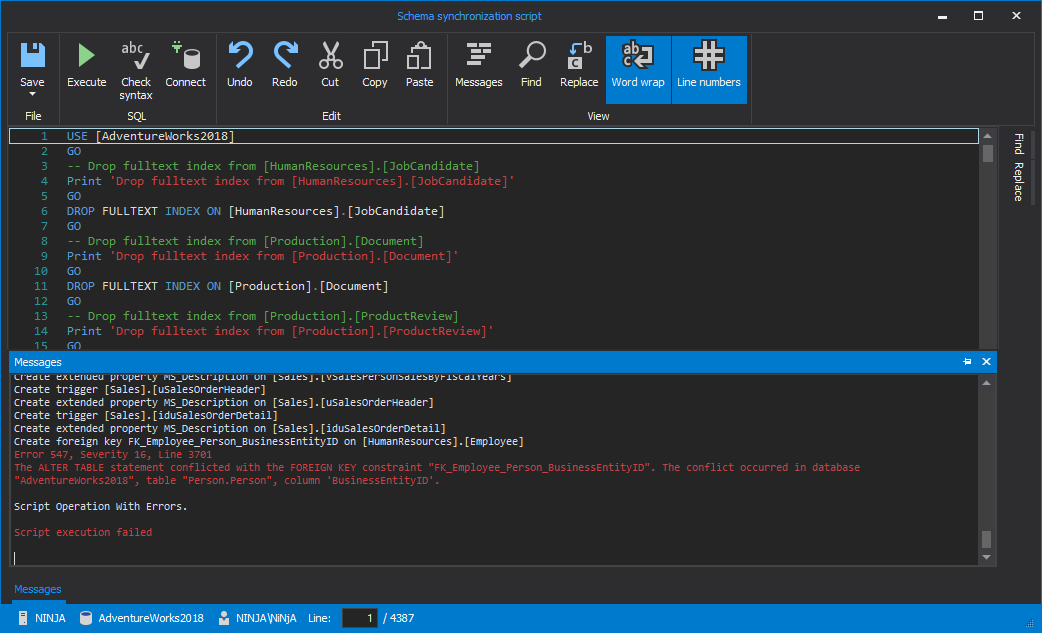
Generated schema synchronization script can be reviewed and edited if needed; syntax can be checked and if everything is good, click the Execute button in the top-left corner and the synchronization script will be executed. If there are any issues, those will be shown under the Messages panel.
-
If the Synchronize now action was chosen, the Synchronize button will be shown and once clicked the confirmation message will be shown, after which the Results dialog will be shown along with the message at the end whether the synchronization was successful or not:
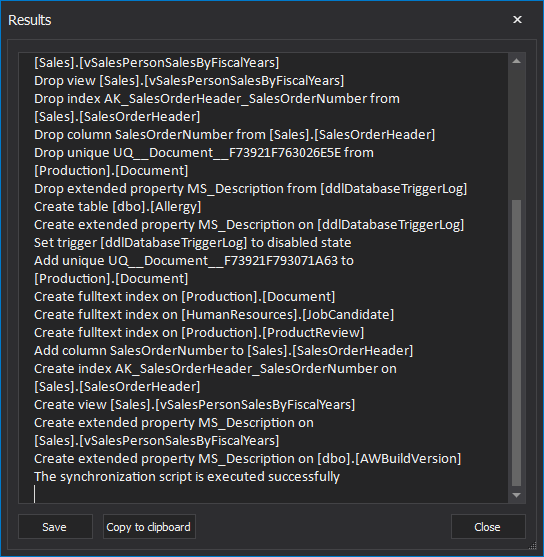
With a click on the Save button, the execution results can be saved in four different output types, to review them if needed.
Once the Close button is clicked in the Results dialog, the re-comparison process will start and once finished, only the equal objects are shown in the Results grid as a result of successful synchronization:

Conclusion
In this article, we have seen how to compare SQL Server database schemas using the native Visual Studio’s feature called Schema Comparison. This, as most out-of-the-box solutions, does the job, but it’s limited from the functionality point of view. Therefore, we looked at another third-party software solution that gives developers full control of pushing schema changes to production and much more. Additional features are linked in the tool’s description above, so feel free to check those out and learn more about the capabilities of this tool.
April 9, 2020


